F33-DVT Reliability Test Report
Dongguan Jin wen hua digital technology Co., LTD
| Item | Content |
|---|---|
| Company name | Dongguan Jin wen hua digital technology Co., LTD |
| Report name | Product Reliability Test Report |
| Product model | F33 |
| Test period | 2025.5.12 to 2025.8.16 |
| Archiving department | Quality Department |
This report records the environmental reliability, mechanical reliability, EMC, component reliability, and electrical performance tests conducted during the DVT phase of the F33 Bluetooth speaker. The conditions, methods, test records, procedures, and results of each test item are presented in separate sections by item.
1. Environmental Reliability
1.1. Low-Temperature Storage Test
1.1.1. Basic Test Item Information
| Item | Content |
|---|---|
| Test category | Environmental Reliability |
| Test item | Low-Temperature Storage Test |
| Test item stated in the report | Unpackaged Product Low-Temperature Storage Test |
| Product model | F33 |
| Report test date | 2025.5.12 |
| Test start time | 2025.5.12 |
| Test completion time | 2025.5.14 |
| Archiving department | Quality Department |
1.1.2. Test Conditions and Methods
-
Check that the speaker's appearance and functions are OK before testing.
-
Place the product that has passed appearance and functional checks in the environmental test chamber for 48H of storage.
-
Operating temperature: set the low temperature to -20℃, 85%RH, with a running time of 48 hours; 1 cycle totals 48 hours.
-
After the low-temperature operation test, remove the test samples and leave them at room temperature for 2 hours before checking their appearance and functions.
1.1.3. Test Standard Requirements and Test Records
-
May 12 at 20:00–May 14 at 20:00: after the 48-hour low-temperature test, remove the test samples and leave them at room temperature for 2 hours, then check their appearance and functions.
-
Check the product's appearance: no deformation, color difference, or surface scorching. Considered a pass.
-
Test the product's basic functions; no abnormalities. Considered a pass.
1.1.4. Equipment and Tools Used
-
Test samples *3pcs
-
High- and low-temperature test chamber
1.1.5. Test Procedure
-
Place the product in the high- and low-temperature oven.
-
Turn on the switch, set the parameters, and click Run to start operation.
-
During the low-temperature test: current temperature -19.99℃; humidity
-
After removing the product, check and test that its functions are normal.
1.1.6. Test Results
After the 48-hour low-temperature test, remove the product and check that its functions are normal. Appearance: no deformation, color difference, or surface scorching. Considered a pass.
1.1.7. Images of the Test Procedure and Results
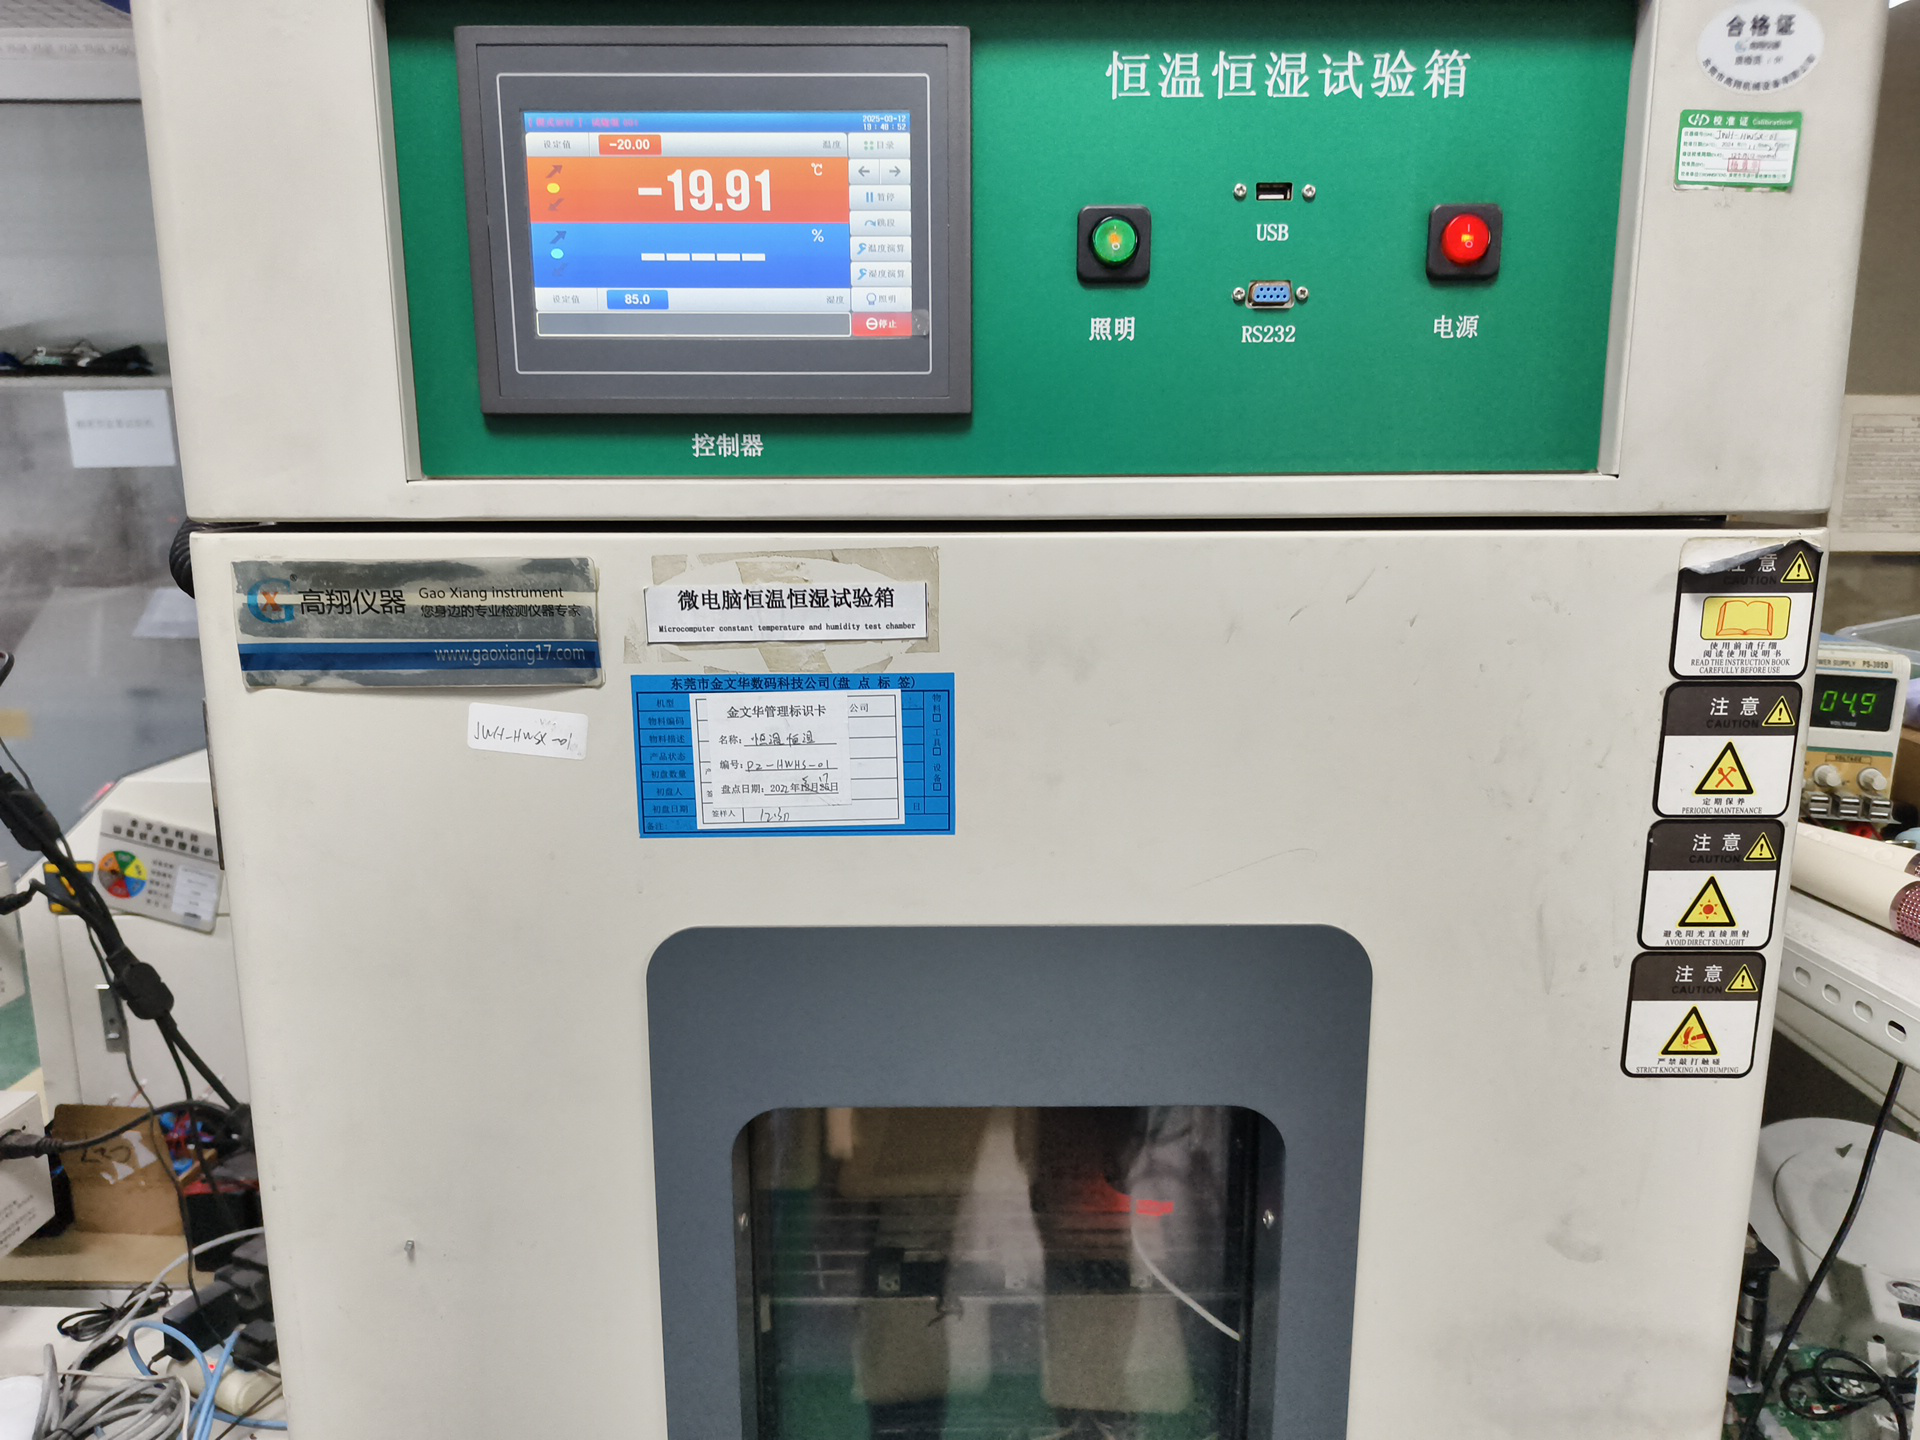
Figure 1.1-1 Low-temperature storage test image
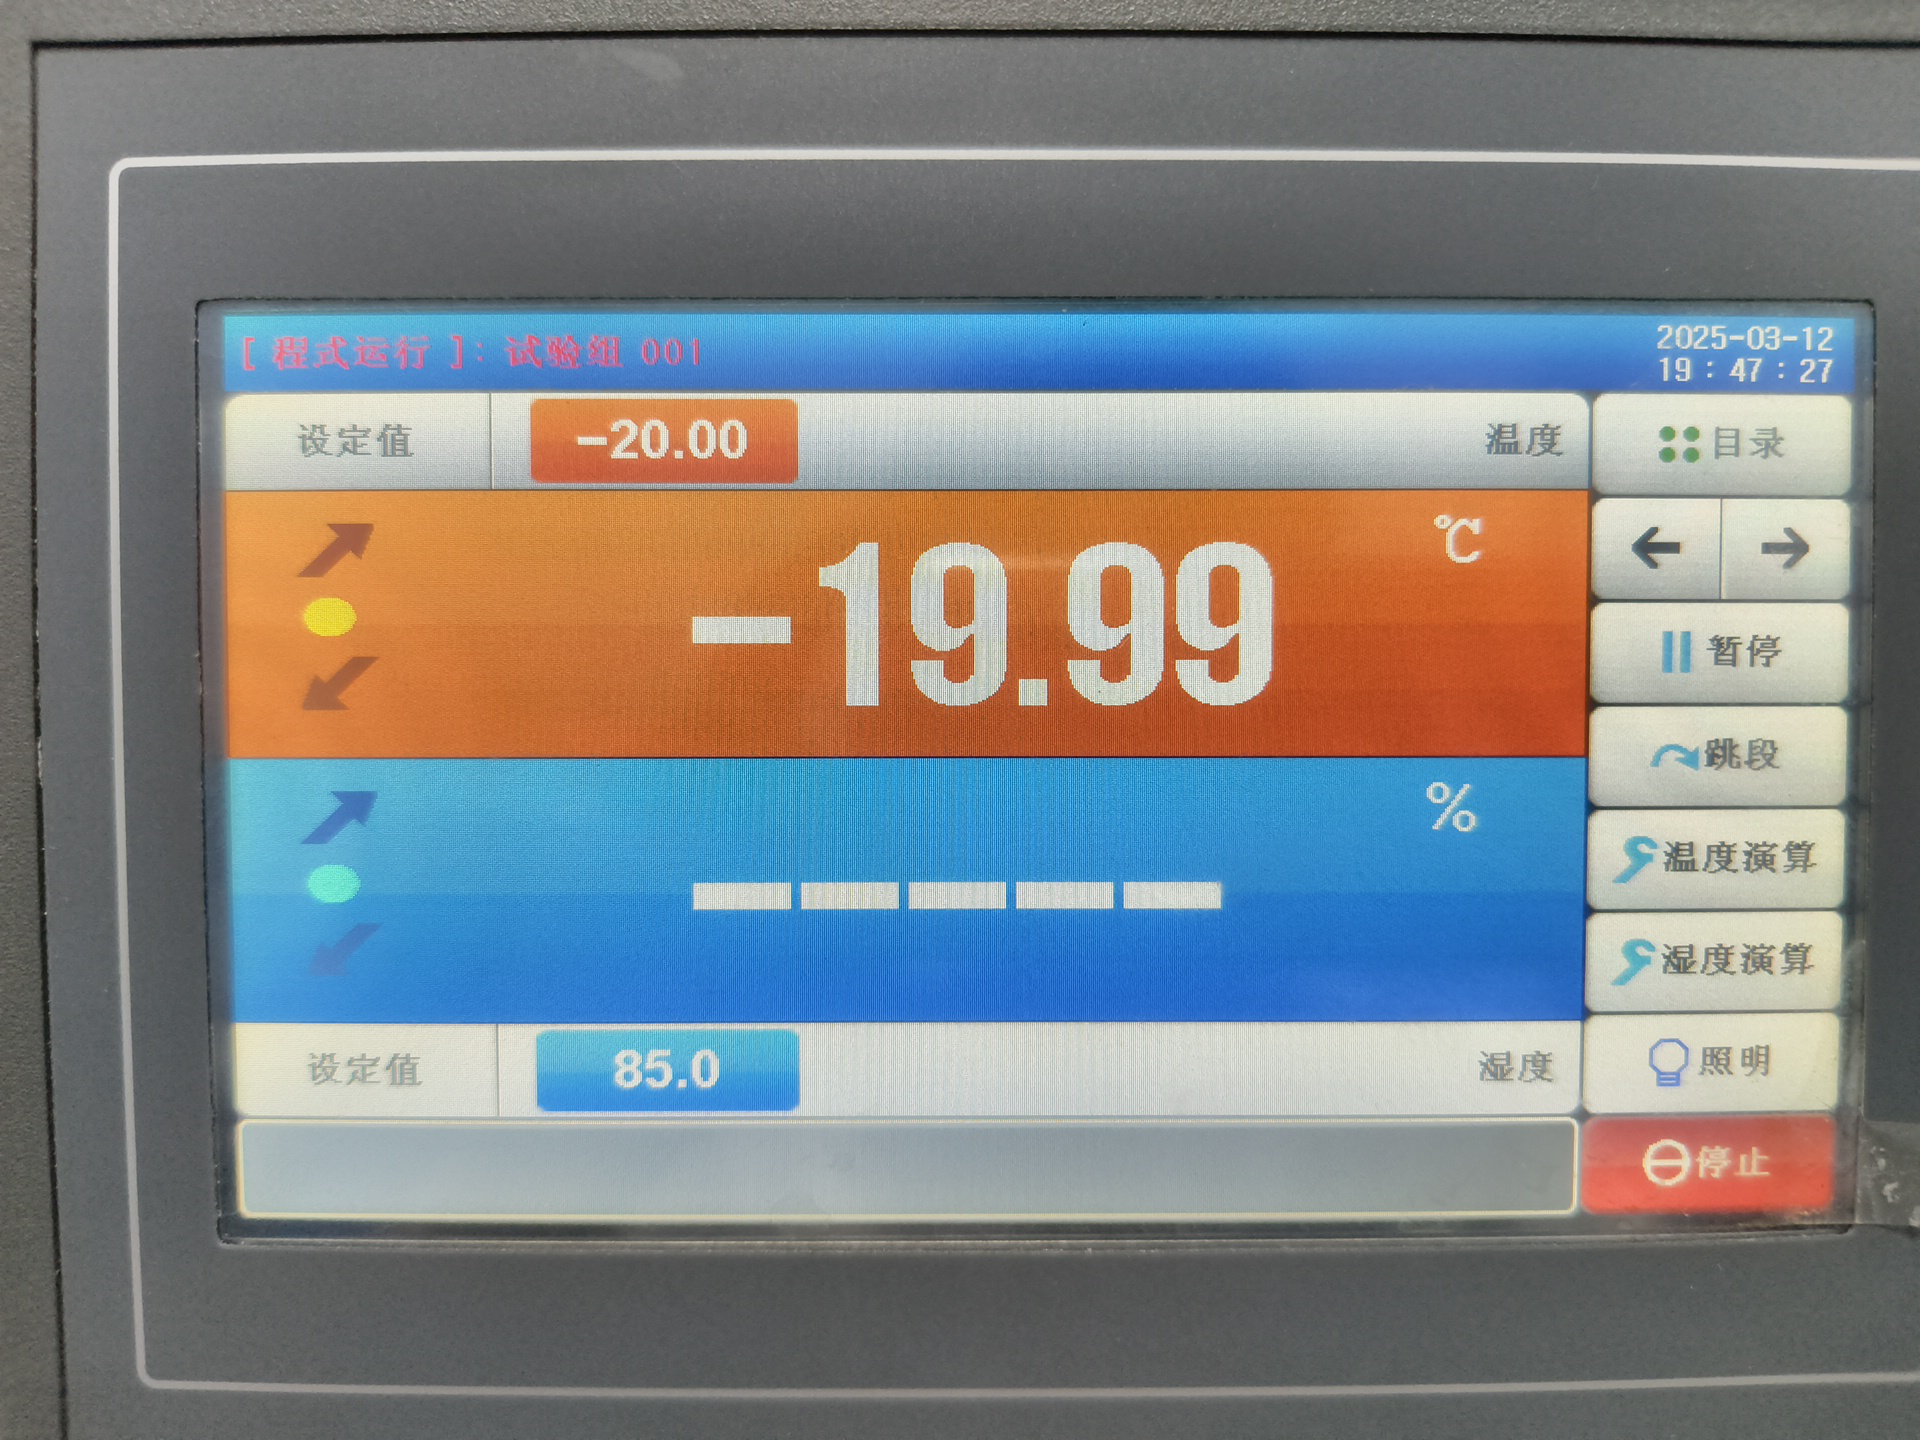
Figure 1.1-2 Low-temperature storage test image
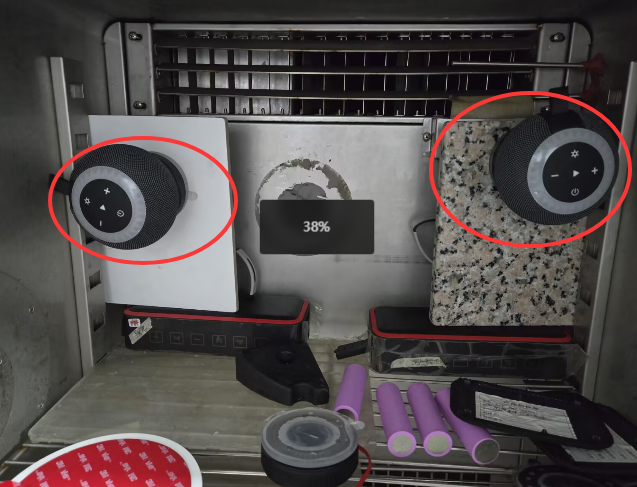
Figure 1.1-3 Low-temperature storage test image
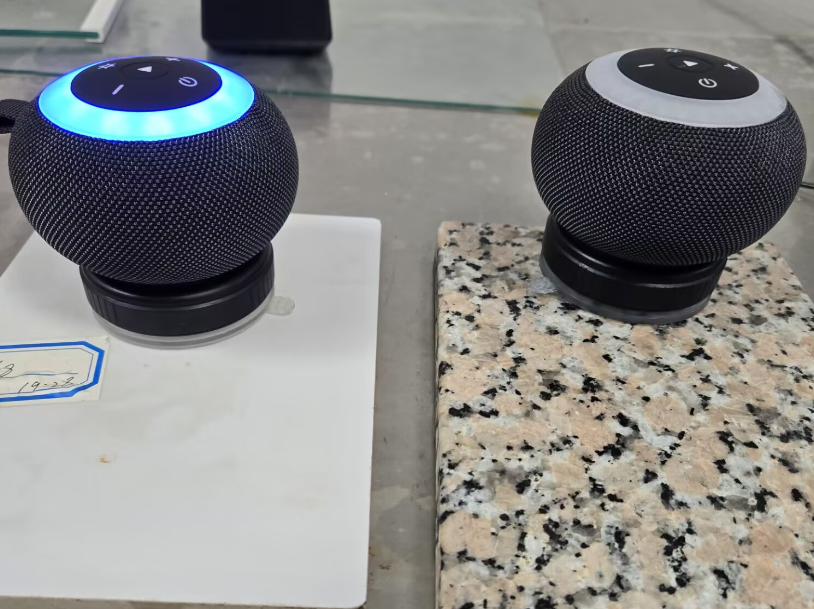
Figure 1.1-4 Low-temperature storage test image
1.1.8. Preparation, Review, and Approval
| Stage | Personnel | Date |
|---|---|---|
| Prepared by | Ji Zuyun | 2025.5.14 |
| Reviewed by | Lu Yuqian | 2025.5.14 |
| Approved by | — | — |
1.2. Low-Temperature Operation Test
1.2.1. Basic Test Item Information
| Item | Content |
|---|---|
| Test category | Environmental Reliability |
| Test item | Low-Temperature Operation Test |
| Test item stated in the report | Unpackaged Product Low-Temperature Operation Test |
| Product model | F33 |
| Report test date | 2025.5.14 |
| F33 | |
| Report test date | 2025.5.14 |
| Test start time | 2025.5.14 |
| Test completion time | 2025.5.15 |
| Archiving department | Quality Department |
1.2.2. Test Conditions and Methods
-
Check that the speaker's appearance and functions are OK before testing.
-
Place the product that has passed appearance and functional checks in the environmental test chamber for 24H of storage.
-
Operating temperature: set the low temperature to -20℃, 00%RH, with a running time of 24 hours.
-
After the low-temperature operation test, remove the test samples and leave them at room temperature for 2 hours before checking their appearance and functions.
1.2.3. Test Standard Requirements and Test Records
-
May 14 at 10:00–May 15 at 10:00: after the 24-hour low-temperature test, remove the test samples and leave them at room temperature for 2 hours, then check their appearance and functions.
-
Check the product's appearance: no deformation, color difference, surface scorching, or adhesive separation. Considered a pass.
-
Test the product's basic functions; no abnormalities. Considered a pass.
1.2.4. Equipment and Tools Used
-
Test samples *2pcs
-
High- and low-temperature test chamber
1.2.5. Test Procedure
-
Place the product in the high- and low-temperature oven, connect the charging cable, and power it on. Connect the phone to the product and play at 60% volume.
-
Turn on the switch, set the parameters, and click Run to start operation.
-
During the low-temperature test: current temperature -19.99℃; humidity
-
After removing the product, check and test that its functions are normal.
1.2.6. Test Results
After the 24-hour low-temperature test, remove the product and check that its functions are normal. Appearance: no deformation, color difference, or surface scorching. Considered a pass.
1.2.7. Images of the Test Procedure and Results
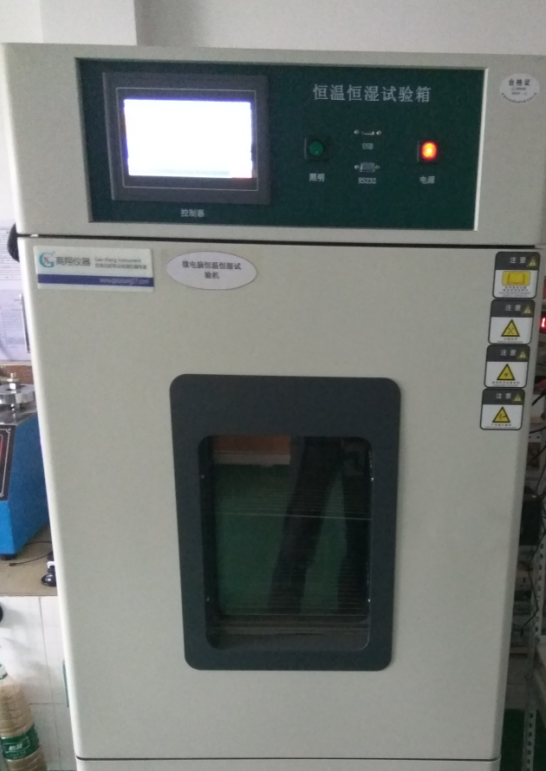
Figure 1.2-1 Low-temperature operation test image
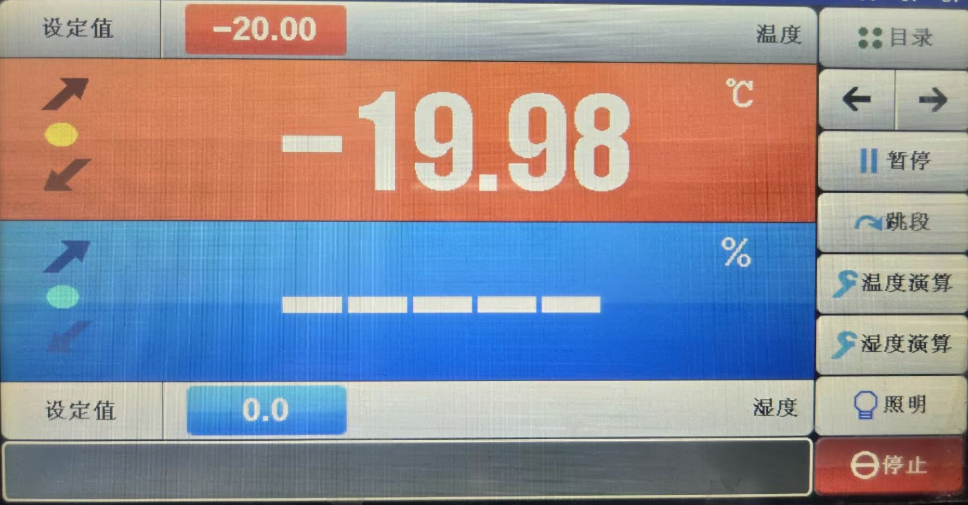
Figure 1.2-2 Low-temperature operation test image
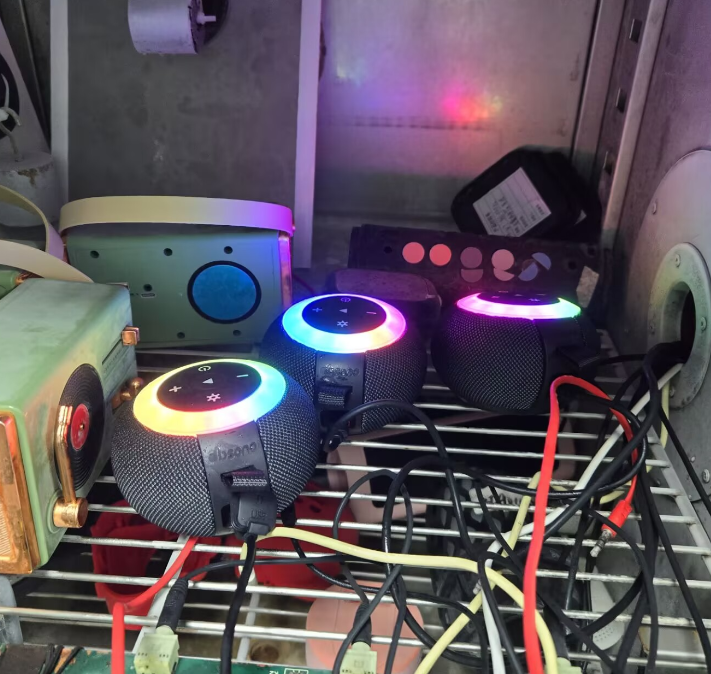
Figure 1.2-3 Low-temperature operation test image
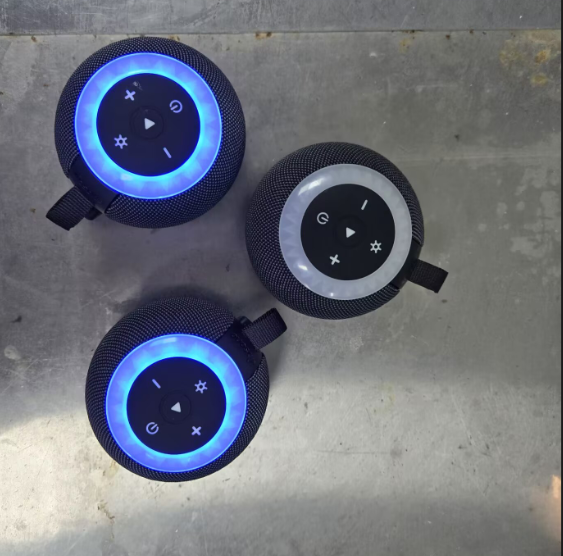
Figure 1.2-4 Low-temperature operation test image
1.2.8. Preparation, Review, and Approval
| Stage | Personnel | Date |
|---|---|---|
| Prepared by | Ji Zuyun | 2025.5.15 |
| Reviewed by | Lu Yuqian | 2025.5.15 |
| Approved by | — | — |
1.3. High-Temperature Storage Test
1.3.1. Basic Test Item Information
| Item | Content |
|---|---|
| Test category | Environmental Reliability |
| Test item | High-Temperature Storage Test |
| Test item stated in the report | Unpackaged Product High-Temperature Storage Test |
| Product model | F33 |
| Report test date | 2025.5.15 |
| Test start time | 2025.5.15 |
| Test completion time | 2025.5.17 |
| Archiving department | Quality Department |
1.3.2. Test Conditions and Methods
-
Check that the speaker's appearance and functions are OK before testing.
-
Place the product that has passed appearance and functional checks in the environmental test chamber for 48H of storage.
-
Operating temperature: set the low temperature to 60℃, 85%RH, with a running time of 48 hours.
-
After the high-temperature operation test, remove the test samples and leave them at room temperature for 2 hours before checking their appearance and functions.
1.3.3. Test Standard Requirements and Test Records
-
May 15 at 11:00–May 17 at 11:00: after the 48-hour high-temperature test, remove the test samples and leave them at room temperature for 2 hours, then check their appearance and functions.
-
Check the product's appearance: no deformation, color difference, surface scorching, or adhesive separation. Considered a pass.
-
Test the product's basic functions; no abnormalities. Considered a pass.
1.3.4. Equipment and Tools Used
-
Test samples *2pcs
-
High- and low-temperature test chamber
1.3.5. Test Procedure
-
Place the product in the high- and low-temperature oven.
-
Turn on the switch, set the parameters, and click Run to start operation.
-
During the high-temperature test: current temperature 59.9℃; humidity 98.1%
-
After removing the product, check and test that its functions are normal.
1.3.6. Test Results
After the 48-hour high-temperature test, remove the product and check that its functions are normal, with no stripes, ripples, display corruption, black screen, or touch malfunction. Appearance: no deformation, color difference, surface scorching, or adhesive separation. Considered a pass.
1.3.7. Images of the Test Procedure and Results
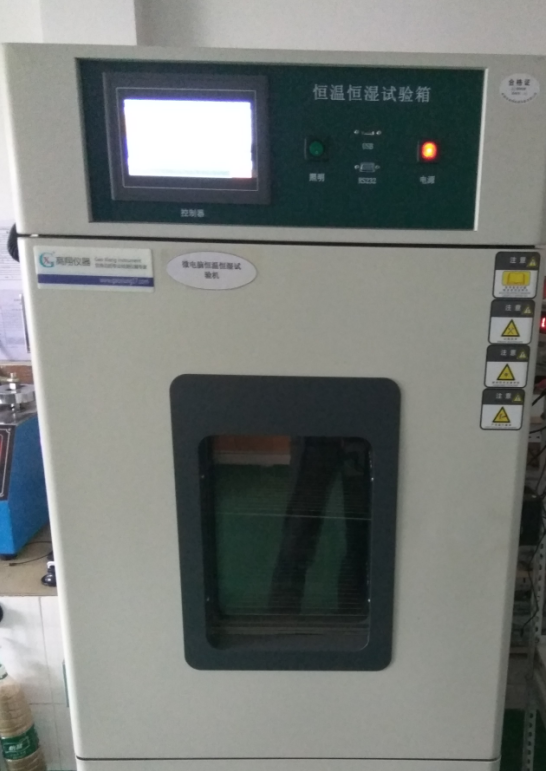
Figure 1.3-1 High-temperature storage test image
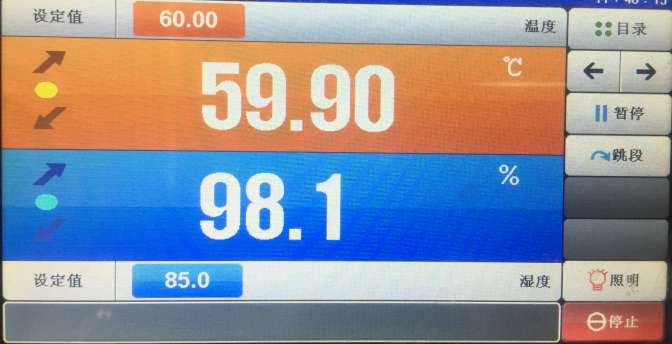
Figure 1.3-2 High-temperature storage test image
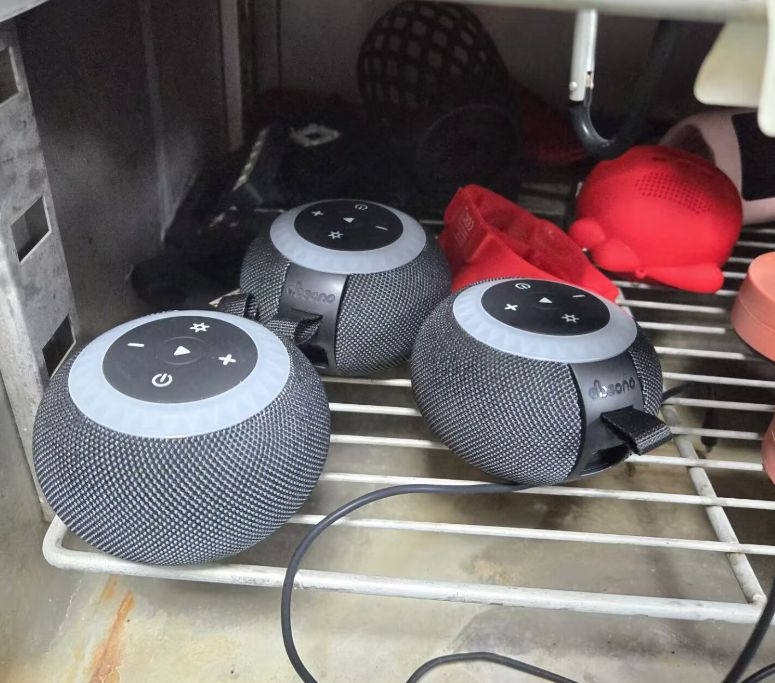
Figure 1.3-3 High-temperature storage test image
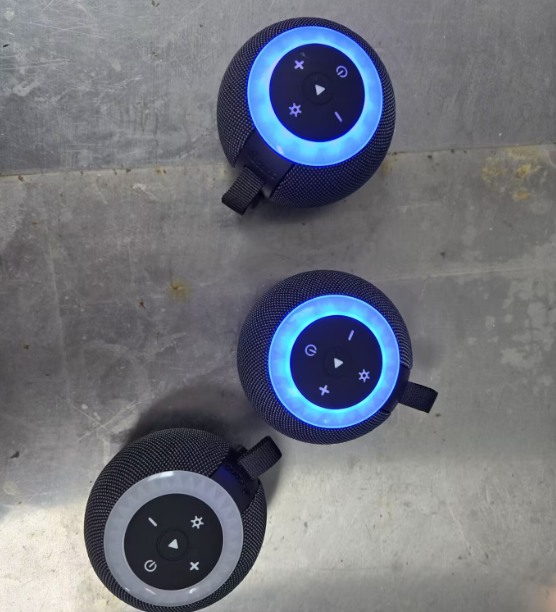
Figure 1.3-4 High-temperature storage test image
1.3.8. Preparation, Review, and Approval
| Stage | Personnel | Date |
|---|---|---|
| Prepared by | Ji Zuyun | 2025.5.17 |
| Reviewed by | Lu Yuqian | 2025.5.17 |
| Approved by | — | — |
1.4. High-Temperature Operation Test (Extreme-Condition Aging)
1.4.1. Basic Test Item Information
| Item | Content |
|---|---|
| Test category | Environmental Reliability |
| Test item | High-Temperature Operation Test (Extreme-Condition Aging) |
| Test item stated in the report | Unpackaged Product High-Temperature Operation Test |
| Product model | F33 |
| Report test date | 2025.5.17 |
| Test start time | 2025.5.17 |
| Test completion time | 2025.5.18 |
| Archiving department | Quality Department |
1.4.2. Test Conditions and Methods
-
Check that the speaker's appearance and functions are OK before testing.
-
Place the product that has passed appearance and functional checks in the environmental test chamber for 24H of storage.
-
Operating temperature: set the low temperature to 60℃, 85%RH, with a running time of 24 hours.
-
After the high-temperature operation test, remove the test samples and leave them at room temperature for 2 hours before checking their appearance and functions.
1.4.3. Test Standard Requirements and Test Records
-
May 17 at 10:00–May 18 at 10:00: after the 24-hour low-temperature test, remove the test samples and leave them at room temperature for 2 hours, then check their appearance and functions.
-
Check the product's appearance: no deformation, color difference, surface scorching, or adhesive separation. Considered a pass.
-
Test the product's basic functions; no abnormalities. Considered a pass.
1.4.4. Equipment and Tools Used
-
Test samples *2pcs
-
High- and low-temperature test chamber
1.4.5. Test Procedure
-
Place the product in the high- and low-temperature oven, connect the charging cable, and power it on. Connect the phone to the product and play at 60% volume.
-
Turn on the switch, set the parameters, and click Run to start operation.
-
During the high-temperature test: current temperature 59.9℃; humidity 98.1%
-
After removing the product, check and test that its functions are normal.
1.4.6. Test Results
After the 24-hour high- and low-temperature test, remove the product and check that its functions are normal, with no stripes, ripples, display corruption, black screen, or touch malfunction. Appearance: no deformation, color difference, surface scorching, or adhesive separation. Considered a pass.
1.4.7. Images of the Test Procedure and Results
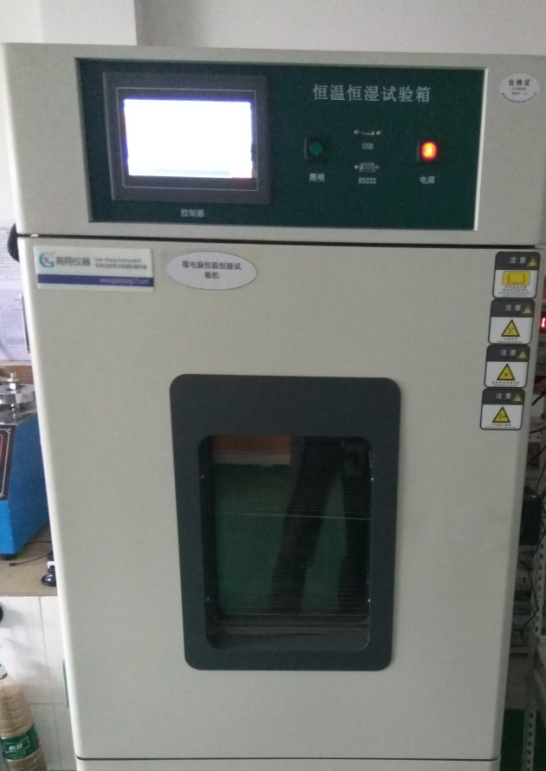
Figure 1.4-1 High-temperature operation test (extreme-condition aging) image
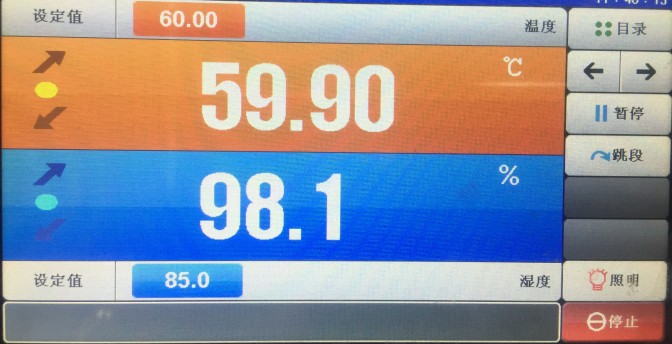
Figure 1.4-2 High-temperature operation test (extreme-condition aging) image
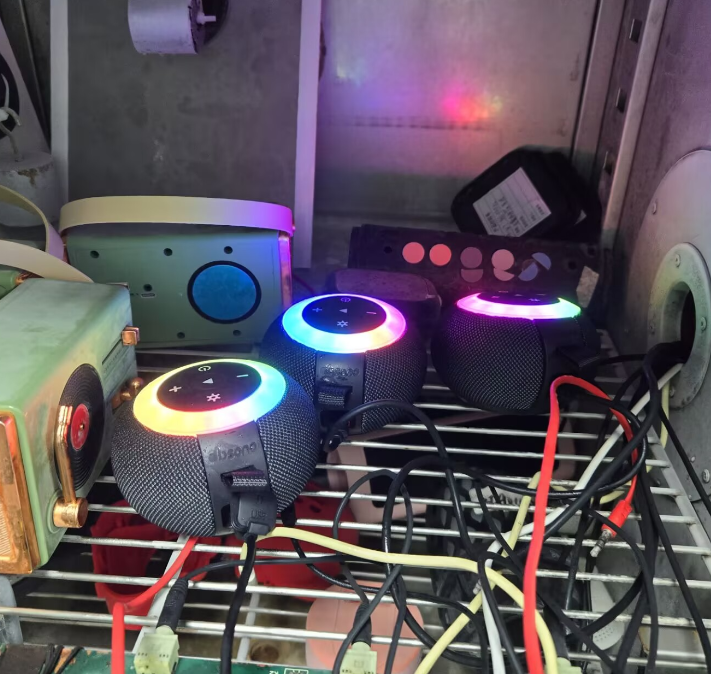
Figure 1.4-3 High-temperature operation test (extreme-condition aging) image
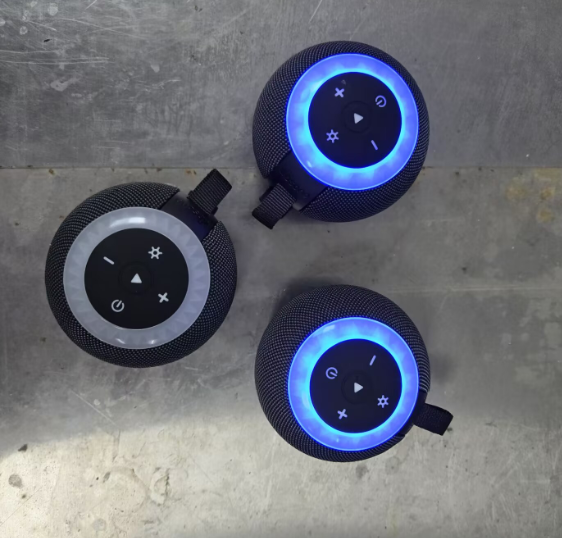
Figure 1.4-4 High-temperature operation test (extreme-condition aging) image
1.4.8. Preparation, Review, and Approval
| Stage | Personnel | Date |
|---|---|---|
| Prepared by | Ji Zuyun | 2025.5.18 |
| Reviewed by | Lu Yuqian | 2025.5.18 |
| Approved by | — | — |
1.5. High- and Low-Temperature Shock Test
1.5.1. Basic Test Item Information
| Item | Content |
|---|---|
| Test category | Environmental Reliability |
| Test item | High- and Low-Temperature Shock Test |
| Test item stated in the report | Unpackaged Product Steady-State Damp Heat Operation Test |
| Product model | F33 |
| Report test date | 2025.5.18 |
| Test start time | 2025.5.18 |
| Test completion time | 2025.5.19 |
| Archiving department | Quality Department |
1.5.2. Test Conditions and Methods
-
Check that the speaker's appearance and functions are OK before testing.
-
Place the product that has passed appearance and functional checks in the environmental test chamber for 24H of storage.
-
Operating temperature: set the low temperature to 55℃, 90%RH, with a running time of 24 hours.
-
After the high-temperature operation test, remove the test samples and leave them at room temperature for 2 hours before checking their appearance and functions.
1.5.3. Test Standard Requirements and Test Records
-
May 18 at 10:00–May 19 at 10:00: after the 24-hour low-temperature test, remove the test samples and leave them at room temperature for 2 hours, then check their appearance and functions.
-
Check the product's appearance: no deformation, color difference, surface scorching, or adhesive separation. Considered a pass.
-
Test the product's basic functions; no abnormalities. Considered a pass.
1.5.4. Equipment and Tools Used
-
Test samples *2pcs
-
High- and low-temperature test chamber
1.5.5. Test Procedure
-
Place the product in the high- and low-temperature oven, connect the charging cable, and power it on. Connect the phone to the product and play at 60% volume.
-
Turn on the switch, set the parameters, and click Run to start operation.
-
During the high-temperature test: current temperature 54.99℃; humidity 85%
-
After removing the product, check and test that its functions are normal.
1.5.6. Test Results
After the 24-hour high- and low-temperature test, remove the product and check that its functions are normal, with no stripes, ripples, display corruption, black screen, or touch malfunction. Appearance: no deformation, color difference, surface scorching, or adhesive separation. Considered a pass.
1.5.7. Images of the Test Procedure and Results
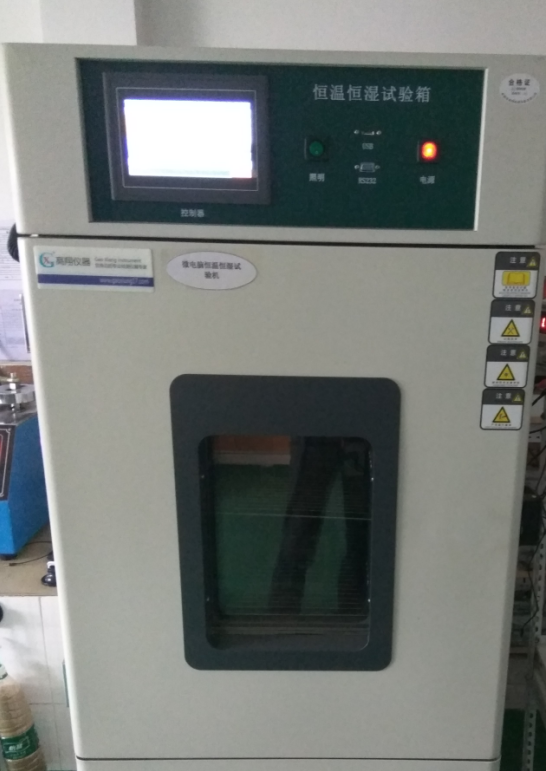
Figure 1.5-1 High- and low-temperature shock test image
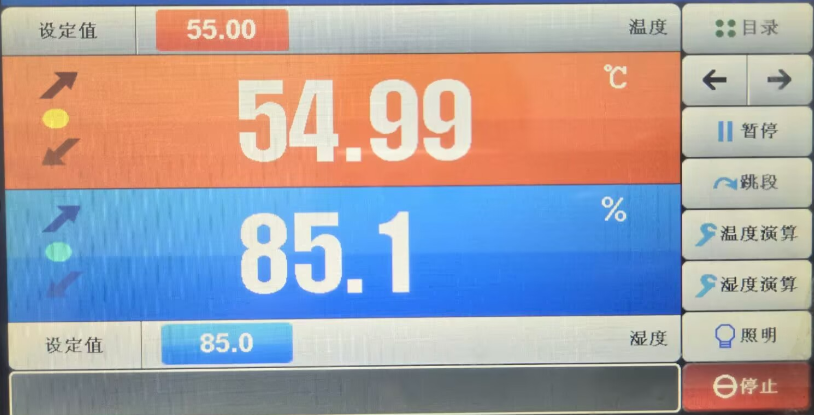
Figure 1.5-2 High- and low-temperature shock test image
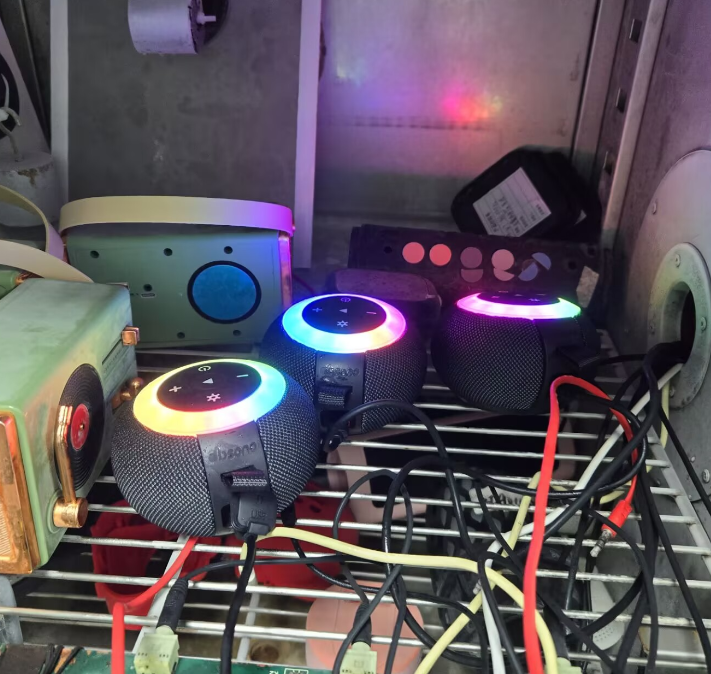
Figure 1.5-3 High- and low-temperature shock test image
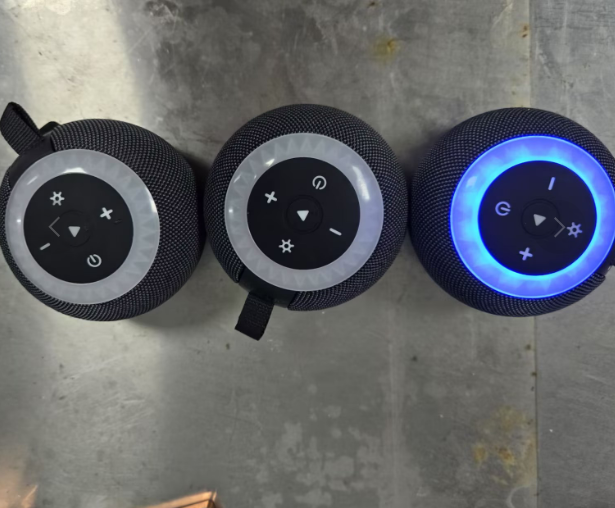
Figure 1.5-4 High- and low-temperature shock test image
1.5.8. Preparation, Review, and Approval
| Stage | Personnel | Date |
|---|---|---|
| Prepared by | Ji Zuyun | 2025.5.19 |
| Reviewed by | Lu Yuqian | 2025.5.19 |
| Approved by | — | — |
1.6. Salt Spray Test
1.6.1. Basic Test Item Information
| Item | Content |
|---|---|
| Test category | Environmental Reliability |
| Test item | Salt Spray Test |
| Test item stated in the report | Salt Spray Testing |
| Product model | F33 |
| Report test date | 2025.5.15 |
| Test start time | 2025.5.15 |
| Test completion time | 2025.5.17 |
| Archiving department | Quality Department |
1.6.2. Test Conditions and Methods
-
Check that the product's appearance is OK before conducting the test.
-
Prepare the salt solution from chemically pure sodium chloride and distilled or deionized water. Use 5% sodium chloride salt and 95% distilled or deionized water, mix thoroughly to obtain a salt solution containing 5±1% sodium chloride, and pour it into the salt spray test chamber's solution tank.
-
Place the product that has passed the appearance inspection in the salt spray test chamber. Laboratory ambient temperature: 27℃; barrel temperature: 47℃; spray duration: 48H.
-
After testing, leave the product at room temperature for 2 hours, then check metal parts for rust, corrosion, oxidation, discoloration, or other abnormalities.
1.6.3. Test Standard Requirements and Test Records
- After the 48H test, leave the product at room temperature for 2 hours. A pass requires no rust, corrosion, oxidation, or discoloration on metal parts and surface screws.
1.6.4. Equipment and Tools Used
-
Test samples *2pcs
-
Industrial sodium chloride salt
-
Salt spray test chamber.
1.6.5. Test Procedure
-
Place the metal parts and product in the salt spray chamber.
-
Turn on the power switch, set the timer to 48H, and enable operation, spraying, and timing to begin the test.
-
Salt spray test in progress
1.6.6. Test Results
After the 48H test, remove the product's metal parts and inspect them after 2H. No rust, corrosion, oxidation, or other surface abnormalities; considered a pass.
1.6.7. Images of the Test Procedure and Results
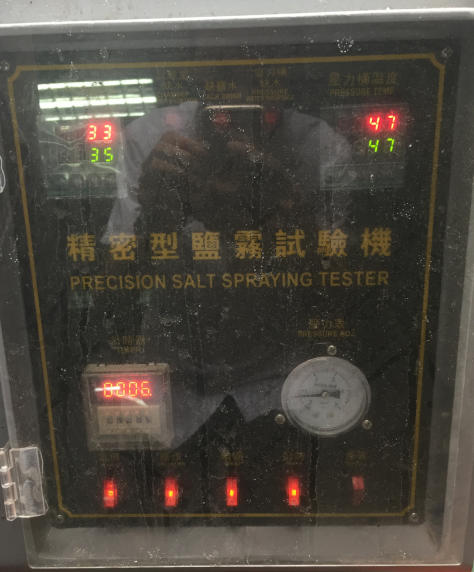
Figure 1.6-1 Salt spray test image
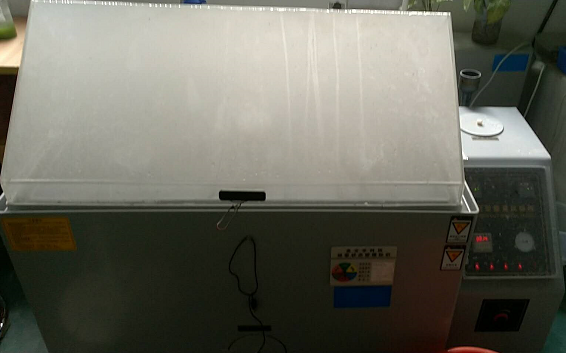
Figure 1.6-2 Salt spray test image
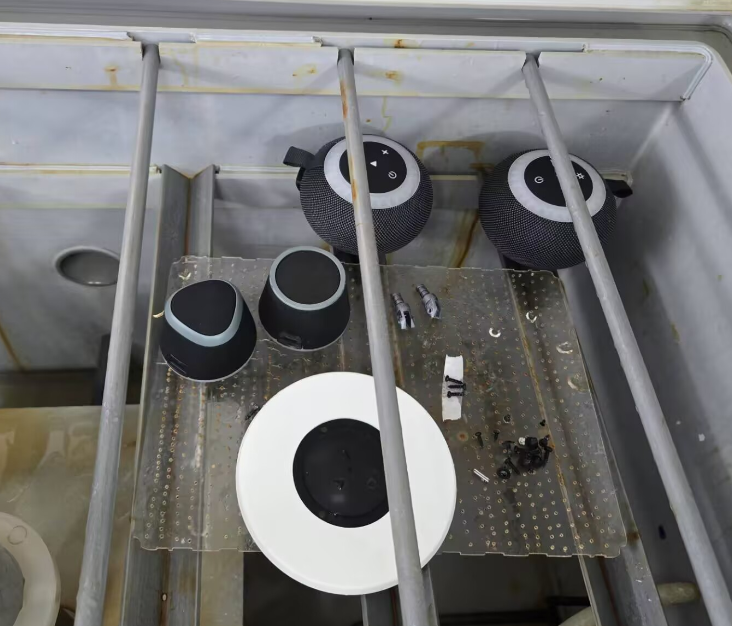
Figure 1.6-3 Salt spray test image
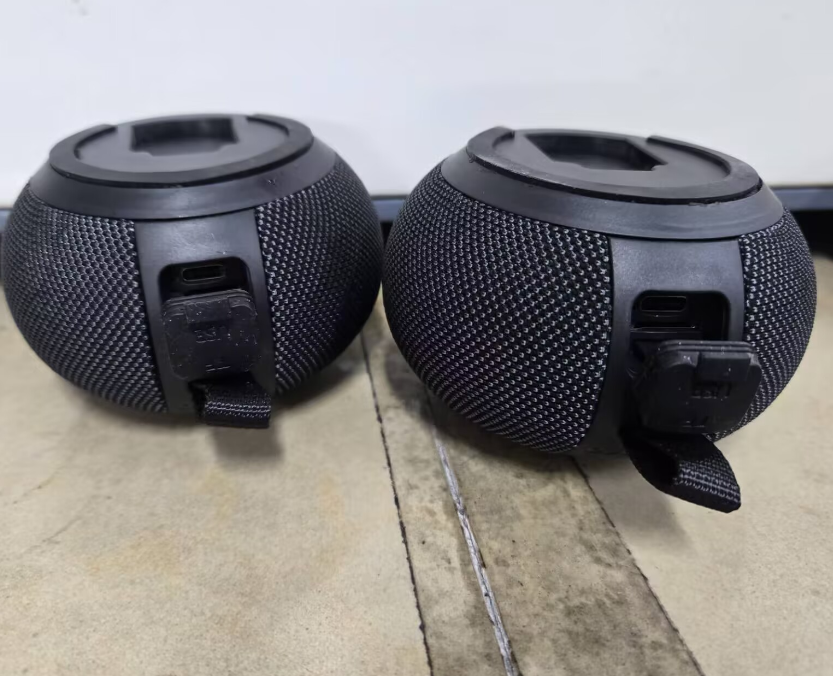
Figure 1.6-4 Salt spray test image
1.6.8. Preparation, Review, and Approval
| Stage | Personnel | Date |
|---|---|---|
| Prepared by | Ji Zuyun | 2025.5.17 |
| Reviewed by | Lu Yuqian | 2025.5.17 |
| Approved by | — | — |
1.7. UV Irradiation
1.7.1. Basic Test Item Information
| Item | Content |
|---|---|
| Test category | Environmental Reliability |
| Test item | UV Irradiation |
| Test item stated in the report | UV Irradiation |
| Product model | F33 |
| Report test date | 2025.5.13 |
| Test start time | 2025.5.13 |
| Test completion time | 2025.5.20 |
| Archiving department | Quality Department |
1.7.2. Test Conditions and Methods
-
Check that the product's appearance is OK before testing.
-
Conduct 8 cycles of 8 hours of exposure at 0.63W/m2 followed by 4 hours of condensation without irradiation (96 hours in total). The UV chamber has no temperature adjustment; measure the sample temperature after UV testing and preheat the constant-temperature chamber to sample temperature +10℃, with humidity >90%RH, to simulate condensation. Measure color difference before and after testing; keep half of the sample exposed and half covered throughout the test.
1.7.3. Test Standard Requirements and Test Records
After testing, the sample must show no discoloration, deformation, cracking, oxidation, corrosion, or other appearance abnormalities. Color difference before and after testing must not exceed 1.
1.7.4. Equipment and Tools Used
- Test samples 25pcs
1.7.5. Test Procedure
-
Place the product in the UV irradiation chamber.
-
Turn on the power switch, set the timer to 96H, and enable operation and timing to begin the test.
-
96H test completed
-
After removing the product, inspect the product and metal parts after 2H. No rust, corrosion, oxidation, or other surface abnormalities.
1.7.6. Test Results
After testing, the samples showed no discoloration, deformation, cracking, oxidation, corrosion, or other appearance abnormalities. Color difference before and after testing did not exceed 1. Considered a pass.
1.7.7. Images of the Test Procedure and Results
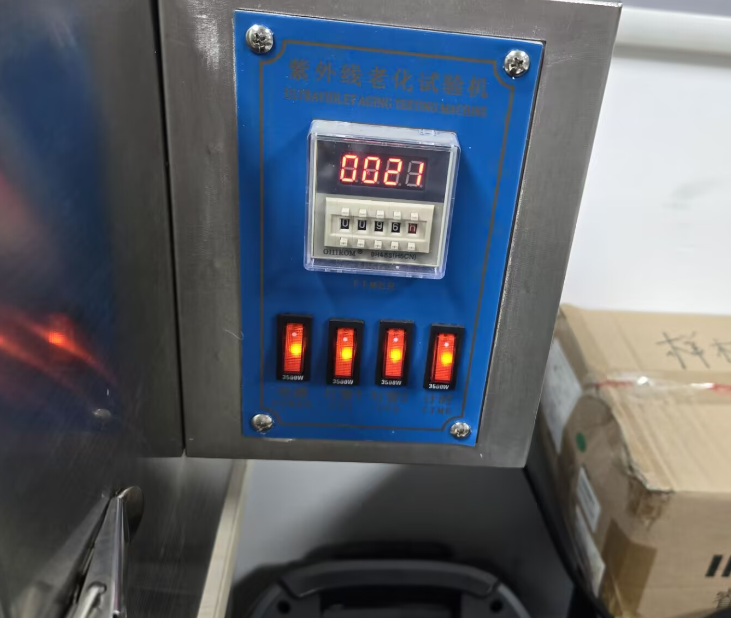
Figure 1.7-1 UV irradiation test image
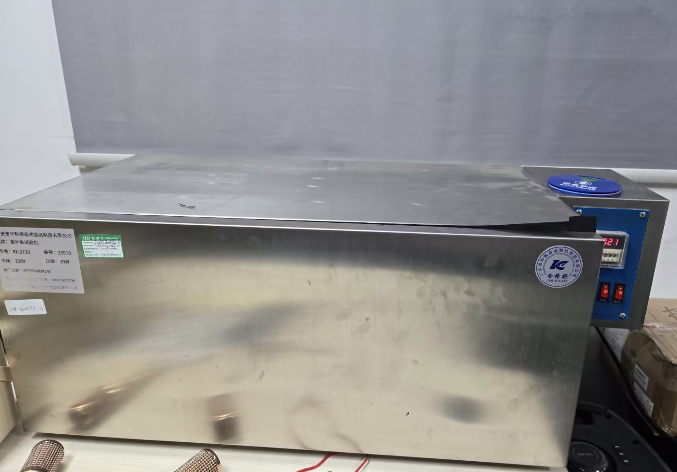
Figure 1.7-2 UV irradiation test image
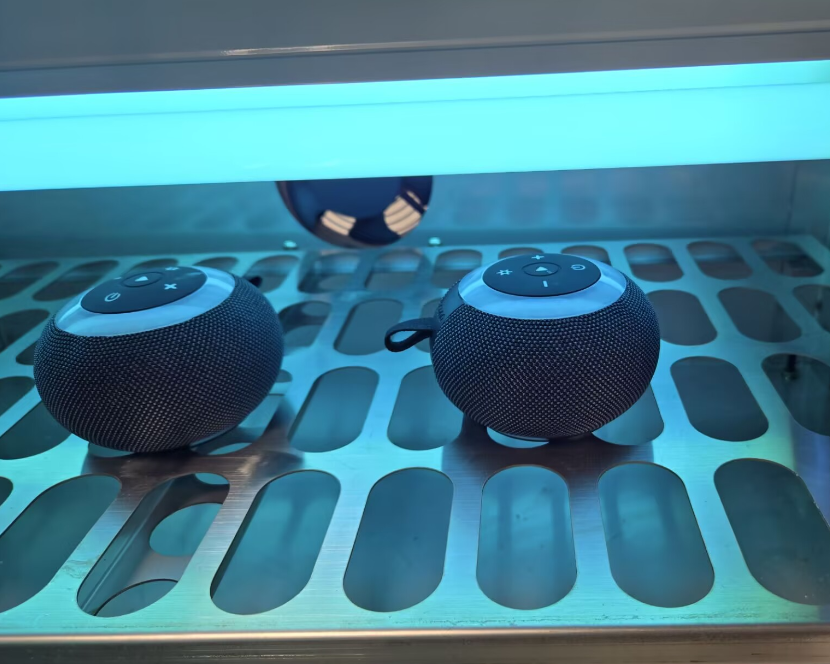
Figure 1.7-3 UV irradiation test image
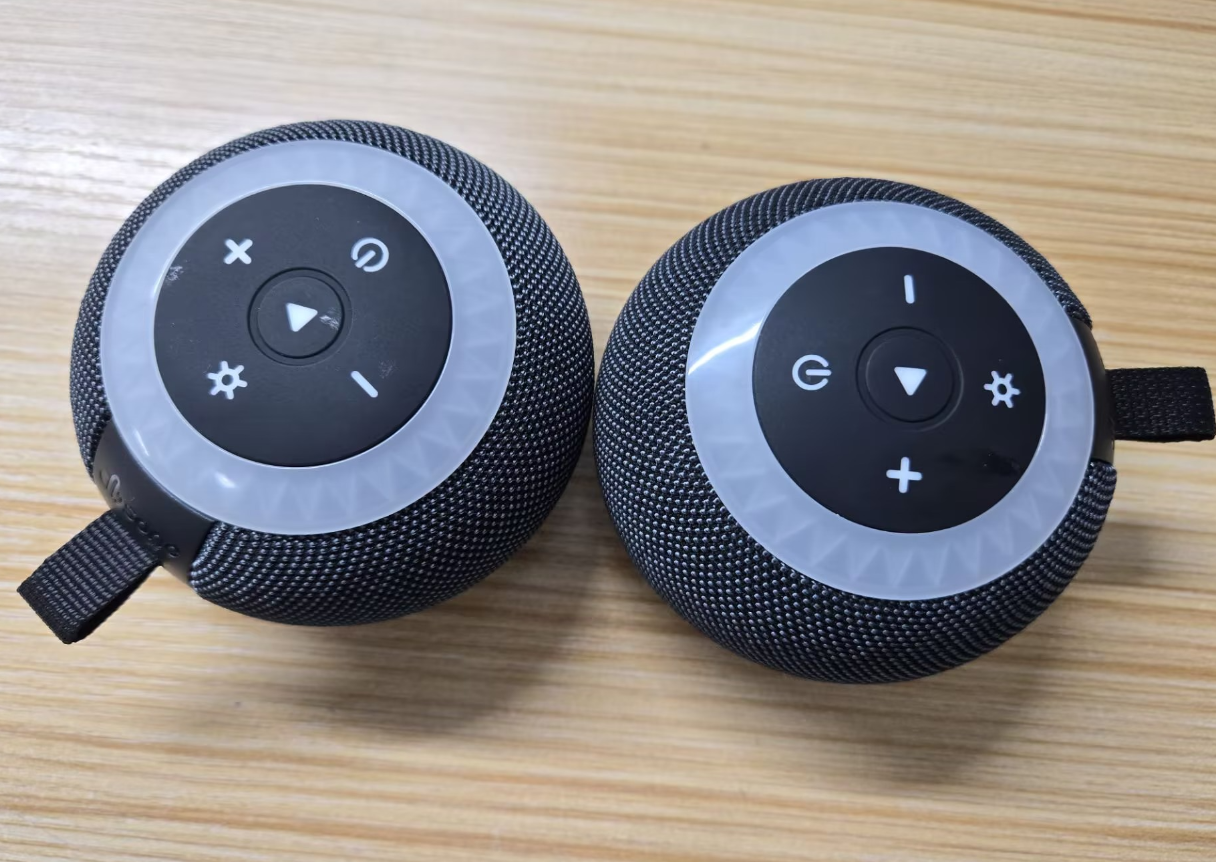
Figure 1.7-4 UV irradiation test image
1.7.8. Preparation, Review, and Approval
| Stage | Personnel | Date |
|---|---|---|
| Prepared by | Ji Zuyun | 2025.5.20 |
| Reviewed by | Lu Yuqian | 2025.5.20 |
| Approved by | — | — |
2. Mechanical Reliability
2.1. Drop Test
2.1.1. Basic Test Item Information
| Item | Content |
|---|---|
| Test category | Mechanical Reliability |
| Test item | Drop Test |
| Test item stated in the report | Unpackaged Product Drop Test |
| Product model | F33 |
| Report test date | 2025.6.5 |
| Test start time | 2025.6.5 |
| Test completion time | 2025.6.5 |
| Archiving department | Quality Department |
2.1.2. Test Conditions and Methods
-
Check that the speaker's appearance and functions are OK before testing.
-
Drop from the standard test height: place the product at a height of 200CM in different orientations and drop it 6 times.
-
Check that the sample's basic functions, performance, and structure are normal, with no internal loosening or other abnormalities.
2.1.3. Test Standard Requirements and Test Records
- Drop the product 6 times from a height of 200CM in different orientations. After the drops, a pass requires normal basic functions and structure, with no loosening or other abnormalities in the exterior or interior.
2.1.4. Equipment and Tools Used
-
Test samples 2pcs
-
Tape measure 1pcs
2.1.5. Test Procedure
-
Drop the product from a height of 200cn in different orientations.
-
Allow the product to fall freely to the floor during the drop.
-
No internal loosening was found in this drop test; function and performance were normal.
2.1.6. Test Results
After the drop test, no internal loosening or functional defects were found, and the structure was normal. Considered a pass.
2.1.7. Images of the Test Procedure and Results
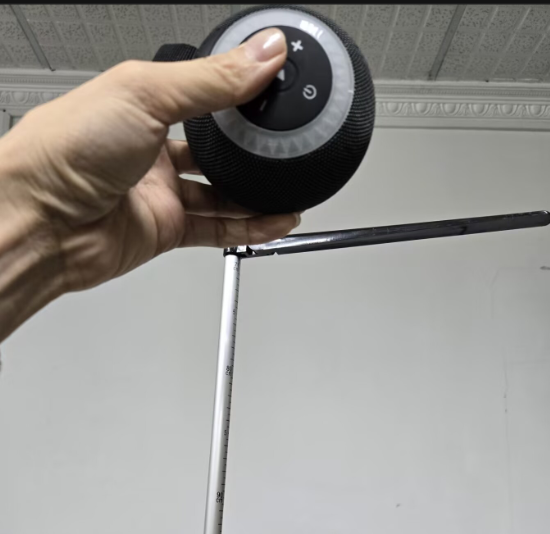
Figure 2.1-1 Drop test image
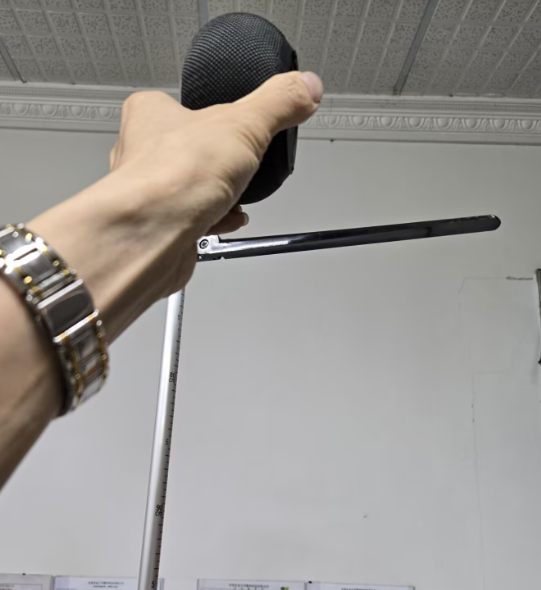
Figure 2.1-2 Drop test image
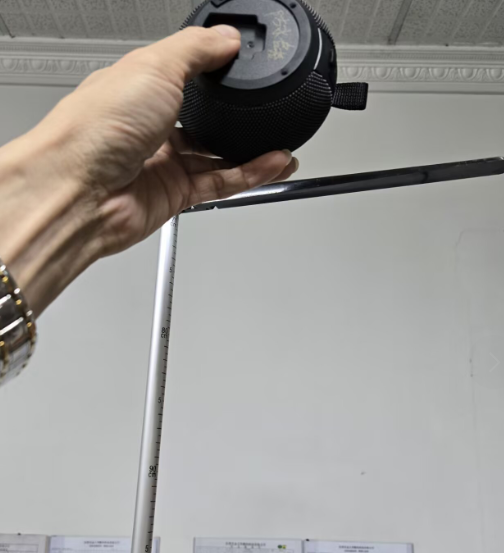
Figure 2.1-3 Drop test image
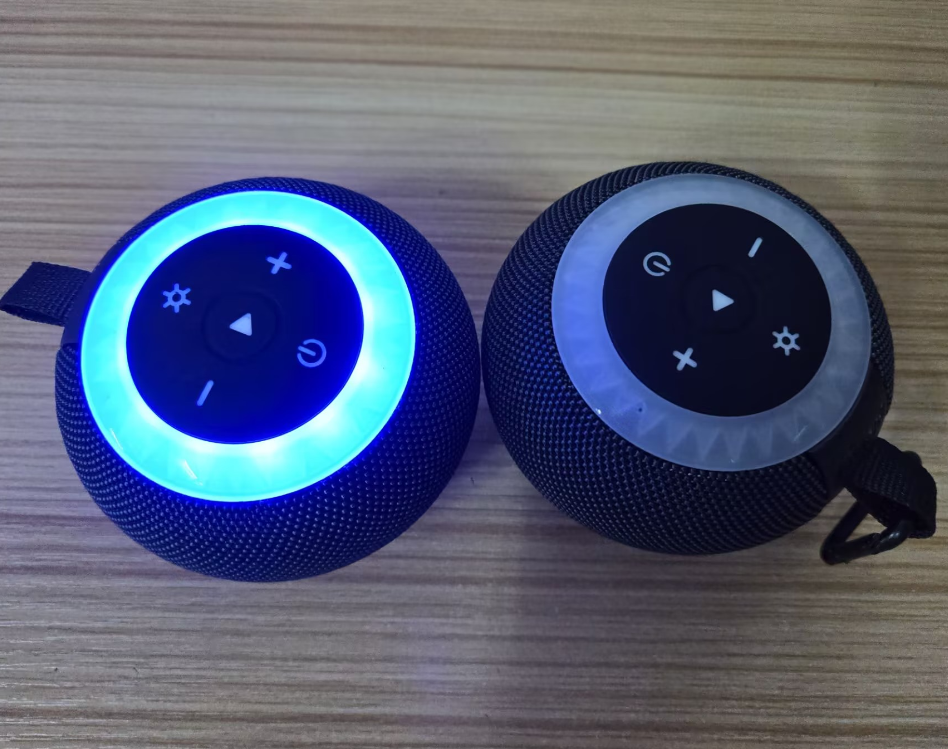
Figure 2.1-4 Drop test image
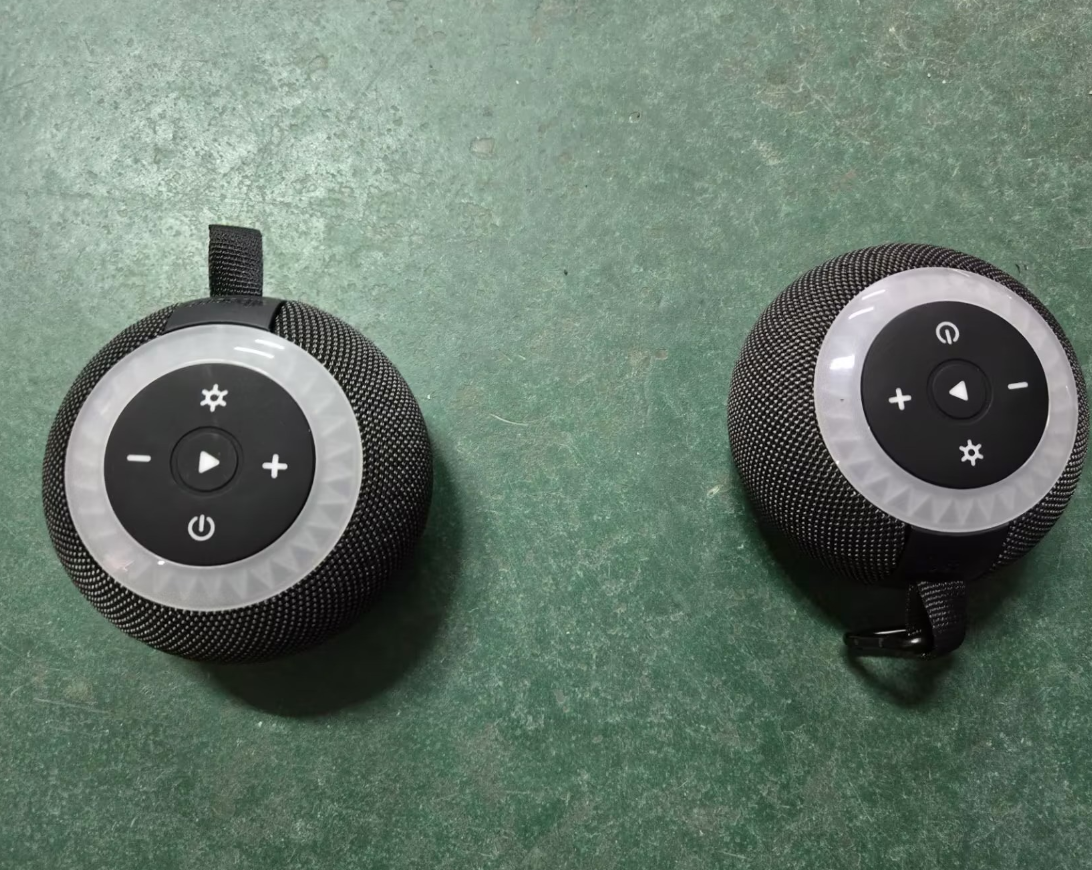
Figure 2.1-5 Drop test image
2.1.8. Preparation, Review, and Approval
| Stage | Personnel | Date |
|---|---|---|
| Prepared by | Ji Zuyun | 2025.6.5 |
| Reviewed by | Lu Yuqian | 2025.6.5 |
| Approved by | — | — |
2.2. Button Feel
2.2.1. Basic Test Item Information
| Item | Content |
|---|---|
| Test category | Mechanical Reliability |
| Test item | Button Feel |
| Test item stated in the report | Screen Ripple Test |
| Product model | F33 |
| Report test date | 2025.5.21 |
| Test start time | 2025.5.21 |
| Test completion time | 2025.5.21 |
| Archiving department | Quality Department |
2.2.2. Test Conditions and Methods
-
Check that the product's buttons function normally before testing.
-
Press the button vertically at 90° with the button test instrument until the button actuates.
-
Use a button force tester to press the DUT button fully without excessive pressure. Test three consecutive times, record the displayed data, and judge based on the average value.
2.2.3. Equipment and Tools Used
- Test samples 2pcs. Button force tester
2.2.4. Test Results
| Sample | Test run | Power button | “-” button | Pause button | “+” button | Light button |
|---|---|---|---|---|---|---|
| Sample 1# | First run | 600 | 550 | 820 | 790 | 700 |
| Second run | 600 | 550 | 850 | 790 | 700 | |
| Third run | 610 | 600 | 850 | 790 | 710 | |
| Average | 603.33 | 566.67 | 840 | 790 | 703.33 |
| Sample | Test run | Power button | “-” button | Pause button | “+” button | Light button |
|---|---|---|---|---|---|---|
| Sample 2# | First run | 700 | 650 | 820 | 850 | 750 |
| Second run | 650 | 650 | 790 | 800 | 700 | |
| Third run | 650 | 600 | 850 | 800 | 700 | |
| Average | 666.67 | 633.33 | 820 | 816.67 | 716.67 |
2.2.5. Images of the Test Procedure and Results
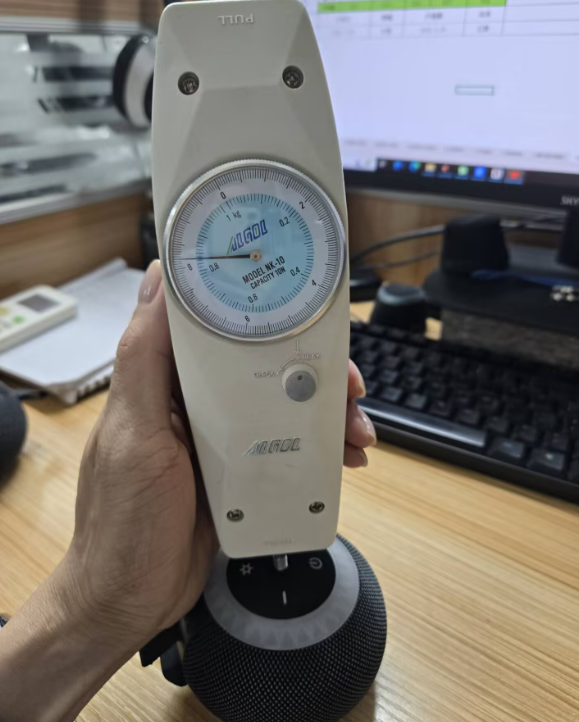
Figure 2.2-1 Button feel test image
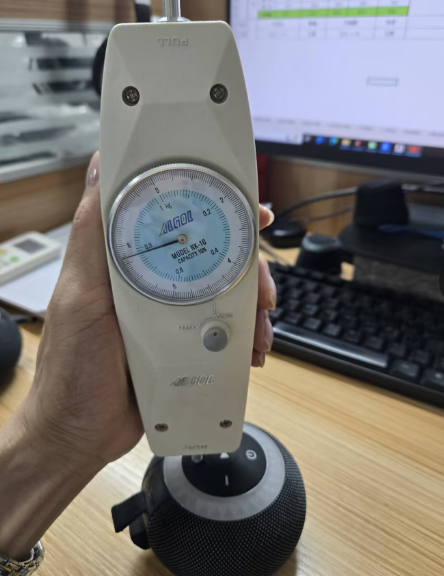
Figure 2.2-2 Button feel test image
2.2.6. Preparation, Review, and Approval
| Stage | Personnel | Date |
|---|---|---|
| Prepared by | Ji Zuyun | 2025.5.21 |
| Reviewed by | Lu Yuqian | 2025.5.21 |
| Approved by | — | — |
2.3. Button Life
2.3.1. Basic Test Item Information
| Item | Content |
|---|---|
| Test category | Mechanical Reliability |
| Test item | Button Life |
| Test item stated in the report | Button Life Test |
| Product model | F33 |
| Report test date | 2025.5.19 |
| Test start time | 2025.5.19 |
| Test completion time | 2025.5.21 |
| Archiving department | Quality Department |
2.3.2. Test Conditions and Methods
-
Check that the speaker's button functions and appearance are OK before testing.
-
Keep the sample stationary and test at 40-60 times/minute with a 500g weight attached to the test handle; one press and release constitutes one cycle. Check basic functions every 10,000 cycles. Record structural or appearance damage and any functional abnormalities.
-
The required button life is 10,000 cycles.
2.3.3. Test Standard Requirements and Test Records
-
After 10,000 test cycles, the buttons must function normally with no poor contact or failure, no appearance deformation, and no broken plastic. All functional tests must be passed.
-
Reduced button resilience is acceptable if tactile feedback remains and the function is normal.
-
This test used 4pcs. Each product has 5 buttons, with each button tested 10020 times.
2.3.4. Equipment and Tools Used
-
Test samples *4pcs
-
500g weights 2pcs
2.3.5. Test Procedure
-
Place the product in the fixture and secure it in the center.
-
Display the speed setting, set the cycle count, and press Start to begin operation.
-
Button life test in progress
-
10020 test cycles completed
2.3.6. Test Results
After 10,000 cycles in this test, the function of each button was checked and no abnormalities were found (pass).
2.3.7. Images of the Test Procedure and Results
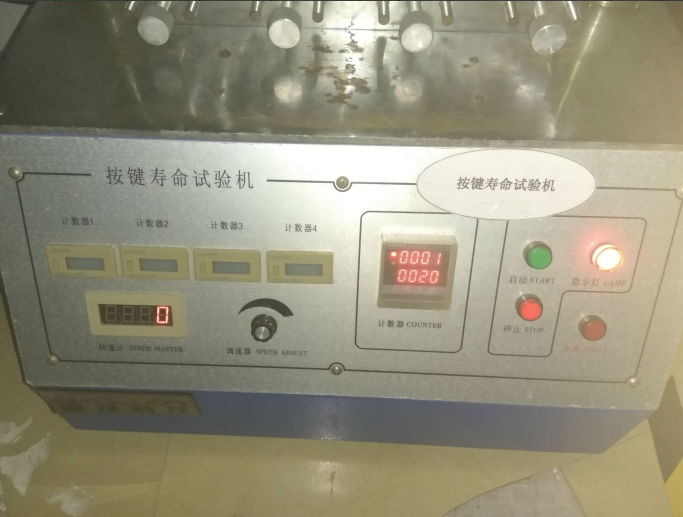
Figure 2.3-1 Button life test image
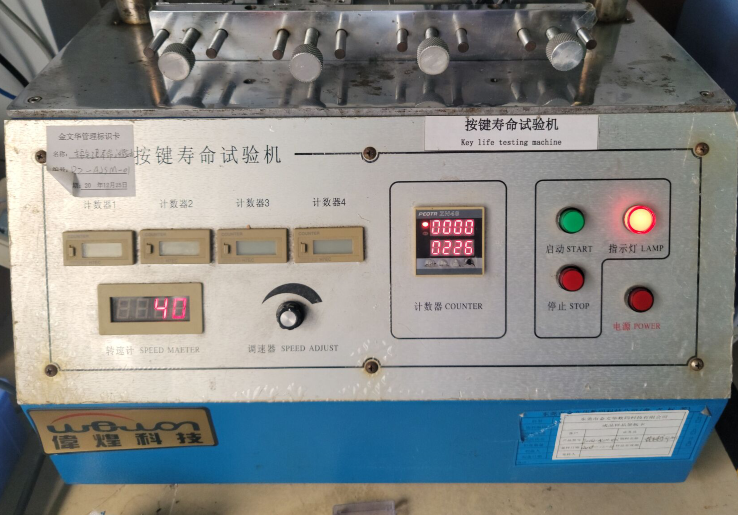
Figure 2.3-2 Button life test image
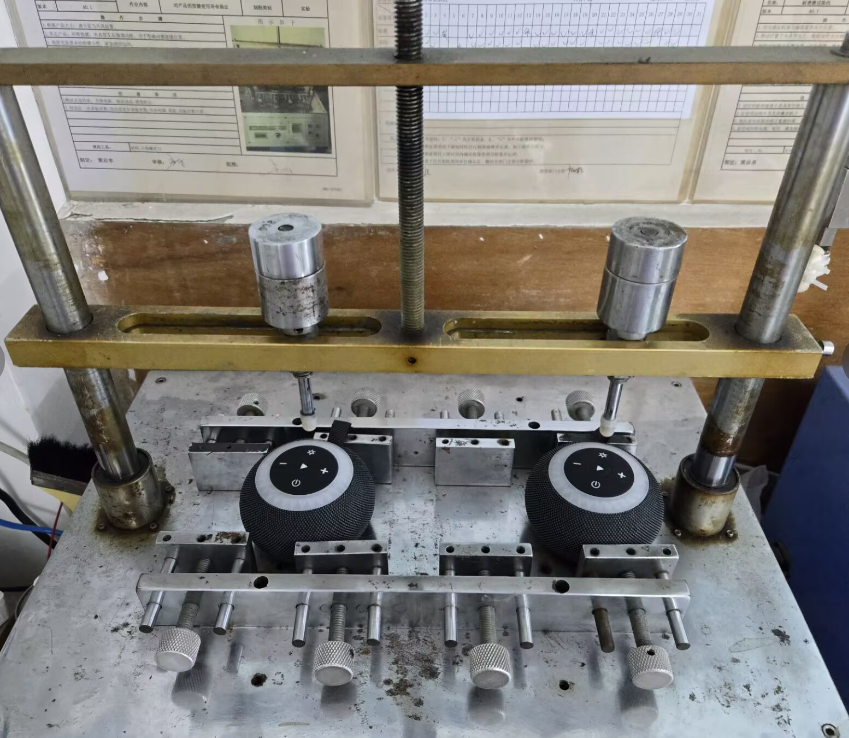
Figure 2.3-3 Button life test image
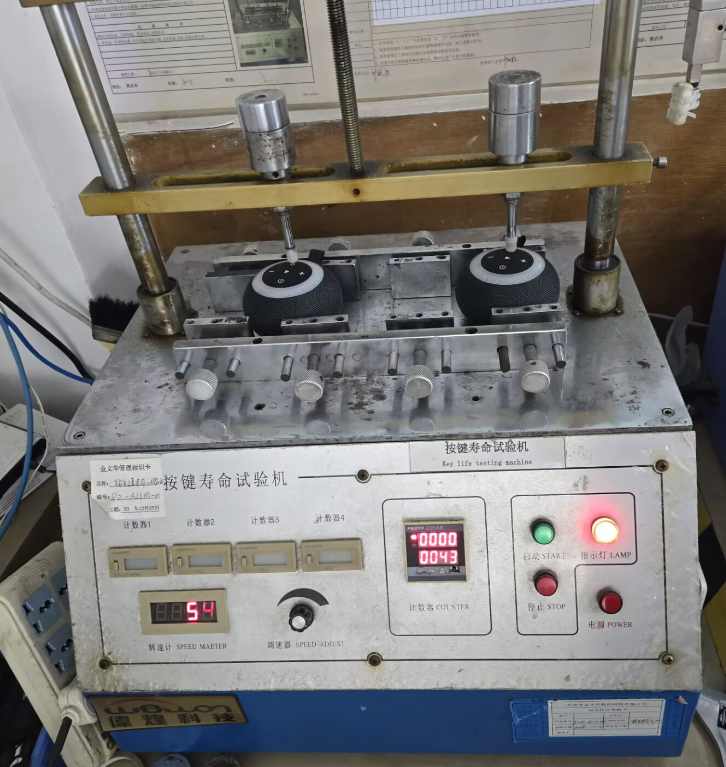
Figure 2.3-4 Button life test image
2.3.8. Preparation, Review, and Approval
| Stage | Personnel | Date |
|---|---|---|
| Prepared by | Wu Limin | 2025.5.21 |
| Reviewed by | Lu Yuqian | 2025.5.21 |
| Approved by | — | — |
2.4. Port Insertion/Removal Force and Life Test
2.4.1. Basic Test Item Information
| Item | Content |
|---|---|
| Test category | Mechanical Reliability |
| Test item | Port Insertion/Removal Force and Life Test |
| Test item stated in the report | 3.5/USB Insertion and Removal Test |
| Product model | F33 |
| Report test date | 2025.5.15 |
| Test start time | 2025.5.19 |
| Test completion time | 2025.5.21 |
| Archiving department | Quality Department |
2.4.2. Test Conditions and Methods
-
Check that the sample's USB and 3.5 functions and appearance pass inspection.
-
Secure the product on the insertion/removal test machine and align the USB plug with the USB port.
-
Conduct the test at 35-45 times per minute.
-
Check functions and appearance every 2500 cycles during testing.
2.4.3. Test Standard Requirements and Test Records
- A pass requires no functional or appearance abnormalities after 5000 cycles.
2.4.4. Equipment and Tools Used
-
Microcomputer-controlled insertion/removal force tester
-
Sample units 3pcs
-
USB data cable 1pcs
2.4.5. Test Procedure
-
Place the product in the fixture and secure it in the center.
-
Set the parameters and press Start to begin operation.
-
Image of testing in progress
-
5020 test cycles completed
2.4.6. Test Results
- After 5000 test cycles, check the USB port. No functional or appearance abnormalities; considered a pass.
2.4.7. Images of the Test Procedure and Results
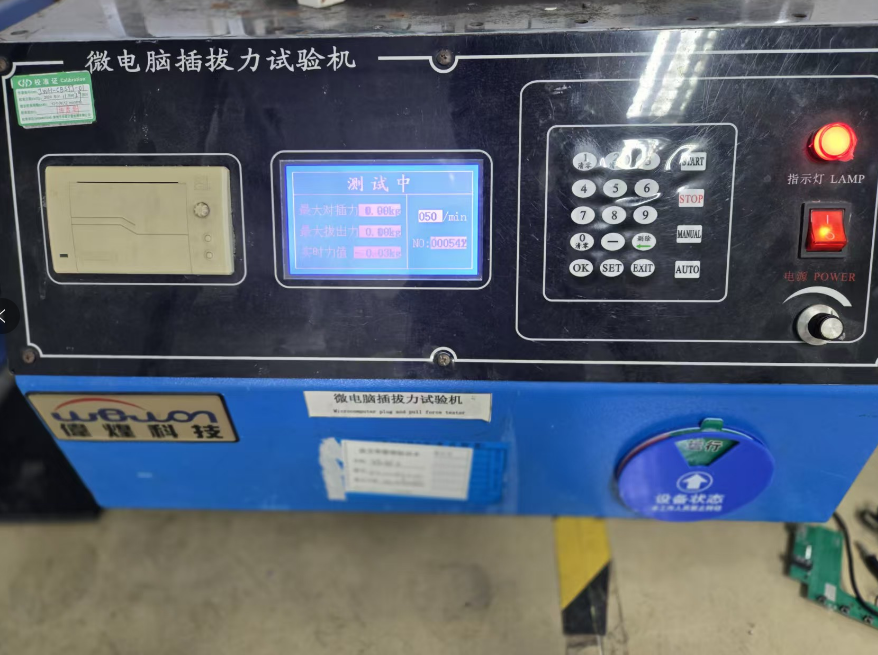
Figure 2.4-1 Port insertion/removal force and life test image
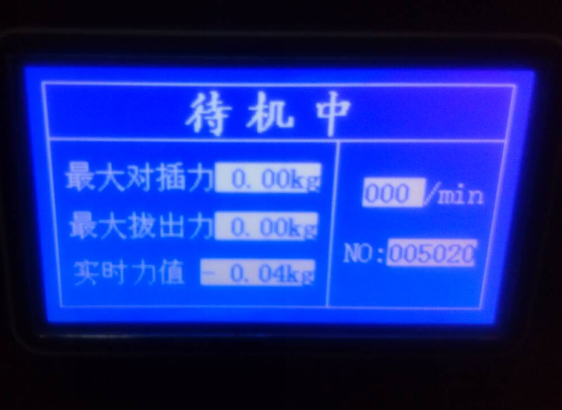
Figure 2.4-2 Port insertion/removal force and life test image
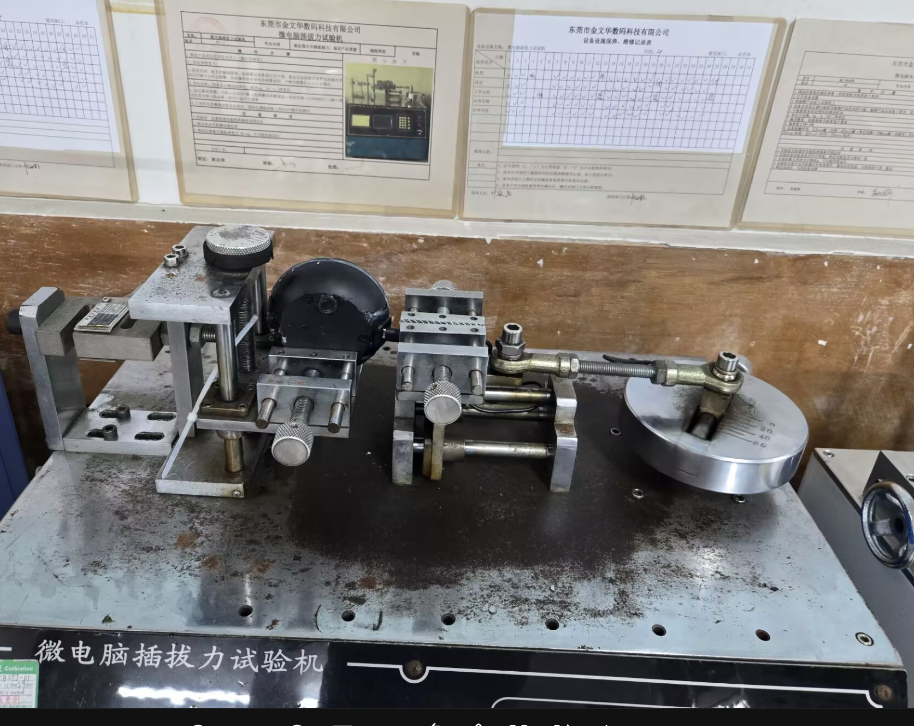
Figure 2.4-3 Port insertion/removal force and life test image
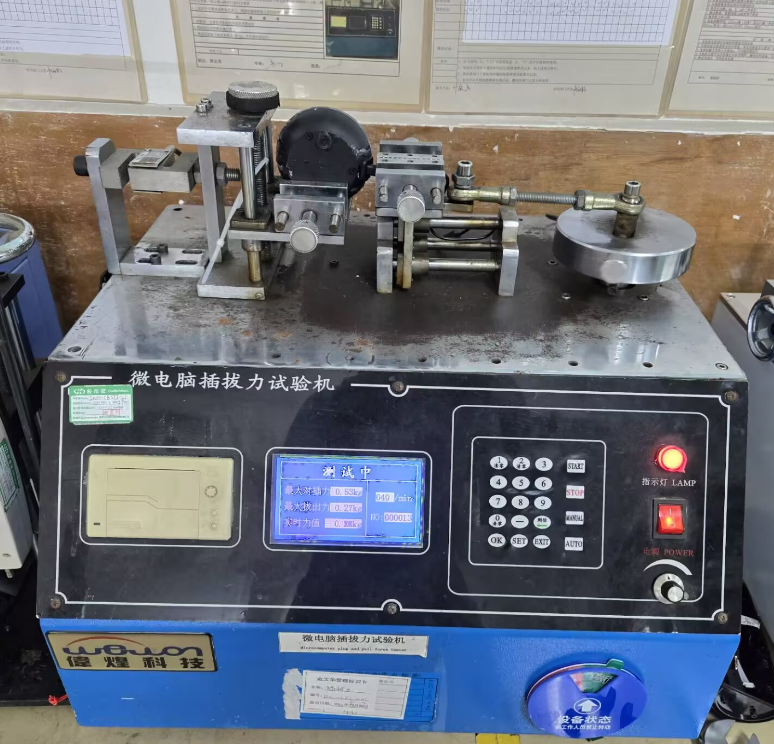
Figure 2.4-4 Port insertion/removal force and life test image
2.4.8. Preparation, Review, and Approval
| Stage | Personnel | Date |
|---|---|---|
| Prepared by | Ji Zuyun | 2025.5.17 |
| Reviewed by | Lu Yuqian | 2025.5.17 |
| Approved by | — | — |
2.5. USB Port Cover Tensile Test
2.5.1. Basic Test Item Information
| Item | Content |
|---|---|
| Test category | Mechanical Reliability |
| Test item | USB Port Cover Tensile Test |
| Test item stated in the report | USB-AUX Silicone Cover Tensile Test |
| Product model | F33 |
| Report test date | 2025.5.20 |
| Test start time | 2025.5.20 |
| Test completion time | 2025.5.20 |
| Archiving department | Quality Department |
2.5.2. Test Conditions and Methods
-
Check that the product's silicone cover passes functional and appearance inspection.
-
Open the silicone cover and apply a vertical 2.5KG tensile load with a push-pull tester, holding steadily for 60 seconds.
2.5.3. Test Standard Requirements and Test Records
- Apply a vertical 2.5KG tensile load with a push-pull tester and hold steadily for 60 seconds. The silicone cover must show no separation, detachment, or damage to be considered OK.
2.5.4. Equipment and Tools Used
-
Test samples 3pcs.
-
Push-pull tester 1pcs.
2.5.5. Test Results
The product's USB silicone cover was tested with a vertical 2.5KG tensile load held steadily for 60 seconds and considered a pass. The USB cover broke at approximately 3-4KG.
2.5.6. Images of the Test Procedure and Results
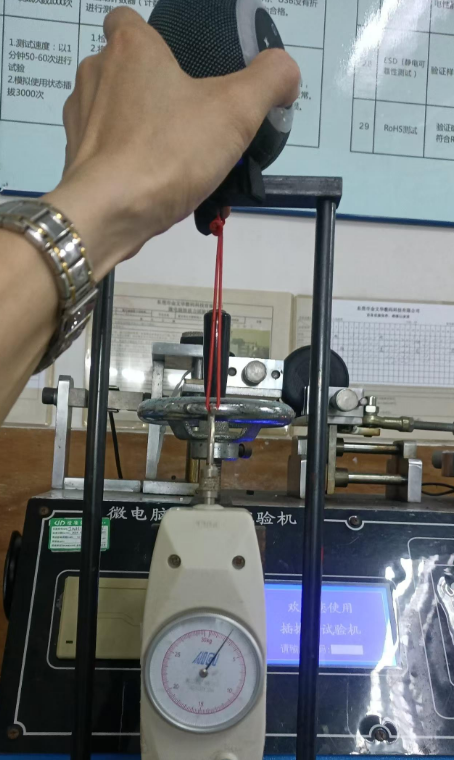
Figure 2.5-1 USB port cover tensile test image
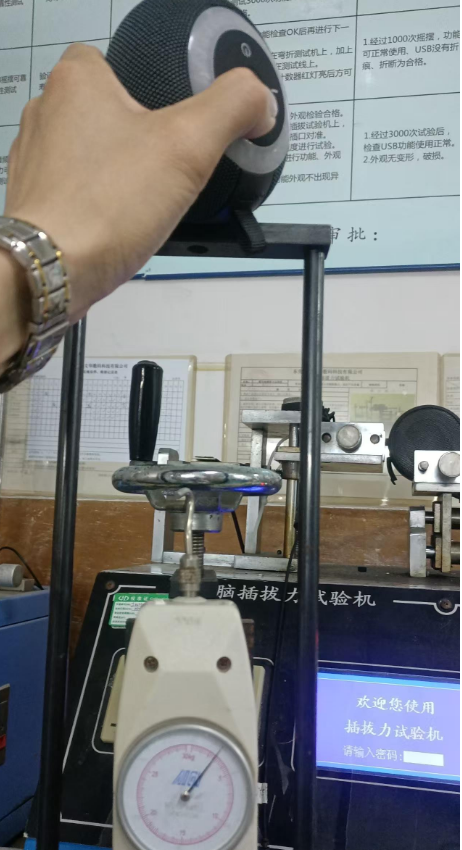
Figure 2.5-2 USB port cover tensile test image
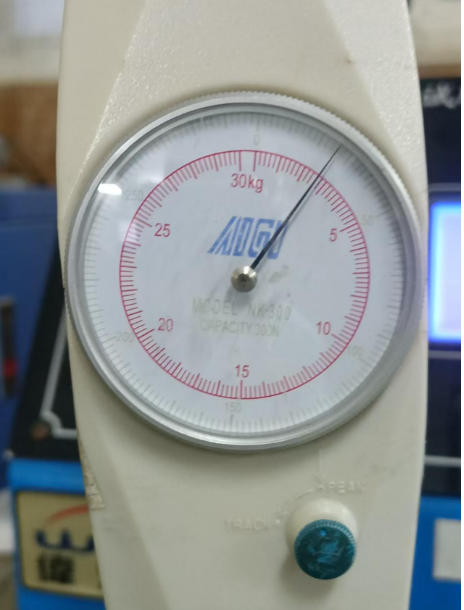
Figure 2.5-3 USB port cover tensile test image
2.5.7. Preparation, Review, and Approval
| Stage | Personnel | Date |
|---|---|---|
| Prepared by | Ji Zuyun | 2025.5.20 |
| Reviewed by | Lu Yuqian | 2025.5.20 |
| Approved by | — | — |
2.6. Handle Hanging-Load Test
2.6.1. Basic Test Item Information
| Item | Content |
|---|---|
| Test category | Mechanical Reliability |
| Test item | Handle Hanging-Load Test |
| Test item stated in the report | Hanging-Load Test |
| Product model | F33 |
| Report test date | 2025.5.16 |
| Test start time | 2025.5.16 |
| Test completion time | 2025.5.20 |
| Archiving department | Quality Department |
2.6.2. Test Conditions and Methods
-
Check that the product's appearance is OK before testing.
-
Product weight 206g; the hanging load is 3 times the product weight, at 930G.
-
Ambient conditions: 26℃, 50%RH.
-
Duration time: 96hrs. Duration: 96 hours. Vertical hanging load for 96 hours.
2.6.3. Test Standard Requirements and Test Records
- A weight of approximately 618G is required for 96 hours; no detachment after the hanging-load test constitutes a pass.
2.6.4. Equipment and Tools Used
- Test samples 2pcs
2.6.5. Test Procedure
-
Product weight 310g
-
2KG weight suspended vertically for 96 hours
2.6.6. Test Results
This test used a 2KG weight suspended vertically for 96 hours, with a hanging load 6.5 times the product weight. No handle detachment was found; considered a pass.
2.6.7. Images of the Test Procedure and Results
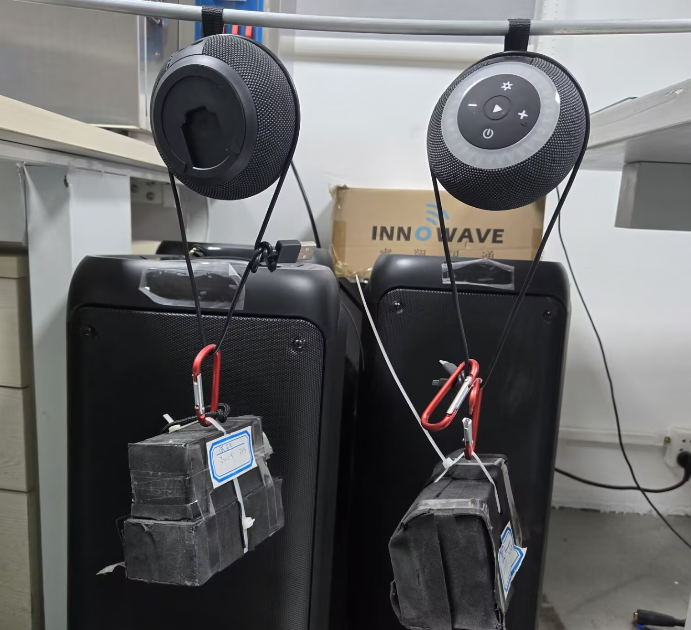
Figure 2.6-1 Handle hanging-load test image
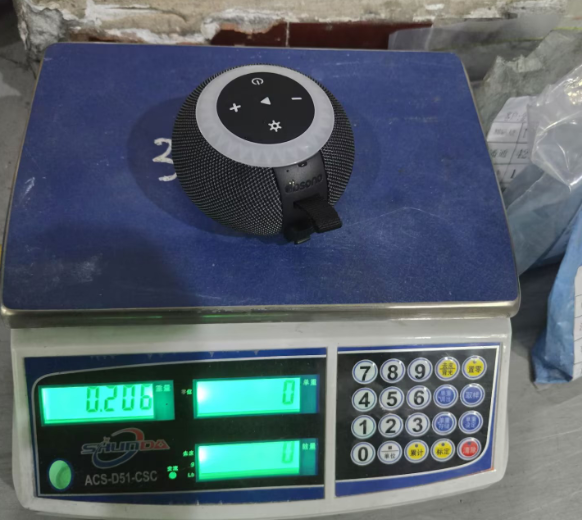
Figure 2.6-2 Handle hanging-load test image
2.6.8. Preparation, Review, and Approval
| Stage | Personnel | Date |
|---|---|---|
| Prepared by | Ji Zuyun | 2025.5.20 |
| Reviewed by | Lu Yuqian | 2025.5.20 |
| Approved by | — | — |
2.7. Waterproof Test
2.7.1. Basic Test Item Information
| Item | Content |
|---|---|
| Test category | Mechanical Reliability |
| Test item | Waterproof Test |
| Test item stated in the report | Waterproof Test |
| Product model | F33 |
| Report test date | 2025.6.13 |
| Test start time | 2025.6.13 |
| Test completion time | 2025.6.13 |
| Archiving department | Quality Department |
2.7.2. Test Conditions and Methods
-
The product structure has a level-seven waterproof rating.
-
Before testing, check that the speaker's appearance, functions, and enclosure sealing are OK.
-
Place the product in the basket, close the lid, and put it in the water tank.
-
Immerse the product in the tank at a depth of 1.2 meters for 30 minutes, then remove it and open the enclosure to check for water ingress.
2.7.3. Test Standard Requirements and Test Records
- After immersing the product at a depth of 1.2 meters for 30 minutes, remove it and open the enclosure. No water ingress was found; considered a pass.
2.7.4. Equipment and Tools Used
- Test samples *3pcs.
2.7.5. Test Procedure
-
Place the product in the water tank.
-
The product is in the water tank at a depth of 1.2 meters.
2.7.6. Test Results
After the waterproof test, disassemble the enclosure. No water ingress was found inside; considered a pass.
2.7.7. Images of the Test Procedure and Results
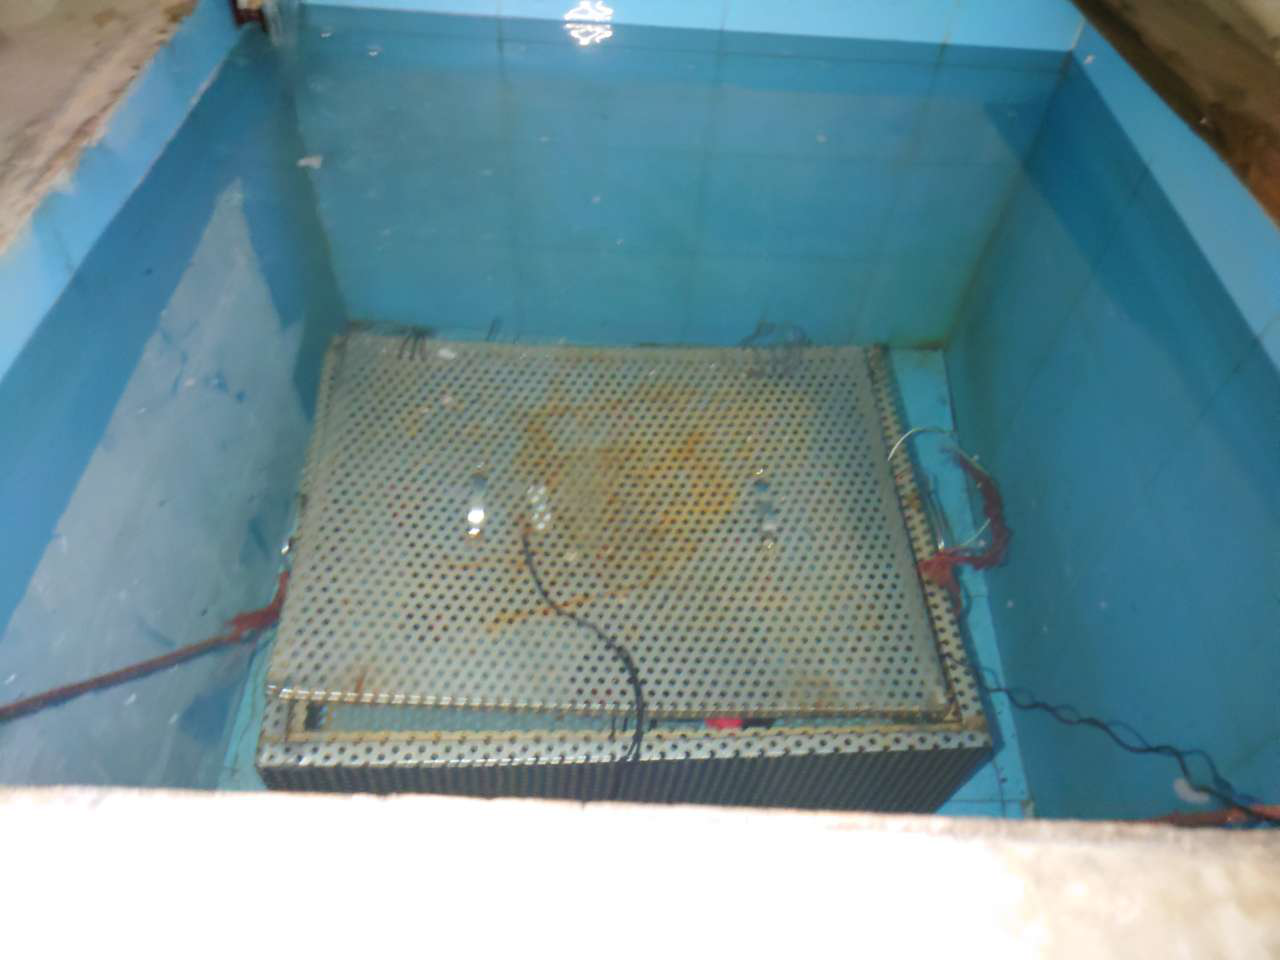
Figure 2.7-1 Waterproof test image
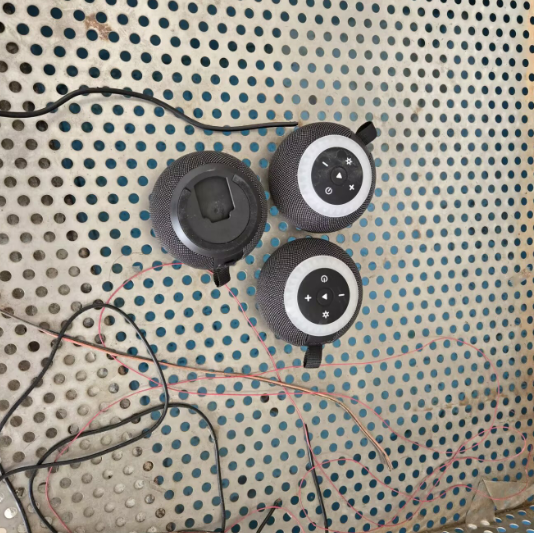
Figure 2.7-2 Waterproof test image
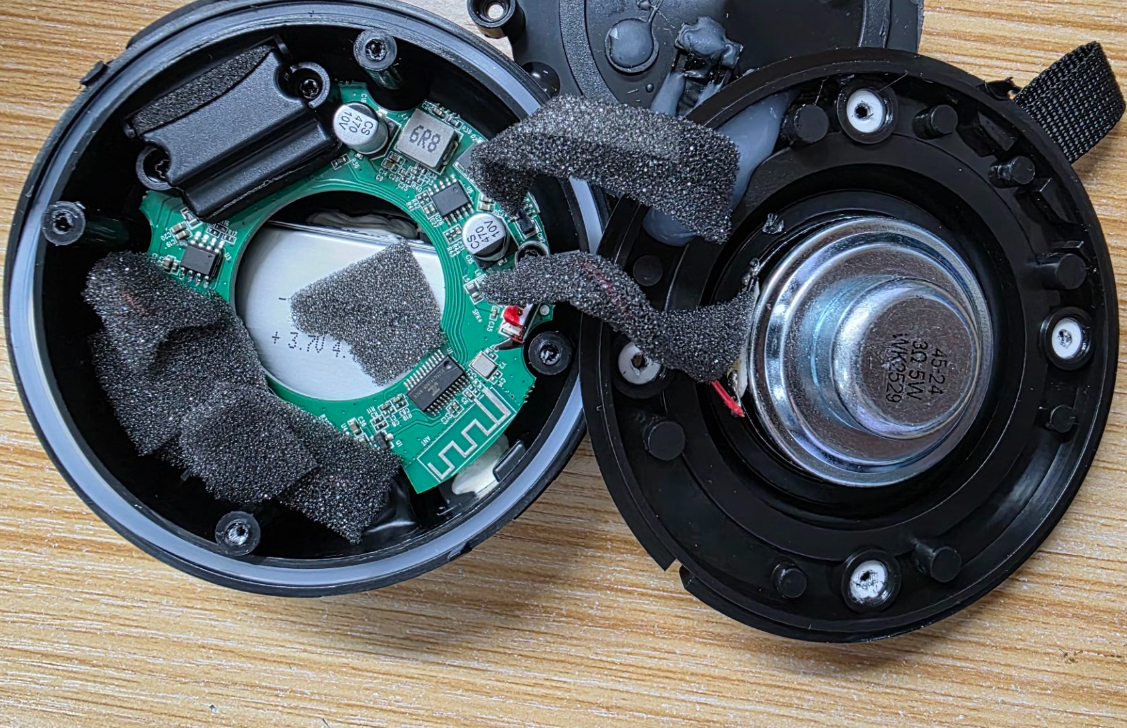
Figure 2.7-3 Waterproof test image
2.7.8. Preparation, Review, and Approval
| Stage | Personnel | Date |
|---|---|---|
| Prepared by | Ji Zuyun | 2025.6.13 |
| Reviewed by | Lu Yuqian | 2025.6.13 |
| Approved by | — | — |
2.8. Suction-Cup Tensile Test
2.8.1. Basic Test Item Information
| Item | Content |
|---|---|
| Test category | Mechanical Reliability |
| Test item | Suction-Cup Tensile Test |
| Test item stated in the report | Suction-Cup Tensile Test |
| Product model | F33 (suction cup) |
| Report test date | 2025.8.16 |
| Test start time | 2025.8.16 |
| Test completion time | 2025.8.16 |
| Archiving department | Quality Department |
2.8.2. Test Conditions and Methods
-
Check that the product's silicone cover passes functional and appearance inspection.
-
Open the silicone cover and apply a vertical 2.5KG tensile load with a push-pull tester, holding steadily for 60 seconds.
2.8.3. Test Standard Requirements and Test Records
- Apply a vertical 2.5KG tensile load with a push-pull tester and hold steadily for 60 seconds. The silicone cover must show no separation, detachment, or damage to be considered OK.
2.8.4. Equipment and Tools Used
-
Test samples 2pcs.
-
Push-pull tester 1pcs.
2.8.5. Test Procedure
-
USB tensile test image
-
Test force ≥9kg, applied vertically and held steadily for 60 seconds; the part was not pulled out.
2.8.6. Test Results
The product's USB silicone cover was tested with a vertical 2.5KG tensile load held steadily for 60 seconds and considered a pass. It was not pulled out at approximately 9KG.
2.8.7. Images of the Test Procedure and Results
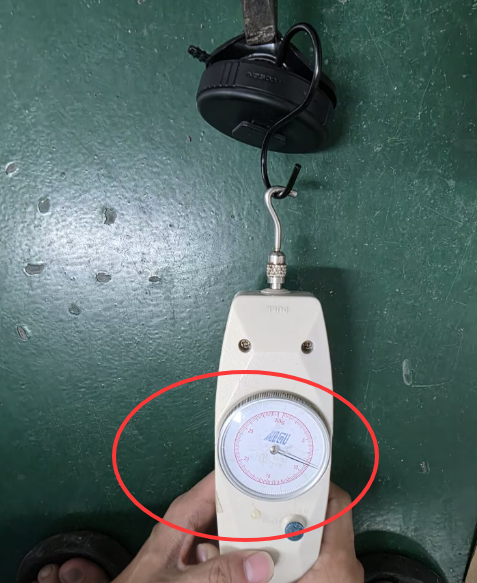
Figure 2.8-1 Suction-cup tensile test image
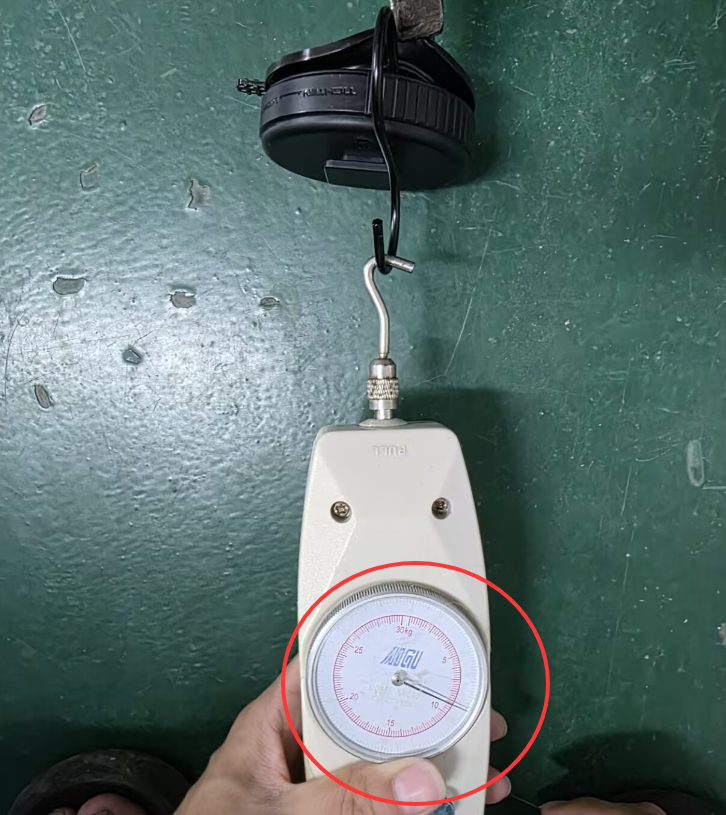
Figure 2.8-2 Suction-cup tensile test image
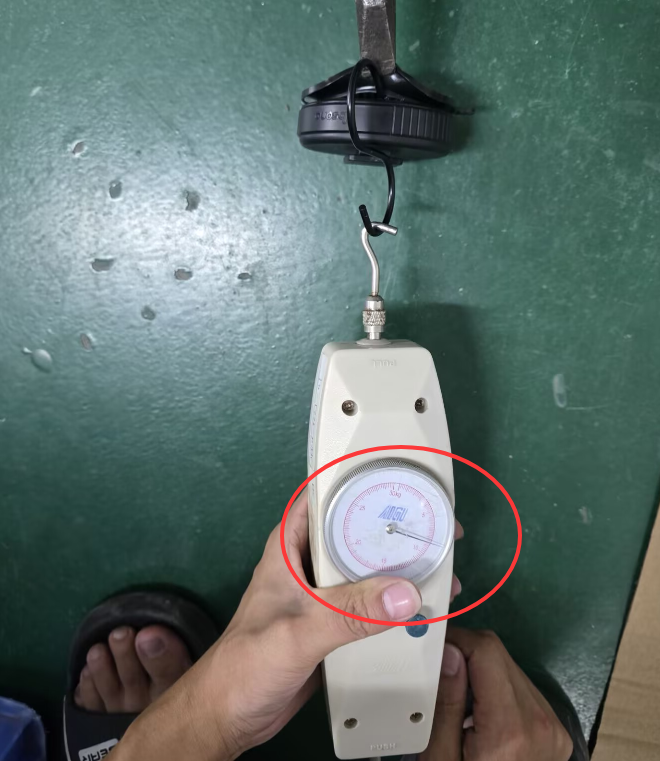
Figure 2.8-3 Suction-cup tensile test image
2.8.8. Preparation, Review, and Approval
| Stage | Personnel | Date |
|---|---|---|
| Prepared by | Ji Zuyun | 2025.8.16 |
| Reviewed by | Lu Yuqian | 2025.8.16 |
| Approved by | — | — |
2.9. Suction-Cup Hanging-Load Test
2.9.1. Basic Test Item Information
| Item | Content |
|---|---|
| Test category | Mechanical Reliability |
| Test item | Suction-Cup Hanging-Load Test |
| Test item stated in the report | Suction-Cup Hanging-Load Test |
| Product model | F33 |
| Report test date | 2025.8.12 |
| Test start time | 2025.8.12 |
| Test completion time | 2025.8.16 |
| Archiving department | Quality Department |
2.9.2. Test Conditions and Methods
-
Check that the product's appearance is OK before testing.
-
Product weight 206g; the hanging load is 3 times the product weight, at 930G.
-
Ambient conditions: 26℃, 50%RH.
4)Duration: 96 hours. Vertical hanging load for 96 hours.
2.9.3. Test Standard Requirements and Test Records
- A weight of approximately 618G is required for 96 hours; no detachment after the hanging-load test constitutes a pass.
2.9.4. Equipment and Tools Used
- Test samples 2pcs
2.9.5. Test Procedure
1)Test completed without nano-adhesive film: sample weight 310g, with a 1KG weight suspended vertically for 48 hours;
2)Test completed with nano-adhesive film: sample weight 310g, with a 1KG weight suspended vertically for 48 hours;
2.9.6. Test Results
This test used a 2KG weight suspended vertically for 96 hours, with a hanging load 4.8 times the product weight. No suction-cup detachment was found; considered a pass.
2.9.7. Images of the Test Procedure and Results
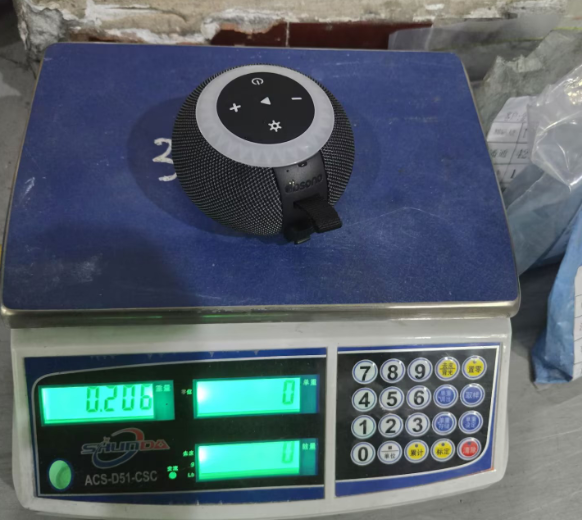
Figure 2.9-1 Suction-cup hanging-load test image
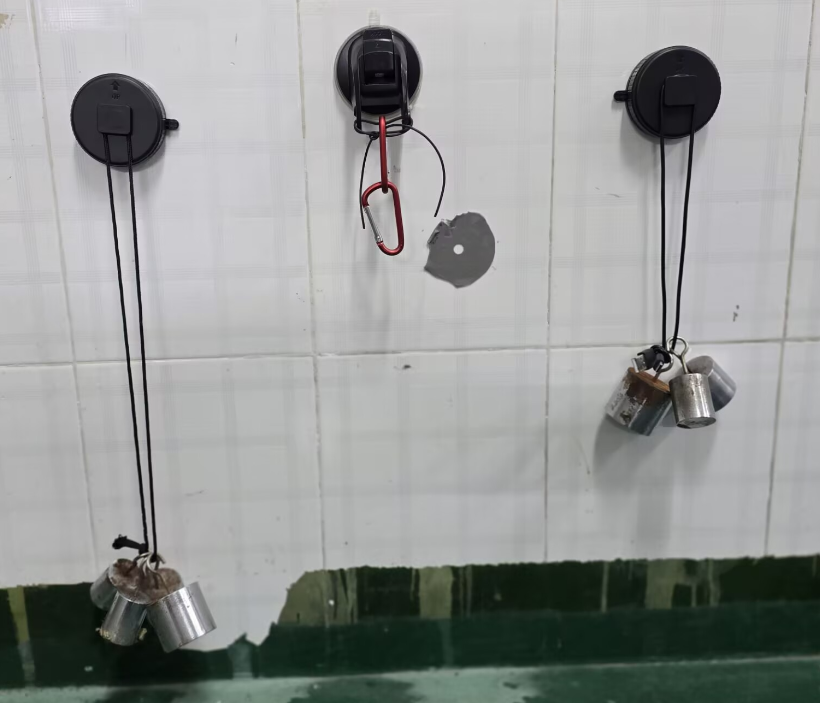
Figure 2.9-2 Suction-cup hanging-load test image
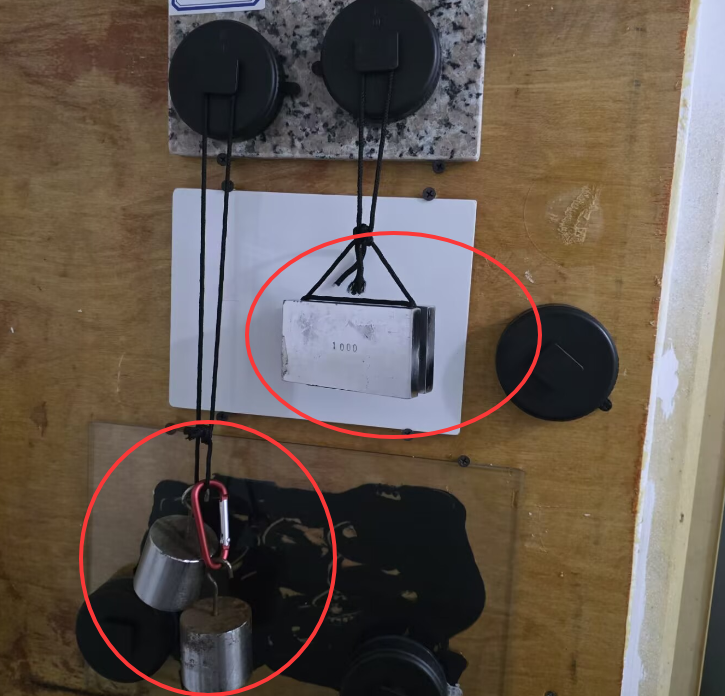
Figure 2.9-3 Suction-cup hanging-load test image
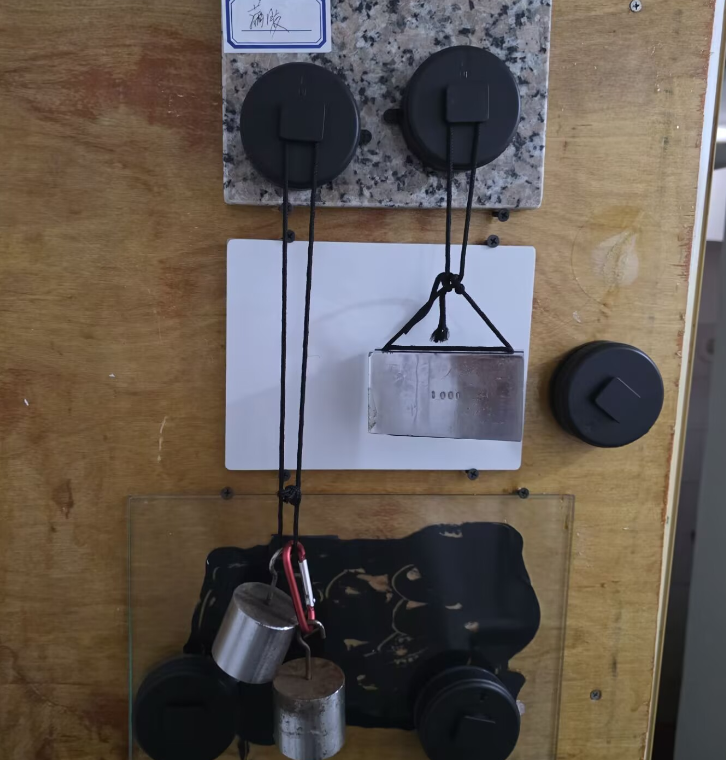
Figure 2.9-4 Suction-cup hanging-load test image
2.9.8. Preparation, Review, and Approval
| Stage | Personnel | Date |
|---|---|---|
| Prepared by | Ji Zuyun | 2025.8.16 |
| Reviewed by | Lu Yuqian | 2025.8.16 |
| Approved by | — | — |
3. EMC
3.1. ESD (Electrostatic Discharge Immunity)
3.1.1. Basic Test Item Information
| Item | Content |
|---|---|
| Test category | EMC |
| Test item | ESD (Electrostatic Discharge Immunity) |
| Test item stated in the report | ESD Test |
| Product model | F33 |
| Report test date | 2025.5.21 |
| Test start time | 2025.5.21 |
| Test completion time | 2025.5.21 |
| Archiving department | Quality Department |
3.1.2. Test Conditions and Methods
-
Connect the product to a phone via Bluetooth and play music; adjust the equipment and begin testing.
-
Contact ESD: ±4KV (exposed metal parts); apply 10 discharges to the USB contact on each product.
-
Air ESD: ±8KV (buttons, gaps, etc.); apply 10 discharges to different points on each product's plastic surface.
-
Keep the product operating throughout testing.
3.1.3. Test Standard Requirements and Test Records
A pass requires no automatic shutdown or damage to the product's functions throughout the test and at completion.
3.1.4. Equipment and Tools Used
-
Test samples *3pcs
-
BACL Laboratory
-
Phone
3.1.5. Test Results
Testing showed that the product met the ESD requirements and functioned normally during testing; the product passes.
3.1.6. Images of the Test Procedure and Results
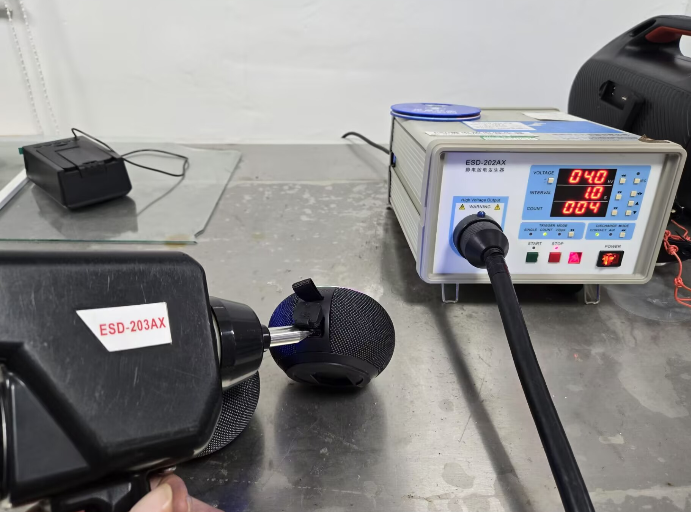
Figure 3.1-1 ESD (electrostatic discharge immunity) test image
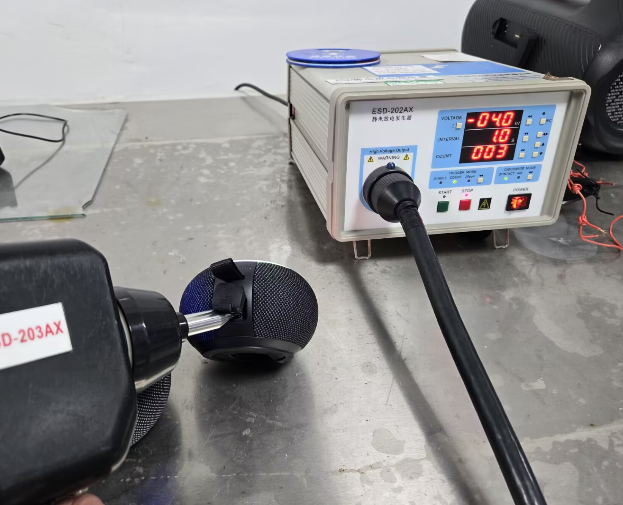
Figure 3.1-2 ESD (electrostatic discharge immunity) test image
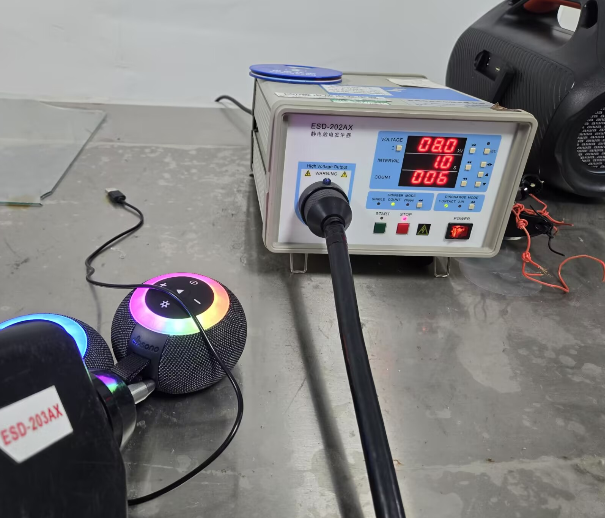
Figure 3.1-3 ESD (electrostatic discharge immunity) test image
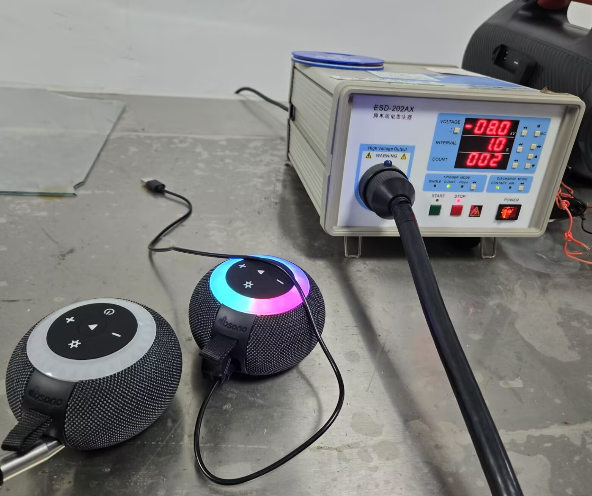
Figure 3.1-4 ESD (electrostatic discharge immunity) test image
3.1.7. Preparation, Review, and Approval
| Stage | Personnel | Date |
|---|---|---|
| Prepared by | Ji Zuyun | 2025.5.21 |
| Reviewed by | Lu Yuqian | 2025.5.21 |
| Approved by | — | — |
4. Component Reliability
4.1. Alcohol Resistance Test (Screen Printing + Laser Engraving)
4.1.1. Basic Test Item Information
| Item | Content |
|---|---|
| Test category | Component Reliability |
| Test item | Alcohol Resistance Test (Screen Printing + Laser Engraving) |
| Test item stated in the report | Screen Printing Alcohol Abrasion Test Report |
| Product model | F33 |
| Report test date | 2025.6.6、7.14 |
| Test start time | 2025.6.6 |
| Test completion time | 2025.6.6 |
| Archiving department | Quality Department |
4.1.2. Test Conditions and Methods
-
Inspect the appearance of 2 pilot-production units and confirm it is OK.
-
Wrap a 500g weight in white cotton cloth, soak with 95% alcohol, and use the instrument to rub back and forth horizontally 50 times at 30 times per minute.
4.1.3. Test Standard Requirements and Test Records
- The LOGO, paint, and screen printing must show no peeling, exposed substrate, blistering, discoloration, or other defects.
4.1.4. Equipment and Tools Used
-
Test samples 2*psc+3pcs
-
Use a 500g weight.
4.1.5. Test Procedure
-
Photo before testing
-
Place and secure the product in the abrasion tester and test with a 500g weight.
-
Secure the product on the abrasion tester, set 30 cycles, and set the speed to 20-30/minute.
-
After the alcohol abrasion test, inspection found slight peeling and minor scratches on the surface and screen printing, within the acceptable range.
4.1.6. Test Results
After the product's alcohol abrasion test, inspection found slight peeling and minor flaking on the surface and screen printing, within the acceptable range.
4.1.7. Images of the Test Procedure and Results
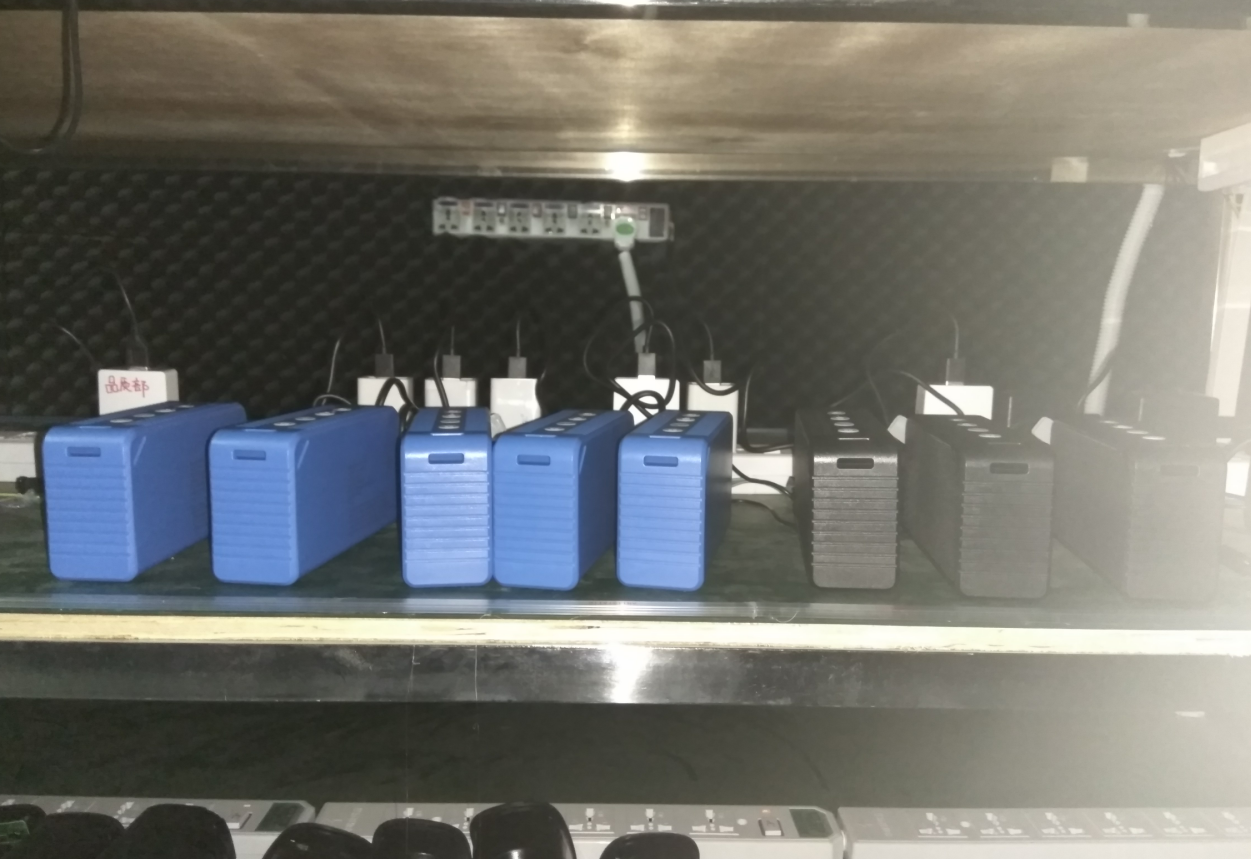
Figure 4.1-1 Alcohol resistance test (screen printing + laser engraving) image
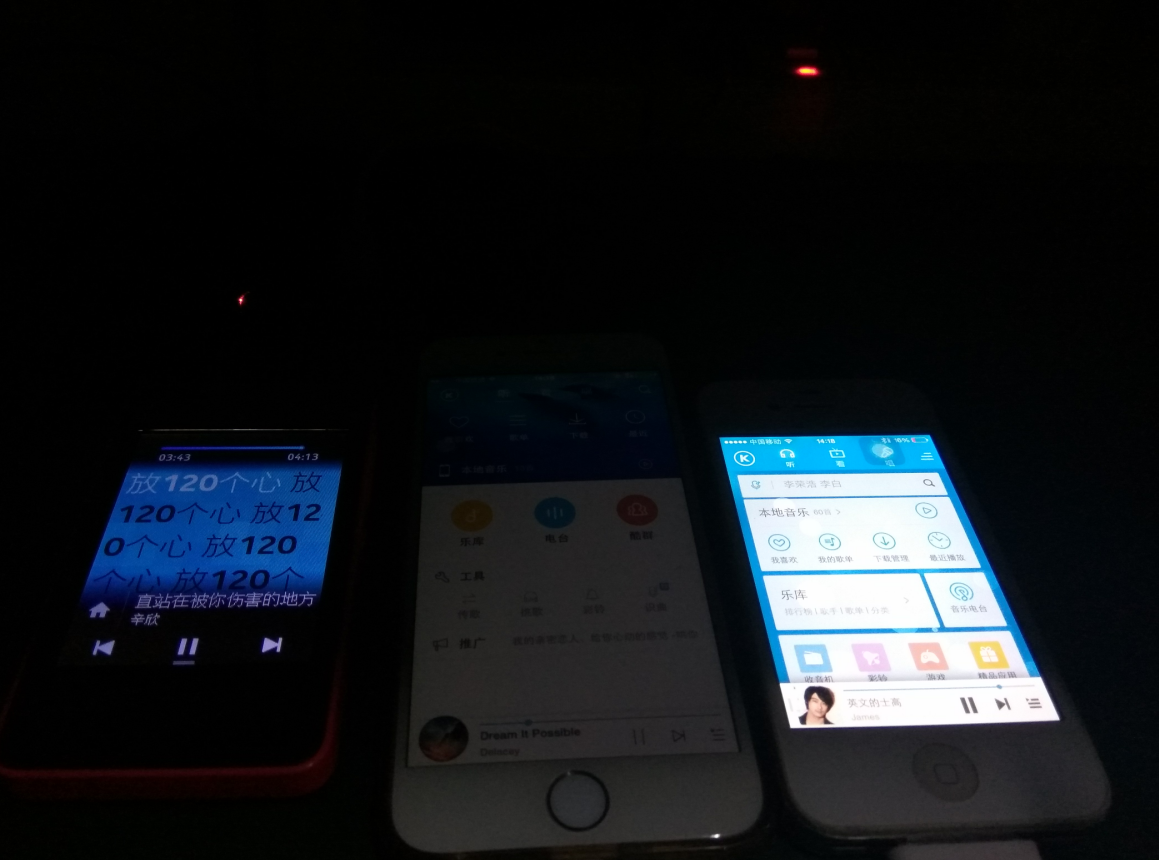
Figure 4.1-2 Alcohol resistance test (screen printing + laser engraving) image
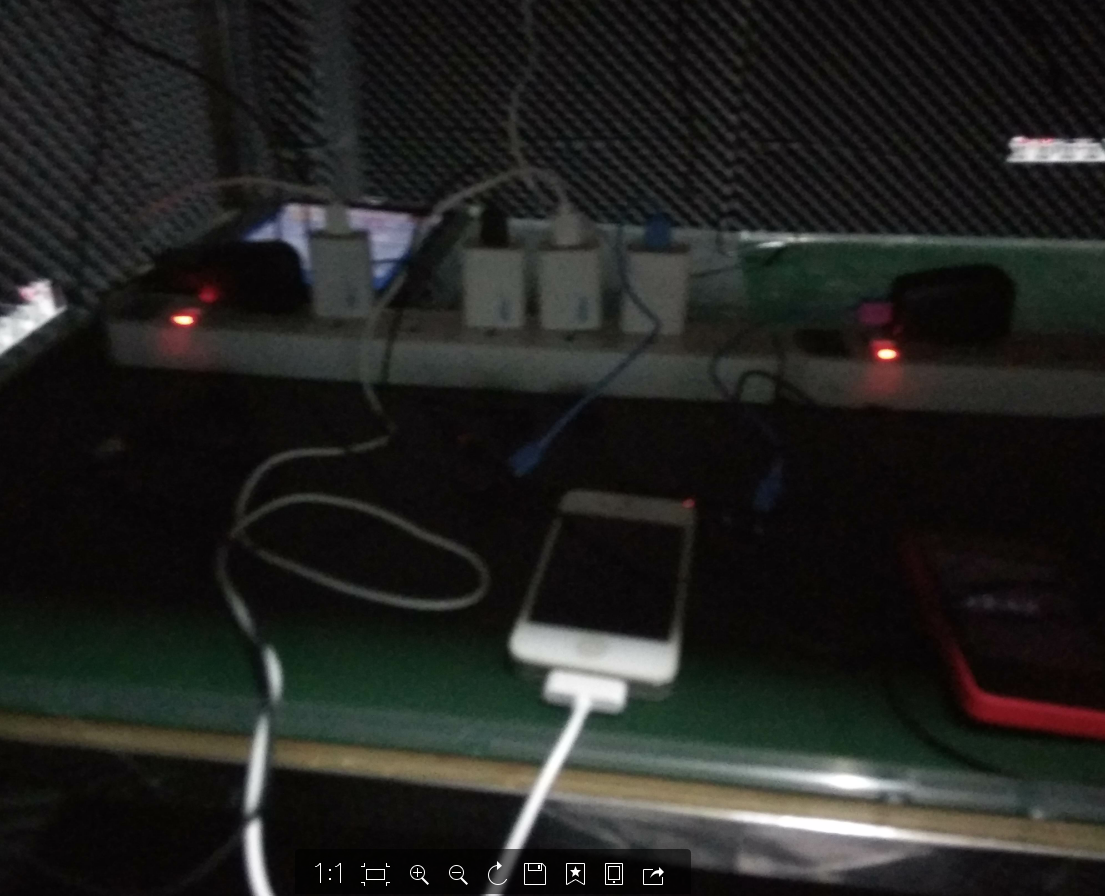
Figure 4.1-3 Alcohol resistance test (screen printing + laser engraving) image
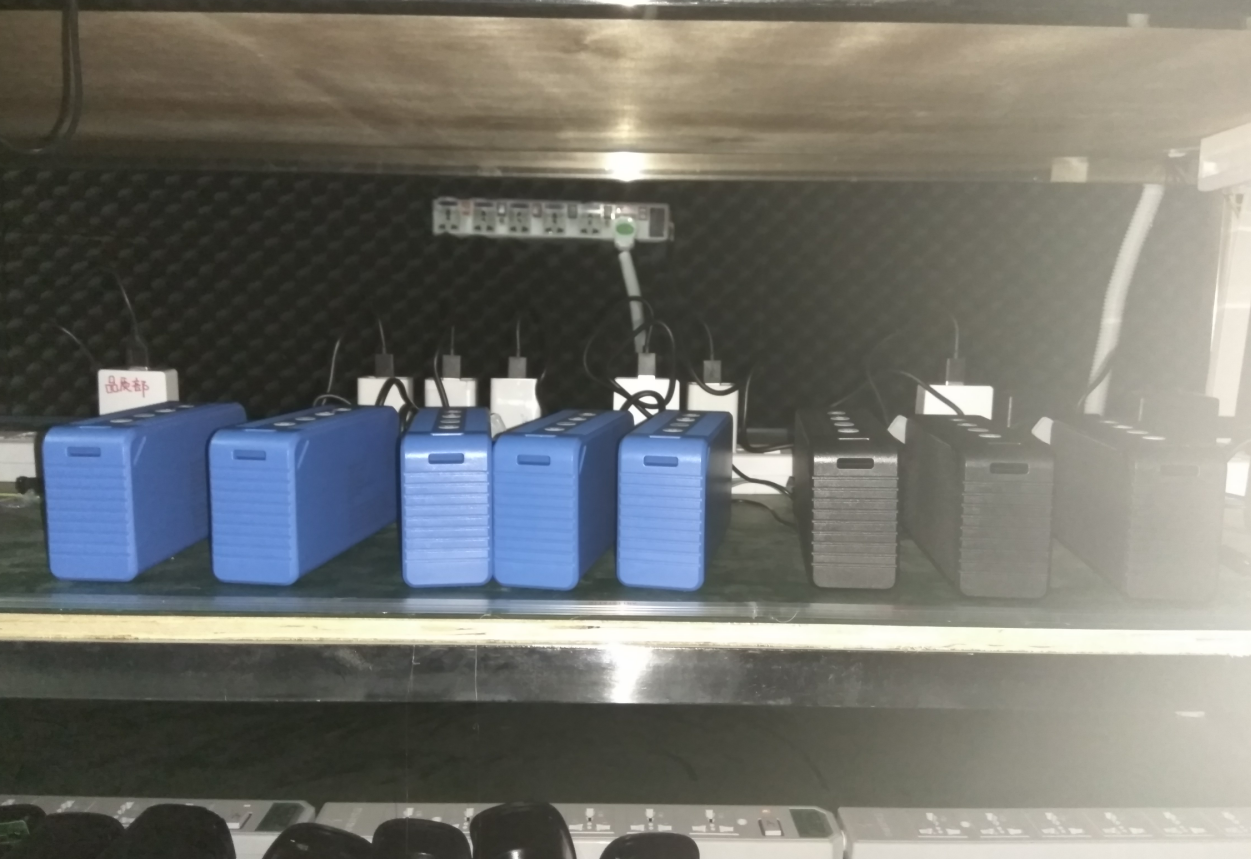
Figure 4.1-4 Alcohol resistance test (screen printing + laser engraving) image
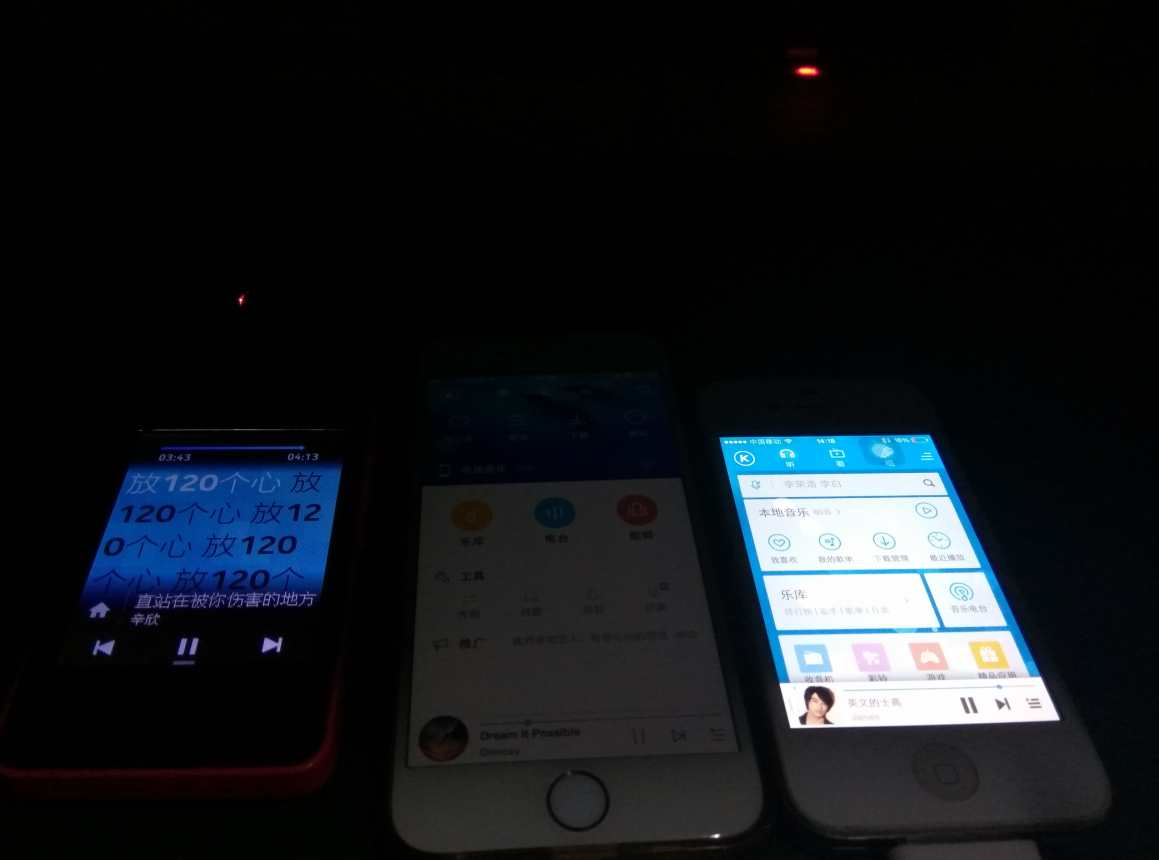
Figure 4.1-5 Alcohol resistance test (screen printing + laser engraving) image
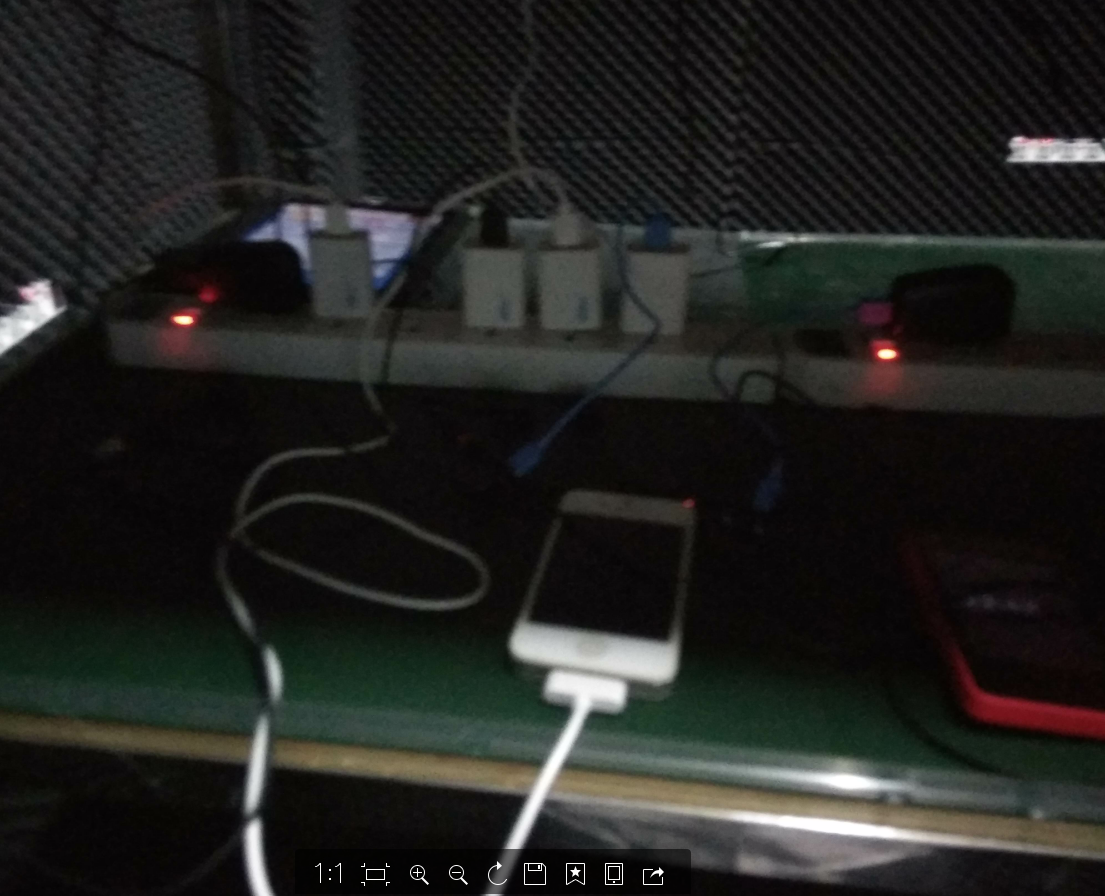
Figure 4.1-6 Alcohol resistance test (screen printing + laser engraving) image
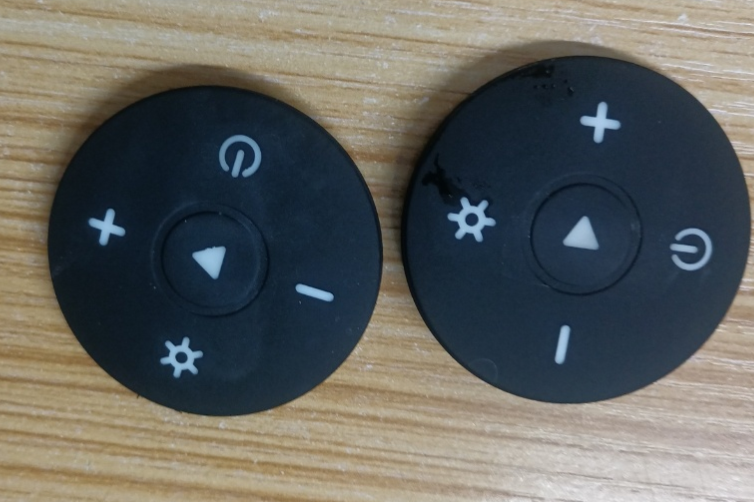
Figure 4.1-7 Alcohol resistance test (screen printing + laser engraving) image
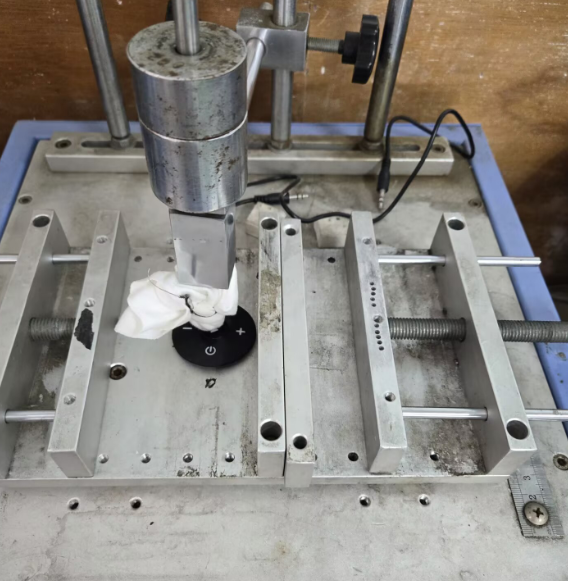
Figure 4.1-8 Alcohol resistance test (screen printing + laser engraving) image
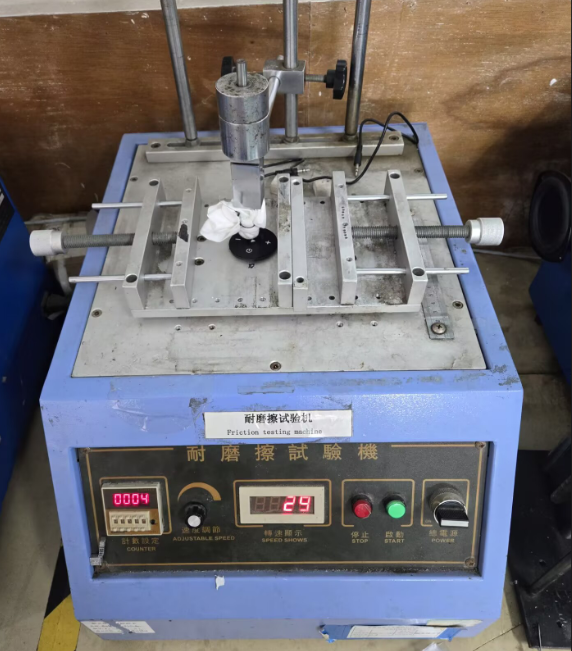
Figure 4.1-9 Alcohol resistance test (screen printing + laser engraving) image
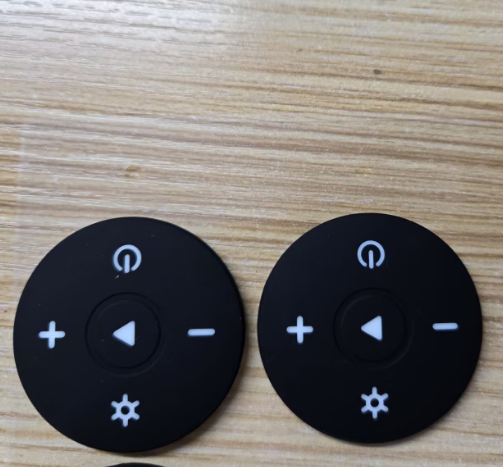
Figure 4.1-10 Alcohol resistance test (screen printing + laser engraving) image
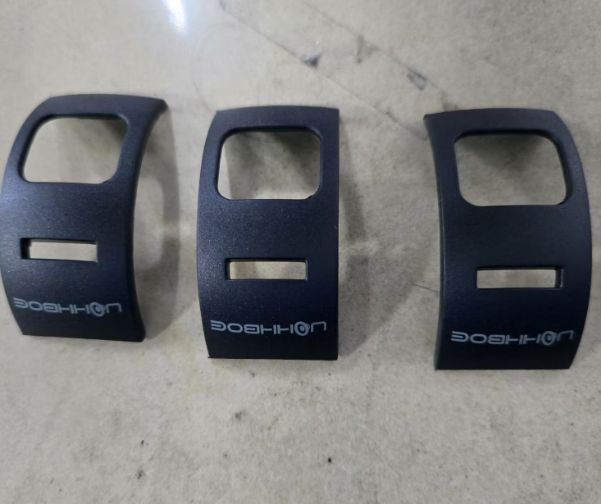
Figure 4.1-11 Alcohol resistance test (screen printing + laser engraving) image
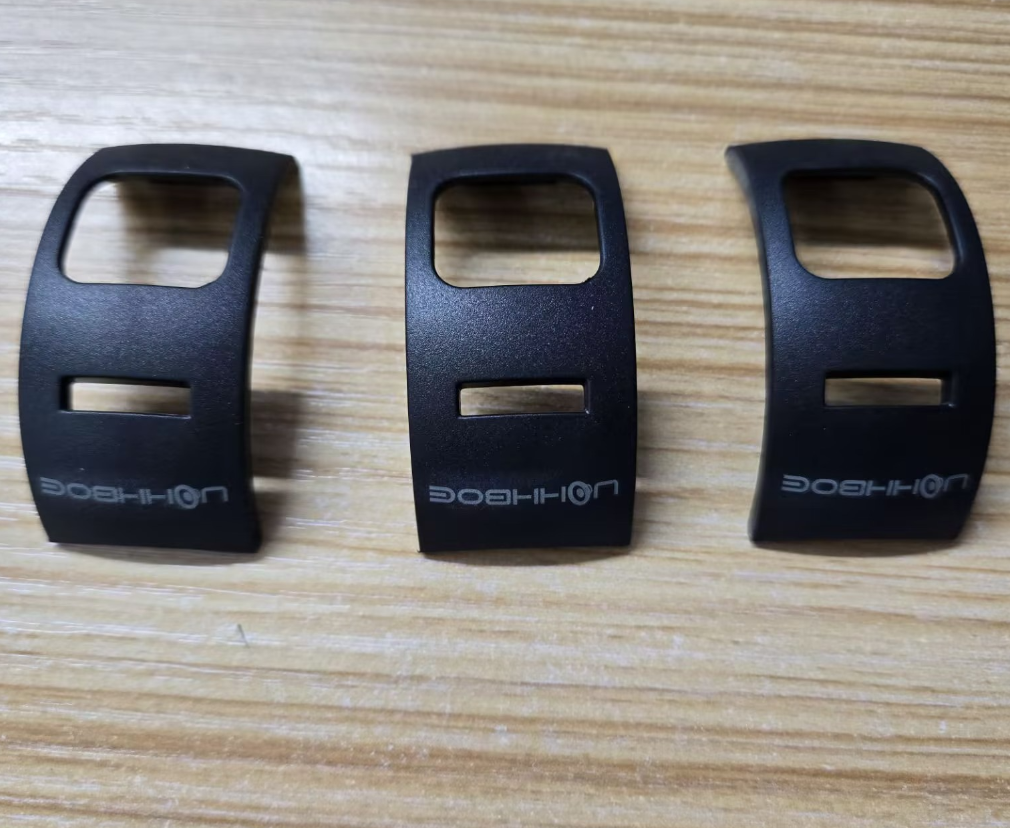
Figure 4.1-12 Alcohol resistance test (screen printing + laser engraving) image
4.1.8. Preparation, Review, and Approval
| Stage | Personnel | Date |
|---|---|---|
| Prepared by | Ji Zuyun | 2025.7.14 |
| Reviewed by | Lu Yuqian | 2025.7.14 |
| Approved by | — | — |
4.2. Eraser Abrasion Test (Logo Surface Coating)
4.2.1. Basic Test Item Information
| Item | Content |
|---|---|
| Test category | Component Reliability |
| Test item | Eraser Abrasion Test (Logo Surface Coating) |
| r Abrasion Test (Logo Surface Coating) | |
| Test item stated in the report | Screen Printing Eraser Abrasion Test Report |
| Product model | F33 |
| Report test date | 2025.6.6 |
| Test start time | 2025.6.6 |
| Test completion time | 2025.6.6 |
| Archiving department | Quality Department |
4.2.2. Test Conditions and Methods
-
Inspect the appearance of 2 pilot-production units and confirm it is OK.
-
Wrap a 500g weight in white cotton cloth, apply the eraser, and use the instrument to rub back and forth horizontally 50 times at 30 times per minute.
4.2.3. Test Standard Requirements and Test Records
- The LOGO, paint, and screen printing must show no peeling, exposed substrate, blistering, discoloration, or other defects.
4.2.4. Equipment and Tools Used
-
Test samples 2*psc
-
Use a 500g weight.
4.2.5. Test Procedure
-
Photo before testing
-
Place and secure the product in the abrasion tester and test with a 500g weight.
-
Secure the product on the abrasion tester, set 50 cycles, and set the speed to 20-30/minute.
-
After the eraser abrasion test, inspection found slight peeling and minor scratches on the surface and screen printing, within the acceptable range.
4.2.6. Test Results
After the product's eraser abrasion test, inspection found slight peeling and minor flaking on the surface and screen printing, within the acceptable range.
4.2.7. Images of the Test Procedure and Results
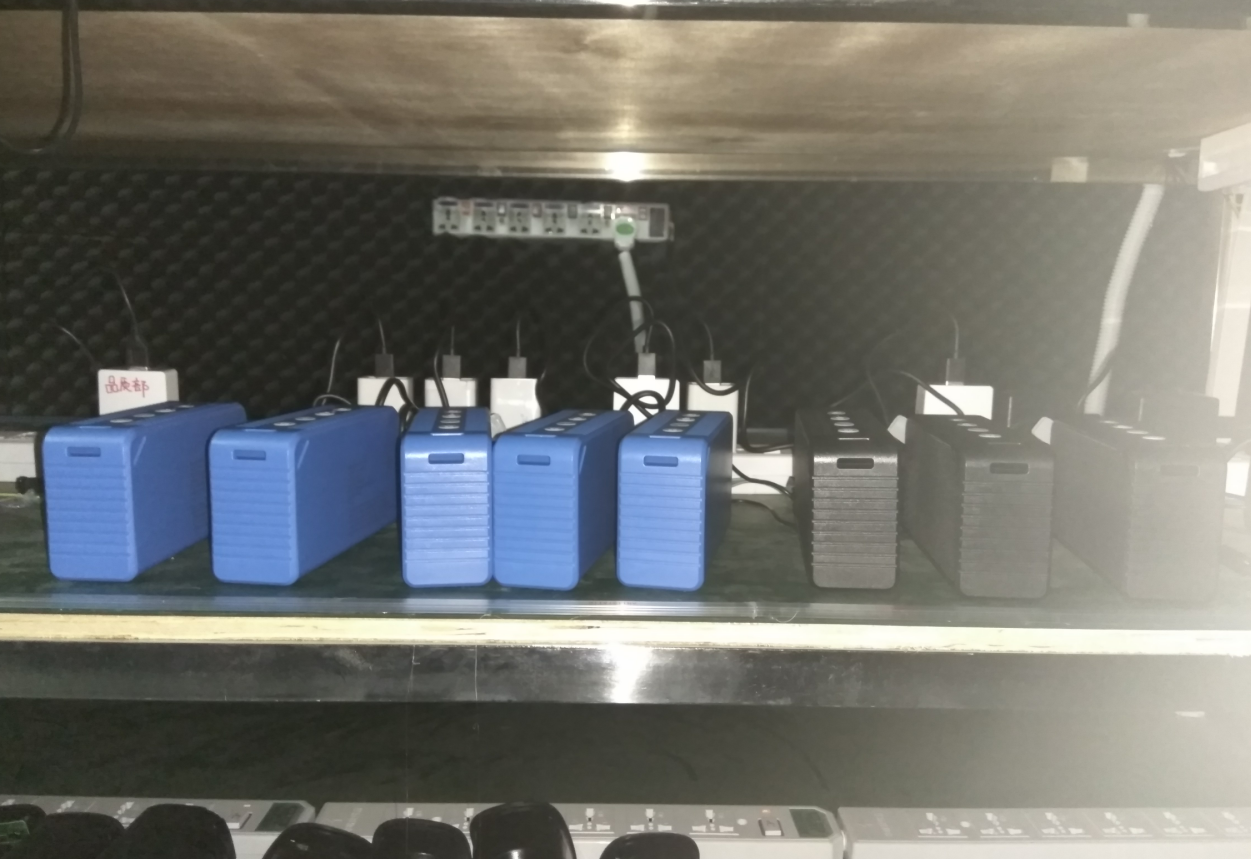
Figure 4.2-1 Eraser abrasion test (logo surface coating) image
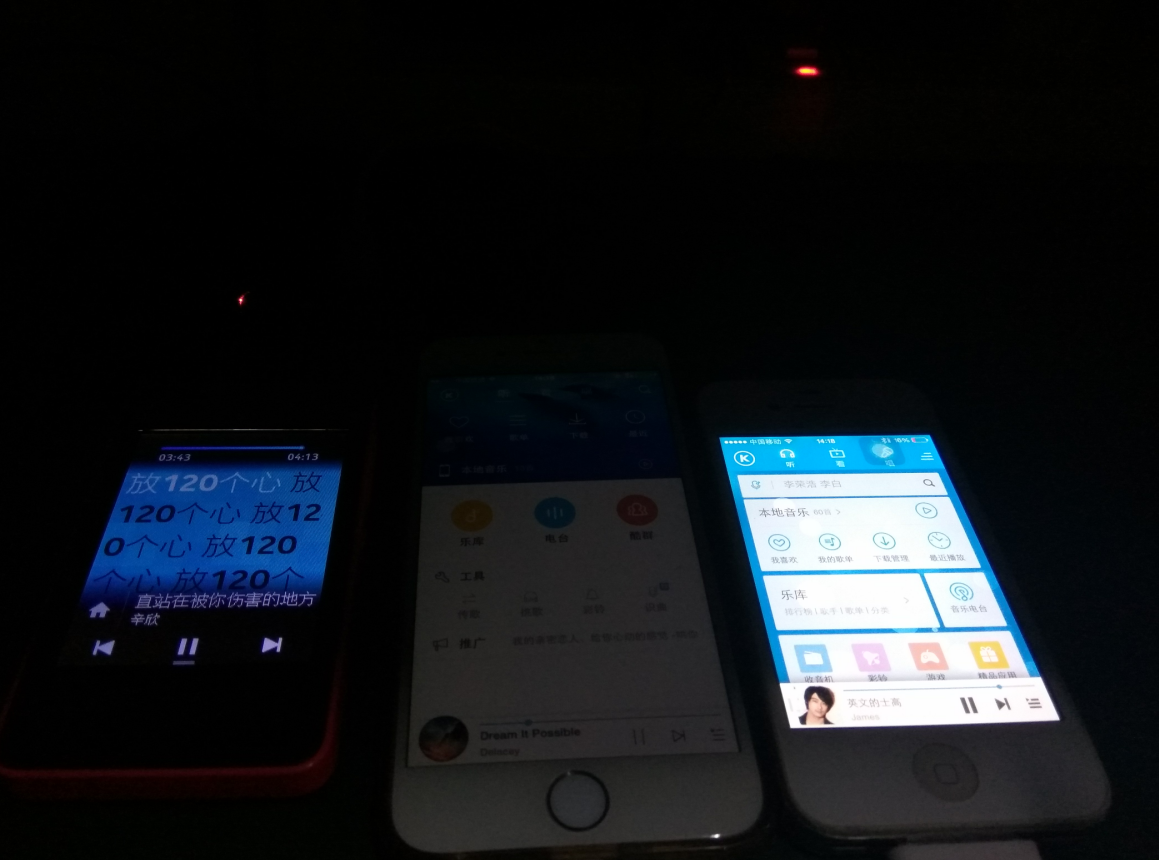
Figure 4.2-2 Eraser abrasion test (logo surface coating) image
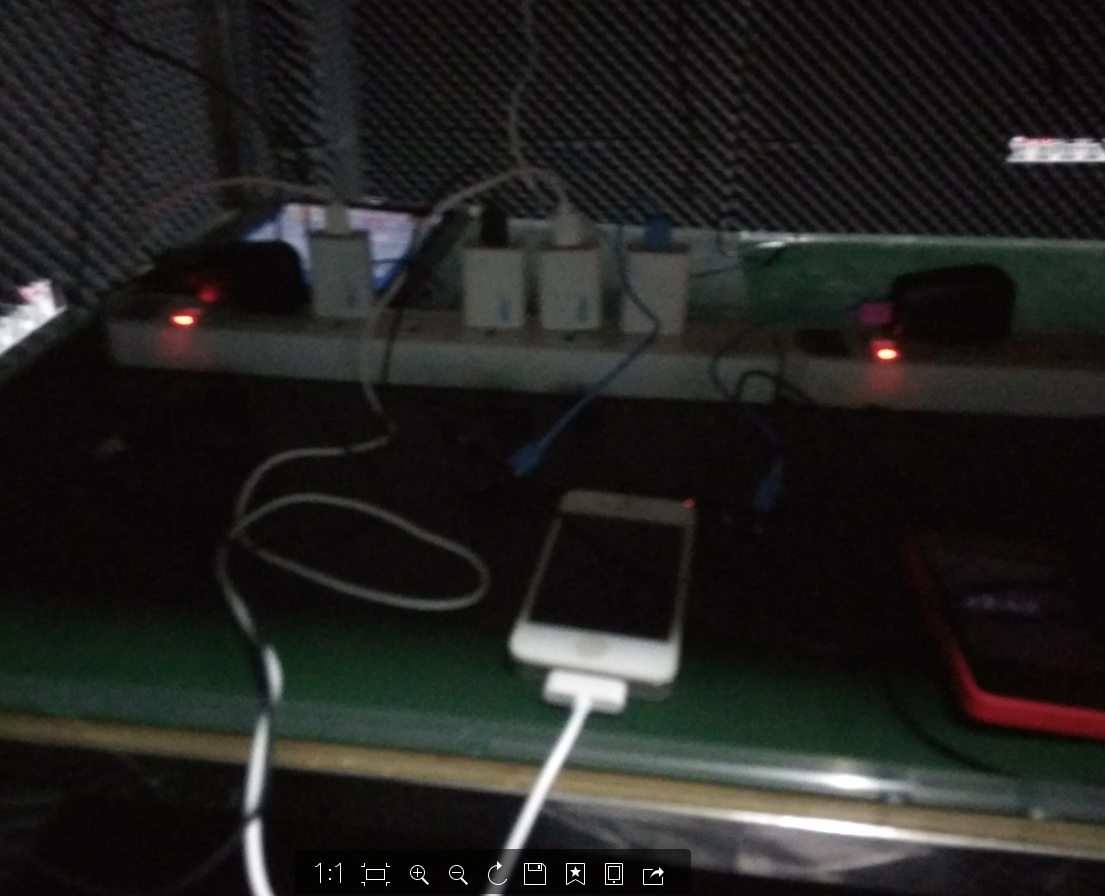
Figure 4.2-3 Eraser abrasion test (logo surface coating) image
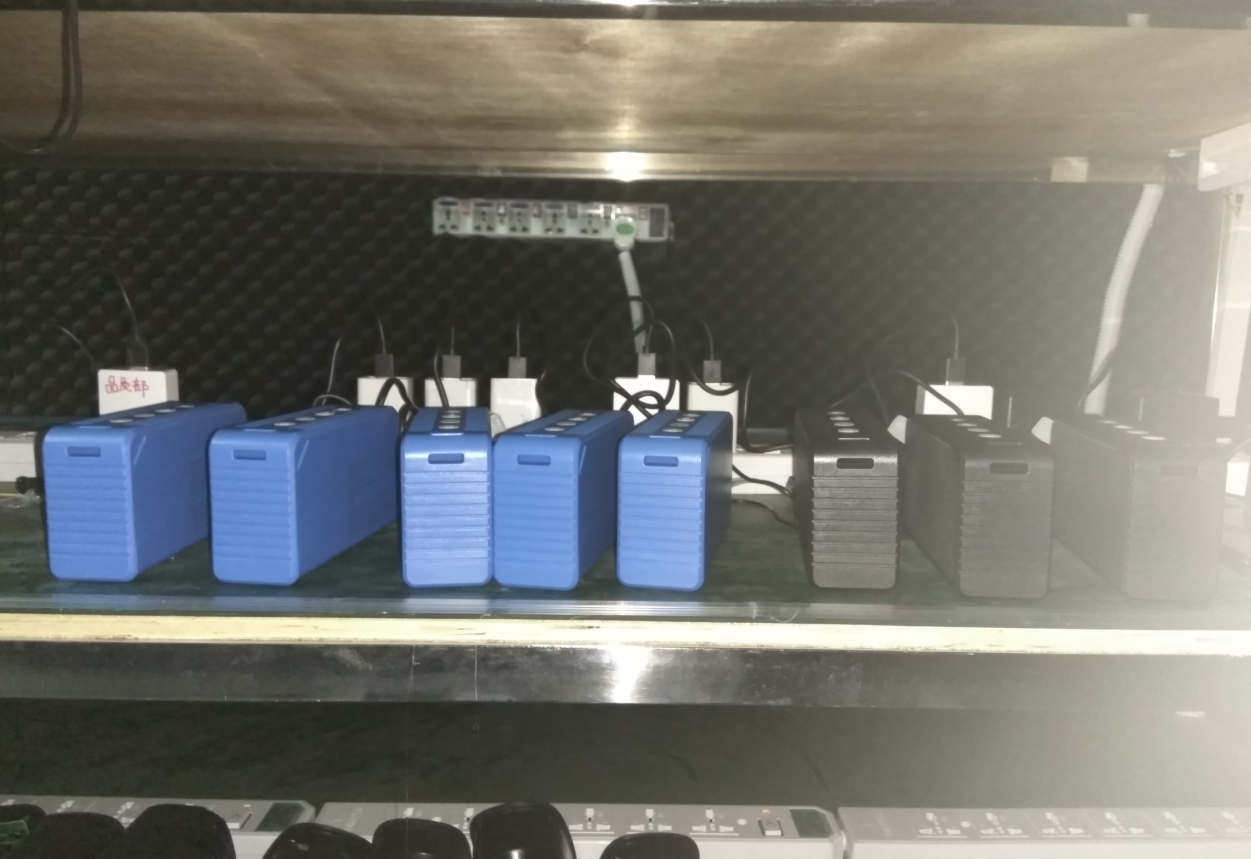
Figure 4.2-4 Eraser abrasion test (logo surface coating) image
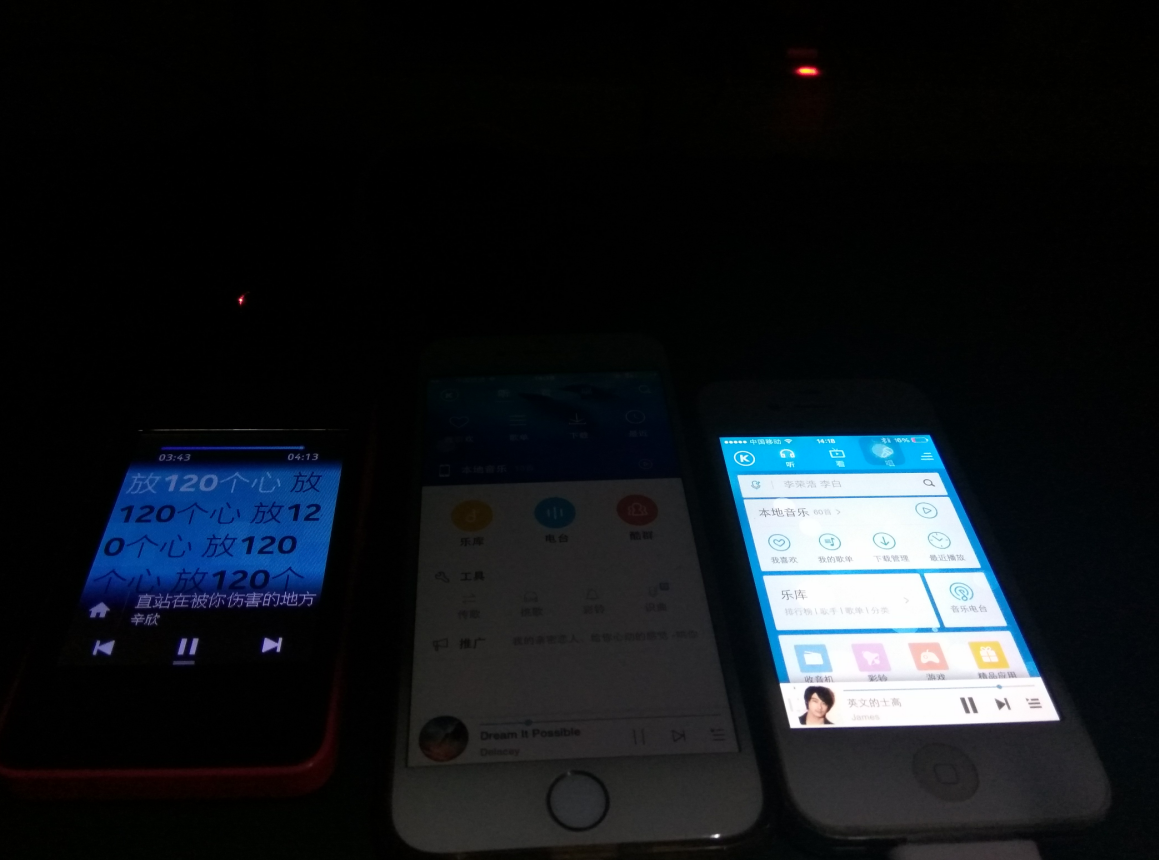
Figure 4.2-5 Eraser abrasion test (logo surface coating) image
Figure 4.2-6 Eraser abrasion test (logo surface coating) image
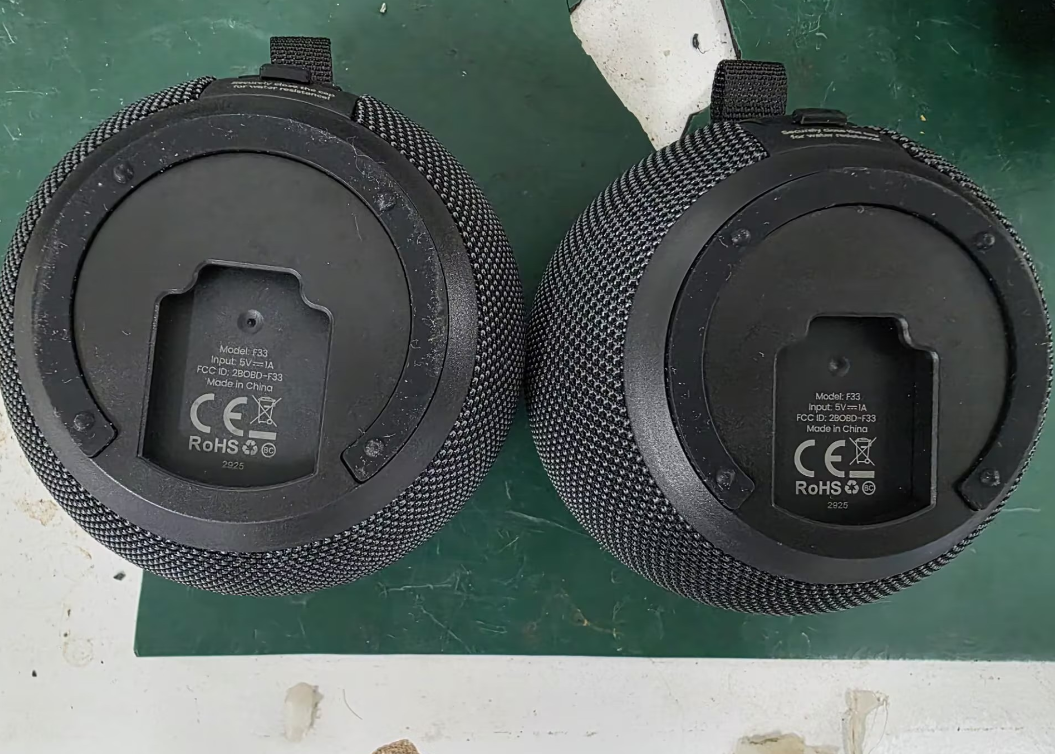
Figure 4.2-7 Eraser abrasion test (logo surface coating) image
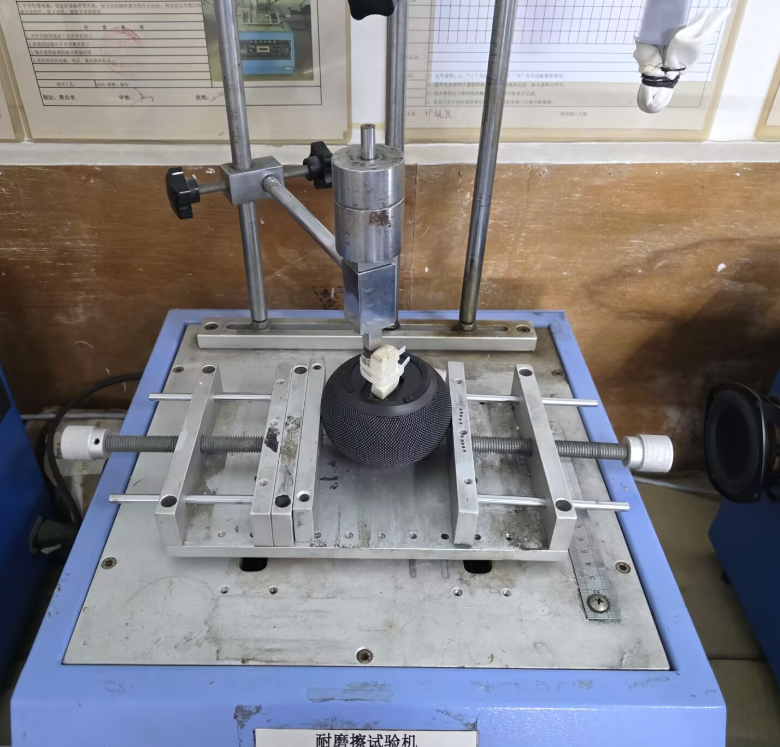
Figure 4.2-8 Eraser abrasion test (logo surface coating) image
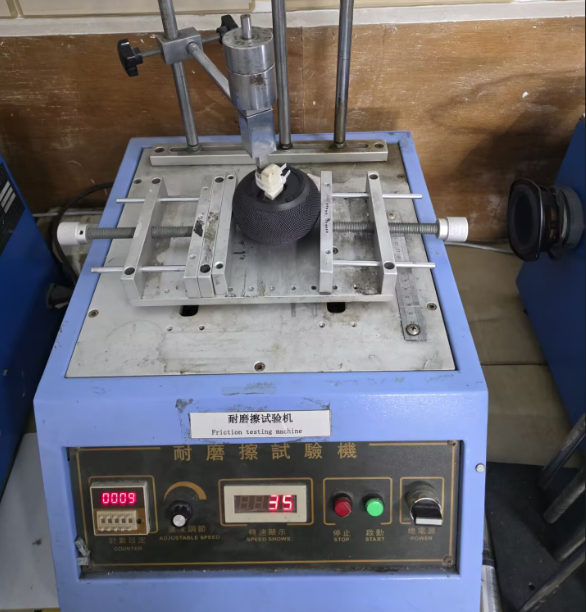
Figure 4.2-9 Eraser abrasion test (logo surface coating) image
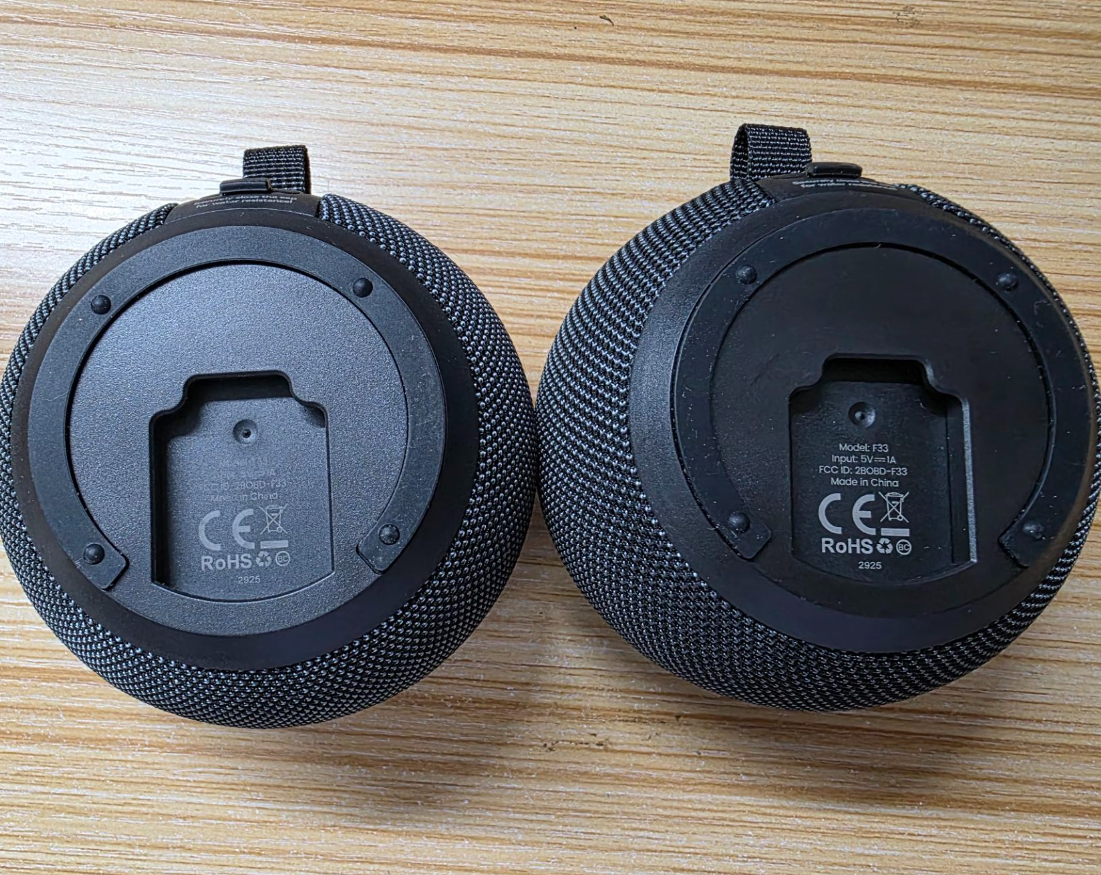
Figure 4.2-10 Eraser abrasion test (logo surface coating) image
4.2.8. Preparation, Review, and Approval
| Stage | Personnel | Date |
|---|---|---|
| Prepared by | Ji Zuyun | 2025.6.6 |
| Reviewed by | Lu Yuqian | 2025.6.6 |
| Approved by | — | — |
4.3. Suction-Cup Life Test
4.3.1. Basic Test Item Information
| Item | Content |
|---|---|
| Test category | Component Reliability |
| Test item | Suction-Cup Life Test |
| Test item stated in the report | F33 Suction-Cup Adhesion Test (with Adhesive Film) |
| Product model | F33 |
| Report test date | 2025.6.10-2025.6.13 |
| Test start time | 2025.6.11 |
| Test completion time | 2025.6.13 |
| Archiving department | Quality Department |
| hiving department | Quality Department |
| Order requirements | Archiving department |
| Customer | Test result |
| Test quantity | 6pcs |
| Test equipment | Various composite wall surfaces |
| Test time | 14:00-11:00 |
| Test ambient temperature | 28℃±2℃ |
| Tester | Cai Hailin |
4.3.2. Test Conditions and Methods
-
Remove the release paper from the three types of nano-adhesive film and apply them respectively to marble, wood coated with waterproof hardwax oil, and wood coated with waterproof putty. Press by hand to ensure full contact and leave undisturbed for 2H.
-
After resting, attach the suction cup to the film, aligning it within the film area without extending beyond the film. Tighten the suction-cup shaft after attachment.
-
Mount the speaker on the suction cup, leave it stationary, and record when the speaker falls.
-
Connect the charging cable and play while charging; record when the product falls.
4.3.3. Test Standard Requirements and Test Records
| Wall surface | Static: 6.10/14:00–6.11/9:00, totaling 19H | Playback: 6.11/9:00–6.11/19:00, totaling 10H | Static: 6.11/19:00–6.12/9:00, totaling 14H | Playback: 6.12/9:00–6.11/19:00, totaling 10H |
|---|---|---|---|---|
| Marble | No suction-cup detachment occurred with any of the three nano-adhesive film types. | No suction-cup detachment occurred with any of the three nano-adhesive film types. | No suction-cup detachment occurred with any of the three nano-adhesive film types. | No suction-cup detachment occurred with any of the three nano-adhesive film types. |
| Wood coated with waterproof paint | No suction-cup detachment occurred with any of the three nano-adhesive film types. | No suction-cup detachment occurred with any of the three nano-adhesive film types. | No suction-cup detachment occurred with any of the three nano-adhesive film types. | No suction-cup detachment occurred with any of the three nano-adhesive film types. |
| Wood coated with waterproof putty | No suction-cup detachment occurred with any of the three nano-adhesive film types. | No suction-cup detachment occurred with any of the three nano-adhesive film types. | No suction-cup detachment occurred with any of the three nano-adhesive film types. | No suction-cup detachment occurred with any of the three nano-adhesive film types. |
4.3.4. Equipment and Tools Used
1)Three composite wall surfaces: marble, wood coated with waterproof paint, and wood coated with waterproof putty;
2)Phone *1pcs.
3)ipod 1pcs
4.3.5. Test Procedure
1)Remove the release paper from the three types of nano-adhesive film and apply them respectively to marble, wood coated with waterproof hardwax oil, and wood coated with waterproof putty. Press by hand to ensure full contact and leave undisturbed for 2H;
2)After resting, attach the suction cup to the film, aligning it within the film area without extending beyond the film. Tighten the suction-cup shaft after attachment;
3)Mount the speaker on the suction cup, leave it stationary, and record when the speaker falls;
4)Connect the charging cable and play while charging; record when the product falls.
4.3.6. Test Results
With the F33 suction cup attached to the three film types, no suction-cup detachment occurred over a total of 33H of static testing and 20H of playback.
4.3.7. Images of the Test Procedure and Results
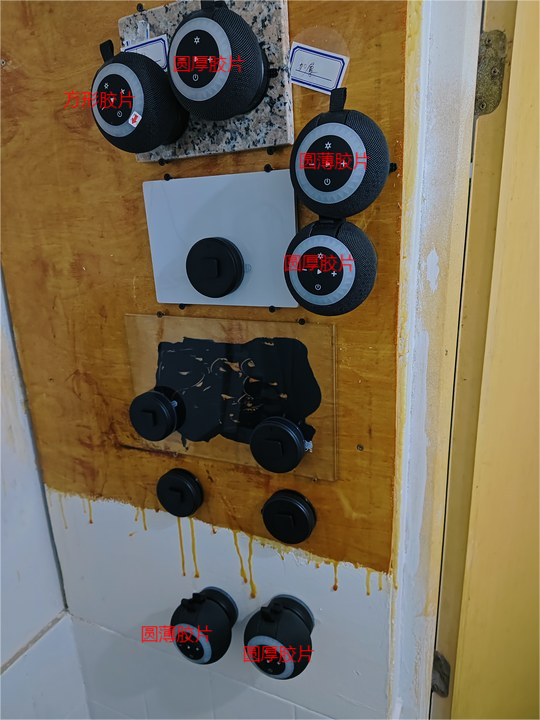
Figure 4.3-1 Suction-cup life test image
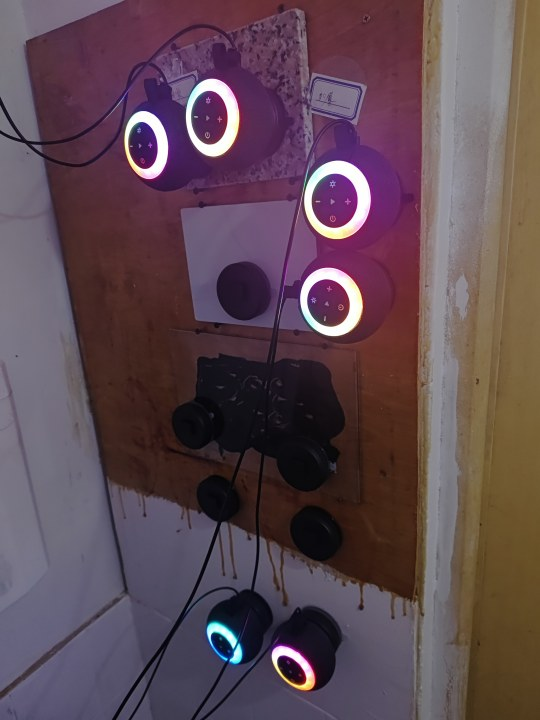
Figure 4.3-2 Suction-cup life test image
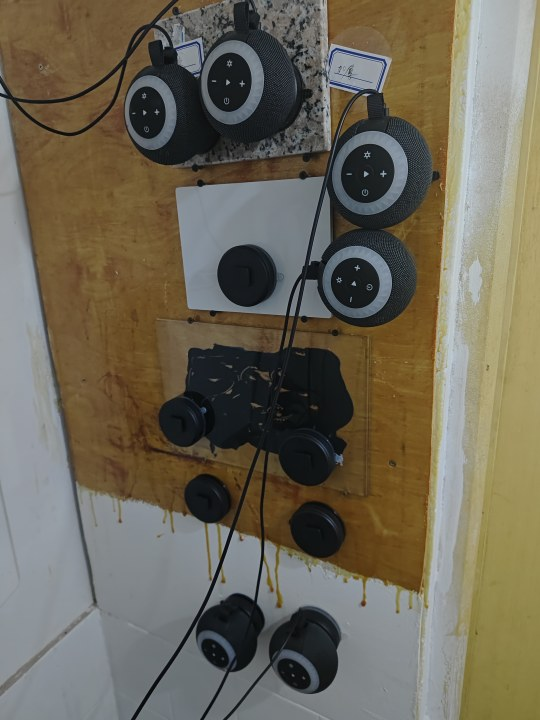
Figure 4.3-3 Suction-cup life test image
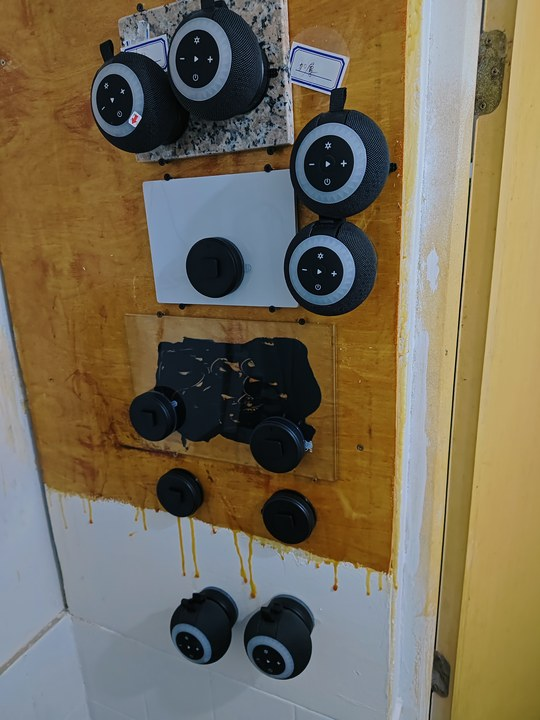
Figure 4.3-4 Suction-cup life test image
4.3.8. Preparation, Review, and Approval
| Stage | Personnel | Date |
|---|---|---|
| Prepared by | Cai Hailin | 2025.6.13 |
| Reviewed by | Lu Yuqian | 2025.6.13 |
| Approved by | — | — |
4.4. Speaker Body and Suction-Cup Assembly Installation Life
4.4.1. Basic Test Item Information
| Item | Content |
|---|---|
| Test category | Component Reliability |
| Test item | Speaker Body and Suction-Cup Assembly Installation Life |
| Test item stated in the report | Speaker Body and Suction-Cup Assembly Installation Life |
| Product model | F33 |
| Report test date | 2025.5.19 |
| Test start time | 2025.5.19 |
| Test completion time | 2025.5.22 |
| Archiving department | Quality Department |
4.4.2. Test Conditions and Methods
- Manually install the speaker body onto the suction-cup assembly and remove it, repeating for 1000 cycles. Check for looseness in the fit between the body and suction-cup assembly and record the cycle count at which looseness occurs.
4.4.3. Test Standard Requirements and Test Records
After testing, check that the body and suction-cup assembly fit securely without wobbling, that no vibration noise occurs during music playback, and that installation/removal requires some force and is not too loose.
4.4.4. Equipment and Tools Used
-
Test samples *3pcs
-
BACL Laboratory
-
Phone
4.4.5. Test Results
Testing showed that the product met the requirements: normal function during testing, a stable fit of the suction-cup assembly without wobbling, and no vibration noise during music playback. The product passes.
4.4.6. Images of the Test Procedure and Results
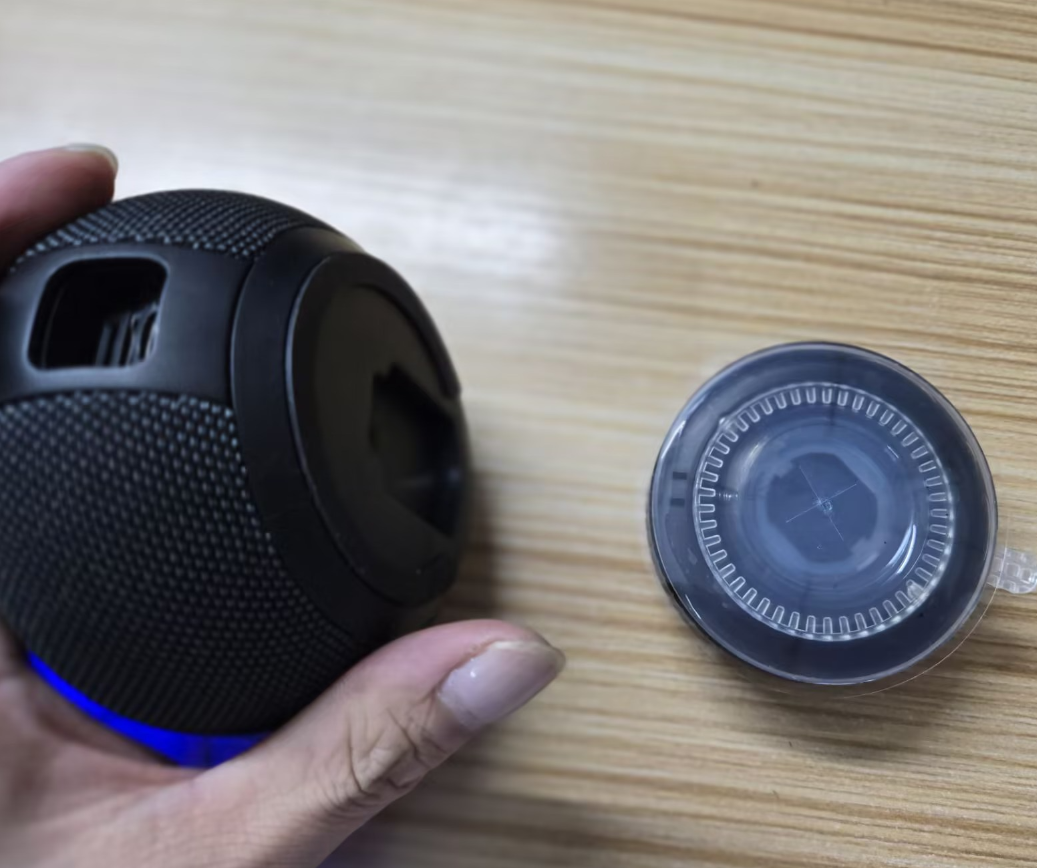
Figure 4.4-1 Speaker body and suction-cup assembly installation life test image
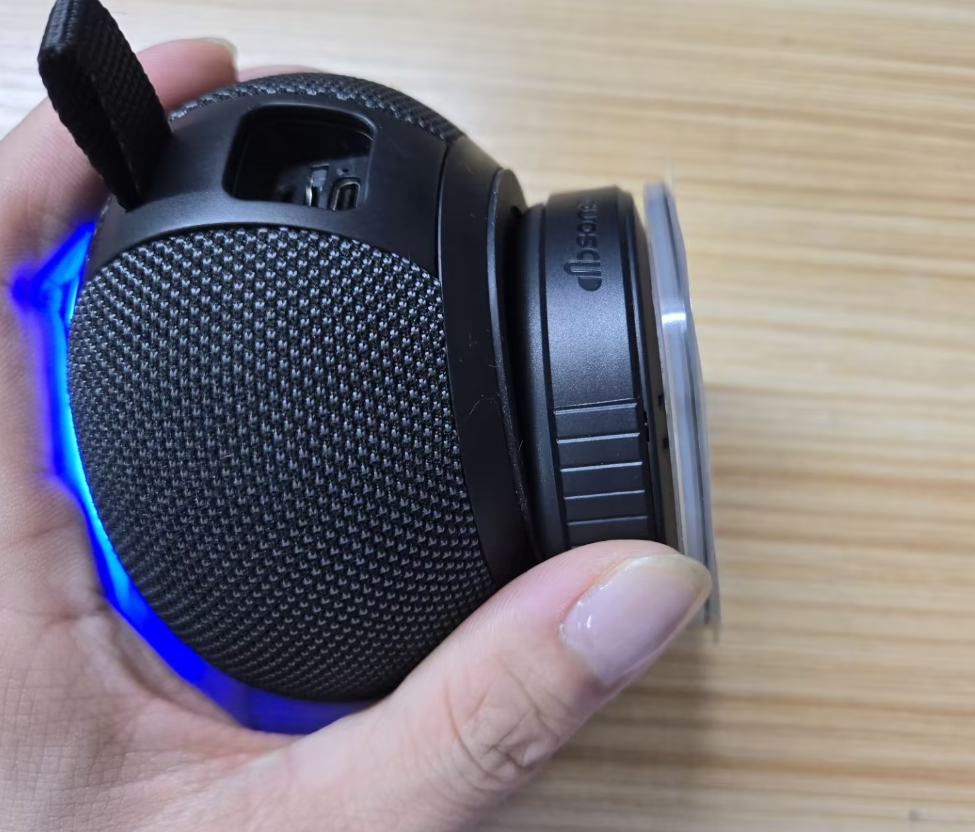
Figure 4.4-2 Speaker body and suction-cup assembly installation life test image
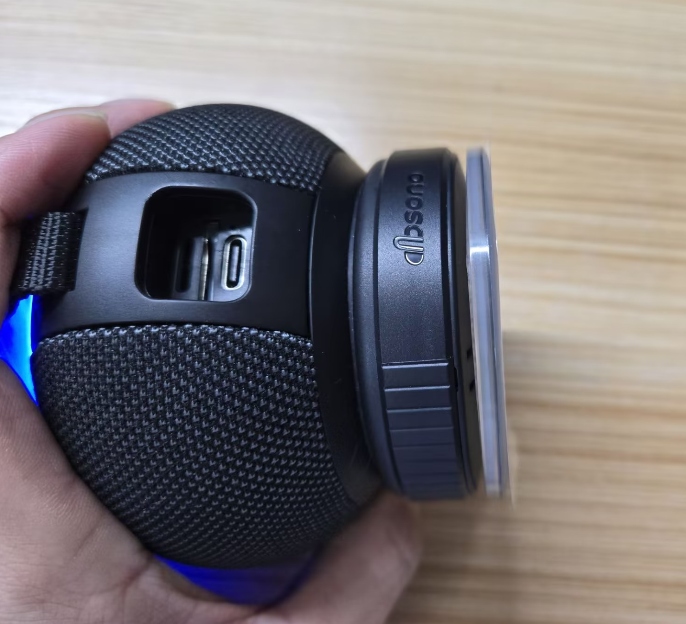
Figure 4.4-3 Speaker body and suction-cup assembly installation life test image
4.4.7. Preparation, Review, and Approval
| Stage | Personnel | Date |
|---|---|---|
| Prepared by | Ji Zuyun | 2025.5.22 |
| Reviewed by | Lu Yuqian | 2025.5.22 |
| Approved by | — | — |
4.5. Suction-Cup and Suction-Cup Structural Component Unscrewing Force
4.5.1. Basic Test Item Information
| Item | Content |
|---|---|
| Test category | Component Reliability |
| Test item | Suction-Cup and Suction-Cup Structural Component Unscrewing Force |
| Test item stated in the report | Suction-Cup and Suction-Cup Structural Component Unscrewing Force |
| Product model | F33 |
| Report test date | 2025.5.17 |
| Test start time | 2025.5.15 |
| Test completion time | 2025.5.17 |
| Archiving department | Quality Department |
4.5.2. Test Conditions and Methods
- Turn the suction cup and upper structural component in the loosening direction to the limit, then continue applying force in that direction to check whether normal force can unscrew and separate the suction cup and structural component.
4.5.3. Test Standard Requirements and Test Records
Easy loosening and separation are not acceptable.
4.5.4. Equipment and Tools Used
-
Test samples *3pcs
-
BACL Laboratory
-
Phone
4.5.5. Test Results
Testing showed that the product met the requirements; no easy loosening or separation was found during testing. The product passes.
4.5.6. Images of the Test Procedure and Results
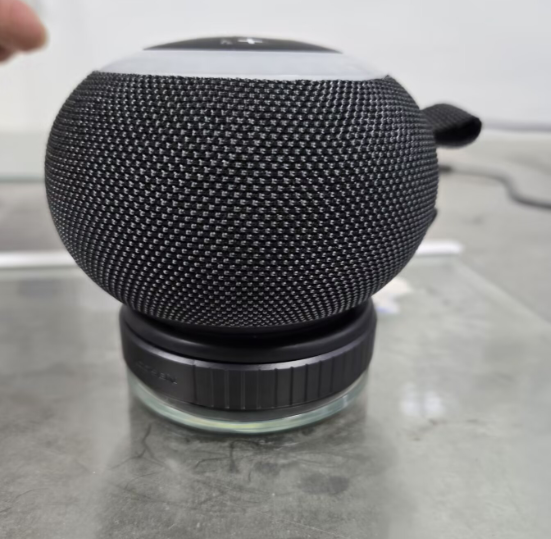
Figure 4.5-1 Suction-cup and suction-cup structural component unscrewing force test image
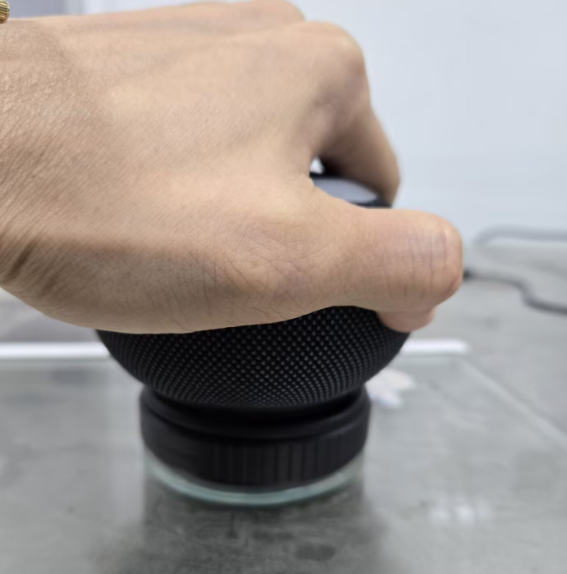
Figure 4.5-2 Suction-cup and suction-cup structural component unscrewing force test image
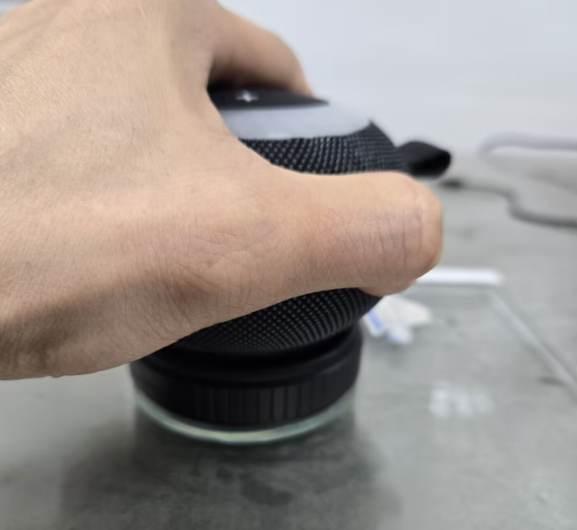
Figure 4.5-3 Suction-cup and suction-cup structural component unscrewing force test image
4.5.7. Preparation, Review, and Approval
| Stage | Personnel | Date |
|---|---|---|
| Prepared by | Ji Zuyun | 2025.5.17 |
| Reviewed by | Lu Yuqian | 2025.5.17 |
| Approved by | — | — |
4.6. Suction-Cup High- and Low-Temperature Storage
4.6.1. Basic Test Item Information
| Item | Content |
|---|---|
| Test category | Component Reliability |
| Test item | Suction-Cup High- and Low-Temperature Storage |
| Test item stated in the report | Unpackaged Product High- and Low-Temperature Storage Test |
| Product model | F33 |
| Report test date | 2025.6.21 |
| Test start time | 2025.6.21 |
| Test completion time | 2025.6.28 |
| Archiving department | Quality Department |
4.6.2. Test Conditions and Methods
-
Clean the tile or other surface and the suction-cup surface, attach the suction cup, and place it in the high- and low-temperature test chamber.
-
Test with a 0.5KG hanging load, ensuring a vertically downward force. Test at a high temperature of 60° and humidity of 95% for 168H, and at a low temperature of -20° and humidity of 25% for 168H.
-
After testing, leave at room temperature for 4H before inspection.
4.6.3. Test Standard Requirements and Test Records
-
June 21 at 20:00–June 28 at 20:00: after the 168-hour high- and low-temperature test, remove the samples and leave them at room temperature for 2 hours, then check their appearance.
-
Check the product's appearance: no deformation, color difference, or surface scorching. Suction remains normal. Considered a pass. (With adhesive film)
4.6.4. Equipment and Tools Used
-
Test samples *2pcs
-
High- and low-temperature test chamber
4.6.5. Test Procedure
-
Place the product in the high- and low-temperature oven; playback is required.
-
Turn on the switch, set the parameters, and click Run to start operation.
-
During the low-temperature test: current temperature 60℃; humidity 85.3%
-
During 48 hours of high-temperature storage testing while attached to a marble tile, the product did not detach and functioned normally.
4.6.6. Test Results
After the 168-hour high-temperature test, the product functioned normally while attached to a marble tile for high-temperature storage and playback. Considered a pass.
4.6.7. Images of the Test Procedure and Results
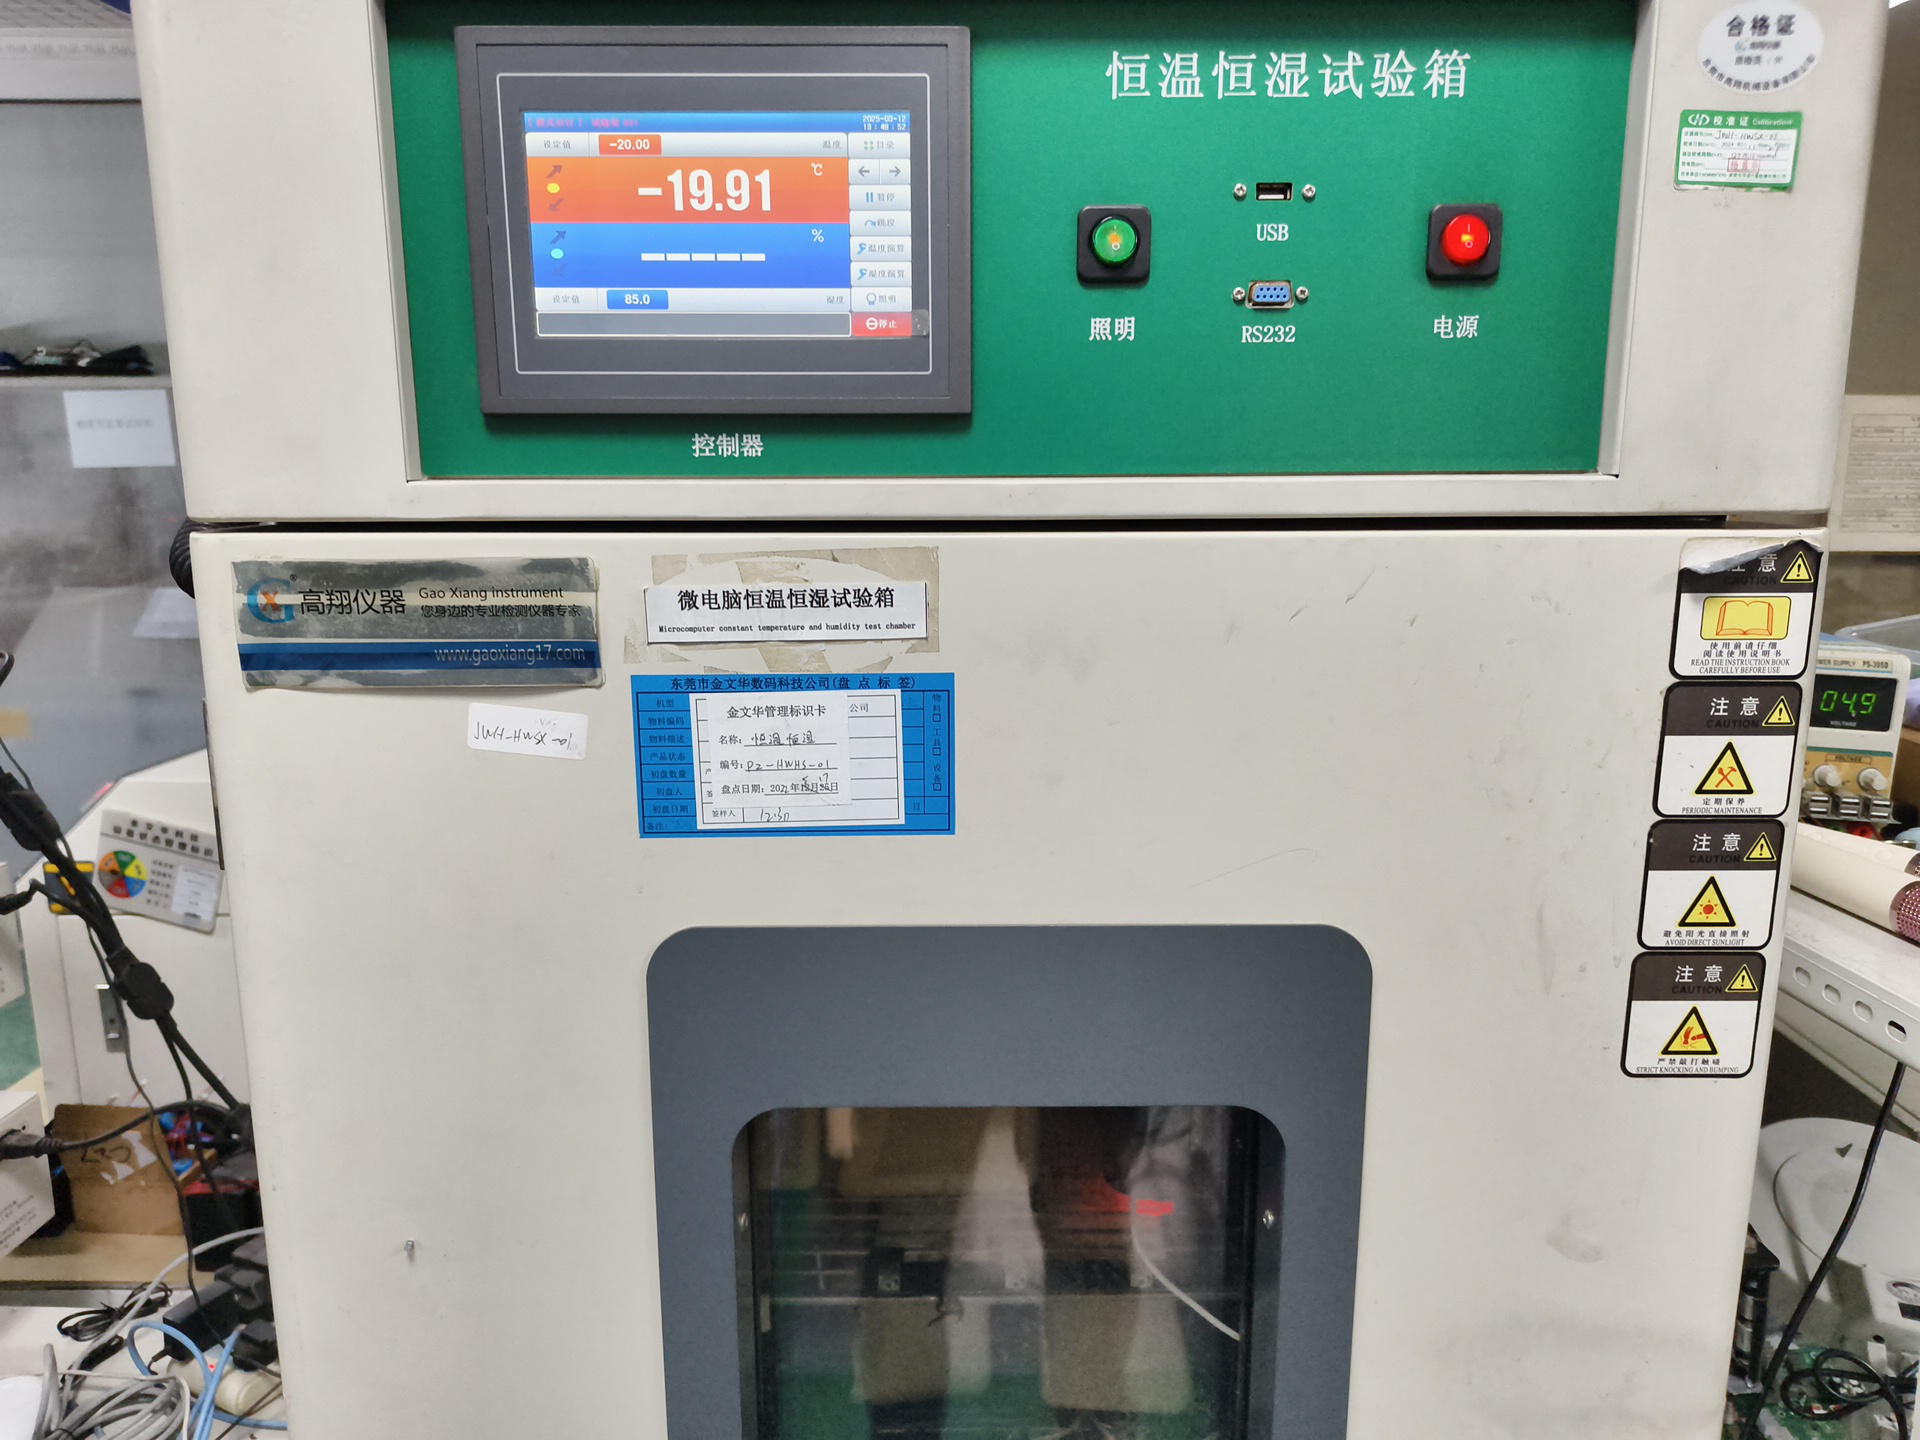
Figure 4.6-1 Suction-cup high- and low-temperature storage test image
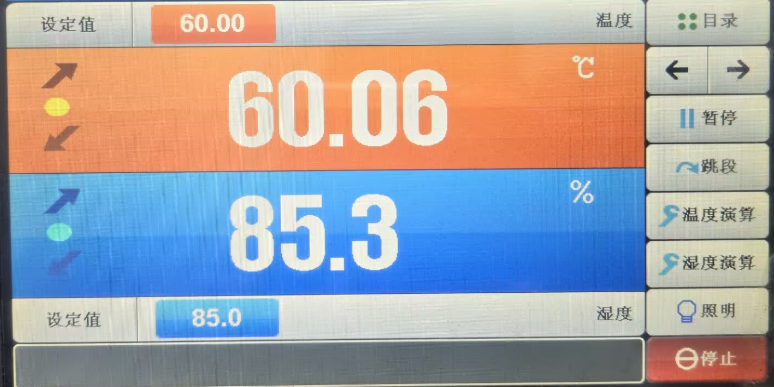
Figure 4.6-2 Suction-cup high- and low-temperature storage test image
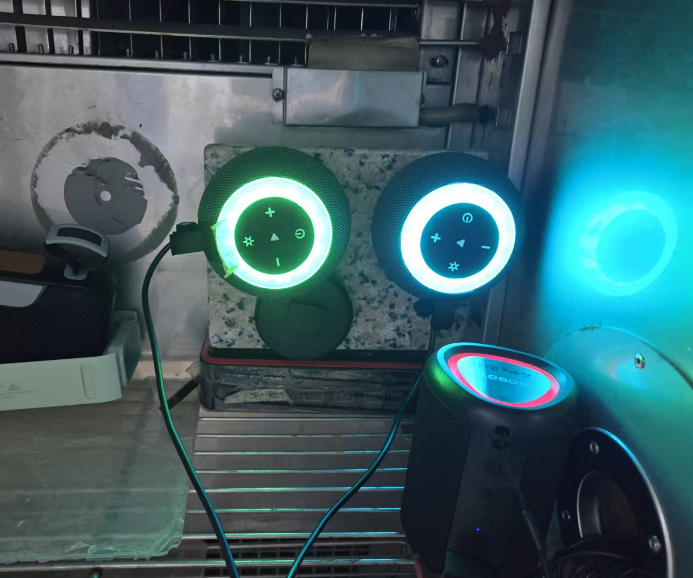
Figure 4.6-3 Suction-cup high- and low-temperature storage test image
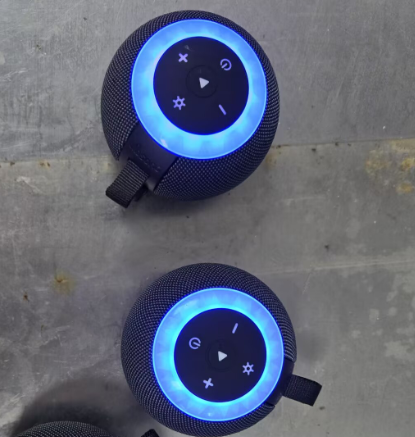
Figure 4.6-4 Suction-cup high- and low-temperature storage test image
4.6.8. Preparation, Review, and Approval
| Stage | Personnel | Date |
|---|---|---|
| Prepared by | Ji Zuyun | 2025.6.28 |
| Reviewed by | Lu Yuqian | 2025.6.28 |
| Approved by | — | — |
5. Electrical Performance Testing
5.1. Connection Uniqueness Test
5.1.1. Basic Test Item Information
| Item | Content |
|---|---|
| Test category | Electrical Performance Testing |
| Test item | Connection Uniqueness Test |
| Test item | Connection Uniqueness Test |
| Test item stated in the report | Connection Uniqueness Test |
| Product model | F33 |
| Report test date | 2025.5.19 |
| Test start time | 2025.5.19 |
| Test completion time | 2025.5.19 |
| Archiving department | Quality Department |
5.1.2. Test Conditions and Methods
-
Pair the phone and product via Bluetooth and play songs.
-
Simulate a real environment by placing 3 or more units in the same test area, approximately 0.5M apart. Each sample set must operate normally, with no crosstalk or mutual interference.
5.1.3. Test Standard Requirements and Test Records
A pass requires normal appearance, function, and performance of the complete unit throughout the test and at completion.
5.1.4. Equipment and Tools Used
-
Test samples *3pcs
-
BACL Laboratory
-
Phone
5.1.5. Test Results
Met interference immunity requirements; functioned normally during testing. Pass.
5.1.6. Images of the Test Procedure and Results
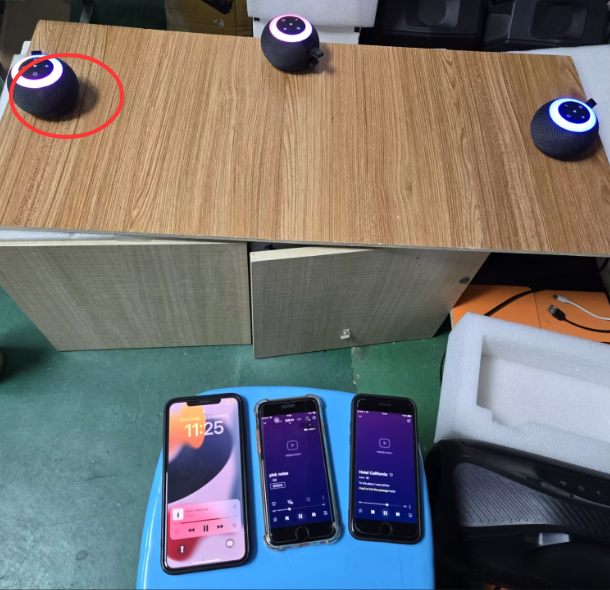
Figure 5.1-1 Connection uniqueness test image
5.1.7. Preparation, Review, and Approval
| Stage | Personnel | Date |
|---|---|---|
| Prepared by | Ji Zuyun | 2025.5.19 |
| Reviewed by | Lu Yuqian | 2025.5.19 |
| Approved by | — | — |
5.2. Bluetooth Range
5.2.1. Basic Test Item Information
| Item | Content |
|---|---|
| Test category | Electrical Performance Testing |
| Test item | Bluetooth Range |
| Test item stated in the report | Bluetooth Range TWS Test |
| Product model | F33 |
| Report test date | 2025.5.19 |
| Test start time | 2025.5.19 |
| Test completion time | 2025.5.19 |
| Archiving department | Quality Department |
5.2.2. Test Conditions and Methods
-
Pair the phone and product via Bluetooth, play songs, and walk away slowly starting at 1 meter.
-
Watch for changes in the product during movement and record the distance at which changes begin.
-
Determine the distance at which Bluetooth can be turned off and reconnected.
-
This test used iphone8P, Samsung S24+, and Huawei Enjoy 20pro phones.
5.2.3. Equipment and Tools Used
-
Test samples *3pcs
-
Bluetooth phone devices 3pcs.
5.2.4. Test Results
| Test requirements | *At ≥15 meters, the product must have no audio interruption or Bluetooth disconnection, and song playback and calls must function normally. *At ≥15 meters, Bluetooth can be turned off and reconnected. |
|---|---|
| Test equipment | Test result |
| iPhone 8P phone. | Sample 1#: playback, Bluetooth shutdown, and reconnection were normal from 0–30 meters. Bluetooth range: 30 meters. |
| Sample 2#: playback, Bluetooth shutdown, and reconnection were normal from 0–32 meters. Bluetooth range: 32 meters. | |
| Sample 3#: playback, Bluetooth shutdown, and reconnection were normal from 0–30 meters. Bluetooth range: 30 meters. | |
| Samsung S24+ phone | Sample 1#: playback, Bluetooth shutdown, and reconnection were normal from 0–22 meters. Bluetooth range: 22 meters. |
| Sample 2#: playback, Bluetooth shutdown, and reconnection were normal from 0–23 meters. Bluetooth range: 23 meters. | |
| Sample 3#: playback, Bluetooth shutdown, and reconnection were normal from 0–23 meters. Bluetooth range: 23 meters. | |
| Huawei Enjoy 20pro | Sample 1#: playback, Bluetooth shutdown, and reconnection were normal from 0–21 meters. Bluetooth range: 21 meters. |
| Sample 2#: playback, Bluetooth shutdown, and reconnection were normal from 0–21 meters. Bluetooth range: 21 meters. | |
| Sample 3#: playback, Bluetooth shutdown, and reconnection were normal from 0–20 meters. Bluetooth range: 20 meters. |
5.2.5. Images of the Test Procedure and Results
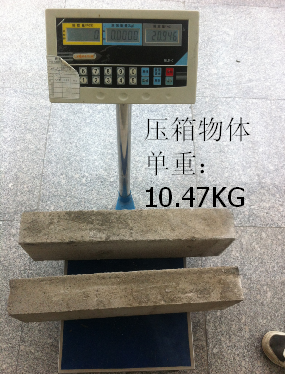
Figure 5.2-1 Bluetooth range test image
Figure 5.2-2 Bluetooth range test image
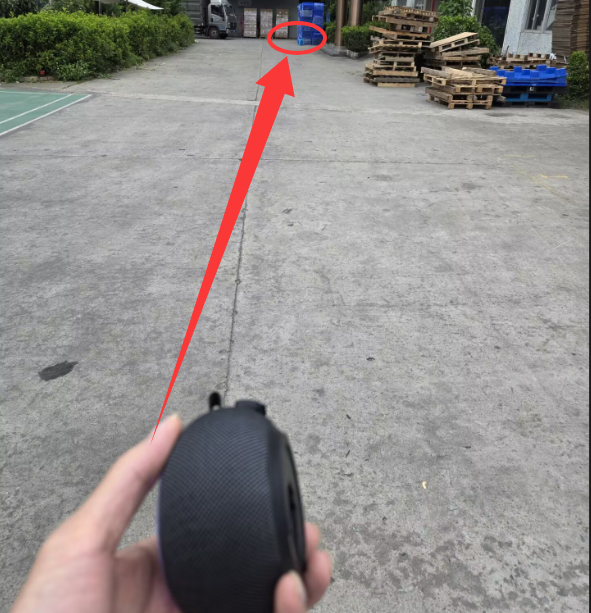
Figure 5.2-3 Bluetooth range test image
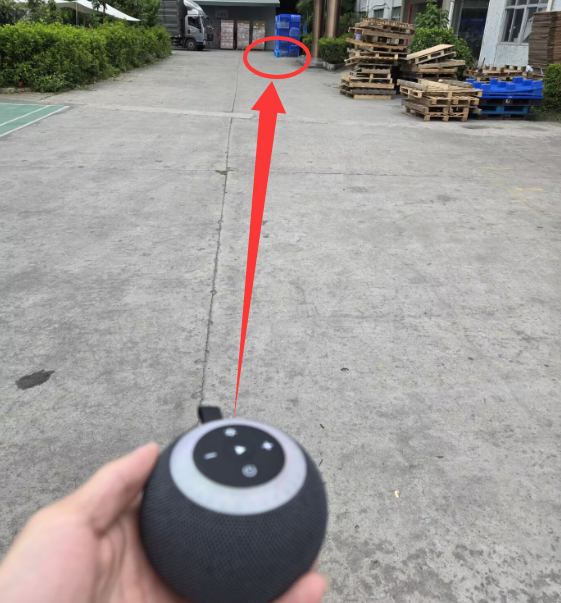
Figure 5.2-4 Bluetooth range test image
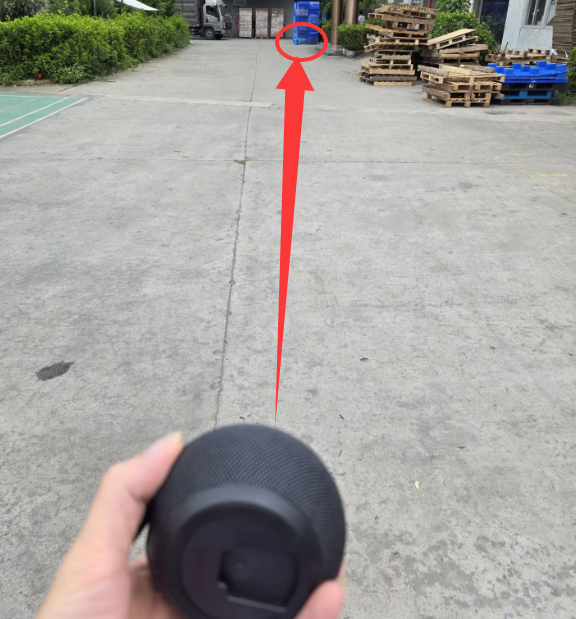
Figure 5.2-5 Bluetooth range test image
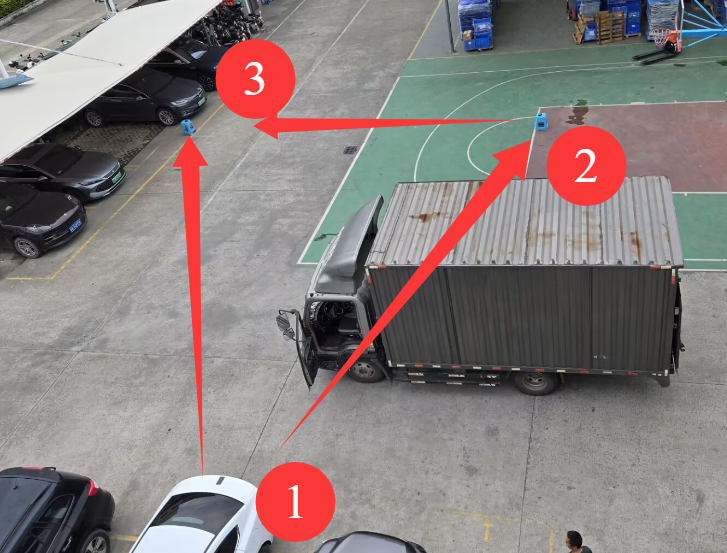
Figure 5.2-6 Bluetooth range test image
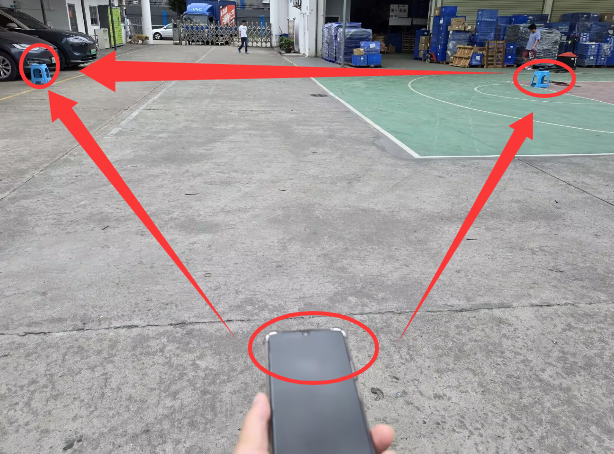
Figure 5.2-7 Bluetooth range test image
5.2.6. Preparation, Review, and Approval
| Stage | Personnel | Date |
|---|---|---|
| Prepared by | Ji Zuyun | 2025.5.19 |
| Reviewed by | Lu Yuqian | 2025.5.19 |
| Approved by | — | — |
5.3. Playback Duration
5.3.1. Basic Test Item Information
| Item | Content |
|---|---|
| Test category | Electrical Performance Testing |
| Test item | Playback Duration |
| Test item stated in the report | BT Music Playback Time Test |
| Product model | F33 |
| Report test date | 2025.5.13 |
| Test start time | 2025.5.13 |
| Test completion time | 2025.5.23 |
| Archiving department | Quality Department |
| Order requirements | Archiving department |
| Customer | Test result |
| Battery supplier | Battery capacity |
| Test quantity | 2pcs |
| Test equipment | iPhone |
| Test time | 08:00-:00:00 |
| Test ambient temperature | 28℃ |
| Tester | Ji Zuyun |
5.3.2. Test Conditions and Methods
-
Fully charge the sample's battery. An illuminated indicator means charging is in progress; four steadily lit charging LED bars indicate a full battery.
-
Enable Bluetooth on the phone and connect. Play a single music track at 50%/100% volume, turn on the product, and synchronize its volume to 50%/100% for playback.
-
Continue until the speaker gives a low-battery alert or shuts down automatically, and record the start and completion times.
5.3.3. Test Standard Requirements and Test Records
| No. | Start date and time | End date and time | Track name | Test equipment | Actual requirement (H) | Product lighting | Remarks | |
|---|---|---|---|---|---|---|---|---|
| Test times with product and phone volume synchronized to 100% are as follows: | ||||||||
| equirement (H)** | Product lighting | Remarks | ||||||
| --- | --- | --- | --- | --- | --- | --- | --- | --- |
| Test times with product and phone volume synchronized to 100% are as follows: | ||||||||
| 1# | May 13, 18:00 | May 13, 20:10 | ITS pink noise | iPhone6 | 2H10min | Lights on | 18650/3.7V/1200mah | |
| 2# | May 13, 18:00 | May 13, 20:12 | iPhone8 | 2H12min | Lights on | |||
| 1# | May 23, 9:00 | May 23, 13:0 | Eagles - Hotel California | iPhone6 | 4H02min | Lights off | 18650/3.7V/1200mah | |
| 2# | May 23, 9:00 | May 23, 12:0 | iPhone8 | 3H50min | Lights off | |||
| Test times with product and phone volume synchronized to 50% are as follows: | ||||||||
| 1# | May 19, 8:00 | May 19, 15:20 | Eagles - Hotel California | iPhone6 | 7H20min | Lights on | 18650/3.7V/1200mah | |
| 2# | May 19, 8:00 | May 19, 15:30 | iPhone8 | 7H30min | Lights on | |||
| 1# | May 21, 8:00 | May 22, 06:50 | Eagles - Hotel California | iPhone6 | 22H50min | Lights on | 18650/3.7V/1200mah | |
| 2# | May 21, 8:00 | May 22, 06:50 | iPhone8 | 22H26min | Lights on |
5.3.4. Equipment and Tools Used
1)Test samples *2pcs
2)Bluetooth phone device (iPhone) *1pcs
5.3.5. Test Procedure
-
Connect the product to the phone via Bluetooth and place it on the aging rack for playback.
-
Phone playback in progress
5.3.6. Test Results
Product playback at 100% volume (ITS pink noise) with lights on: ≥2H. Playback at 50% volume with lights on, Eagles - Hotel California: ≥7H.
5.3.7. Images of the Test Procedure and Results
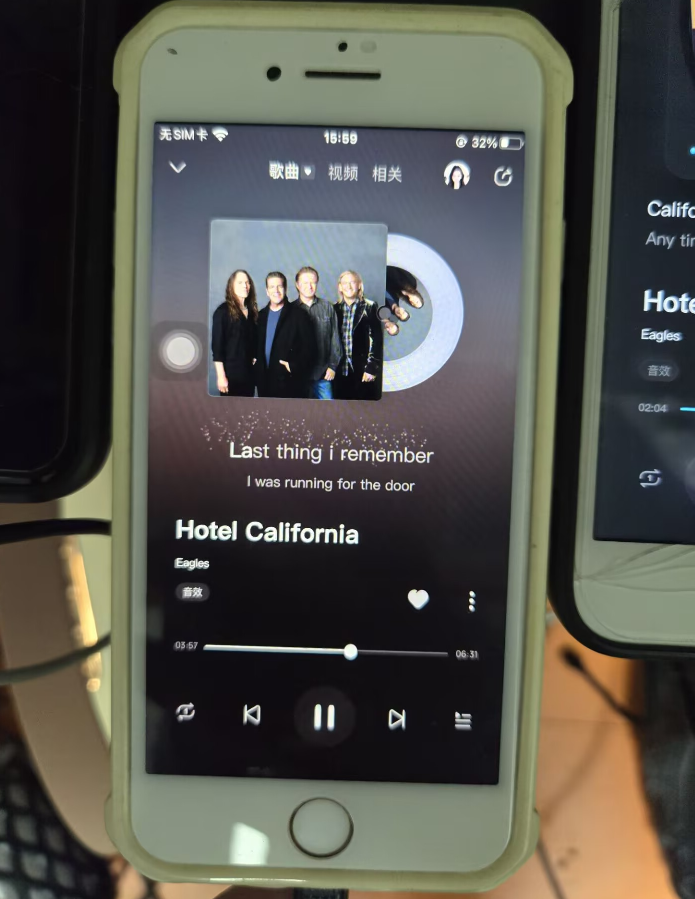
Figure 5.3-1 Playback duration test image
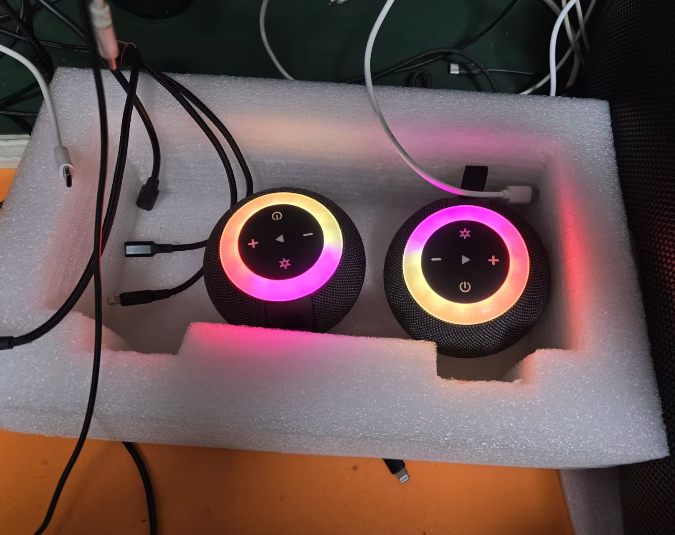
Figure 5.3-2 Playback duration test image
5.3.8. Preparation, Review, and Approval
| Stage | Personnel | Date |
|---|---|---|
| Prepared by | Ji Zuyun | 2025.5.23 |
| Reviewed by | Lu Yuqian | 2025.5.23 |
| Approved by | — | — |
5.4. Charging Time
5.4.1. Basic Test Item Information
| Item | Content |
|---|---|
| Test category | Electrical Performance Testing |
| Test item | Charging Time |
| Test item stated in the report | Charging Time Test |
| Product model | F33 |
| Report test date | 2025.5.17 |
| Test start time | 2025.5.17 |
| Test completion time | 2025.5.17 |
| Archiving department | Quality Department |
| Requesting department | R&D Department |
| Test phase | DV samples PV pilot production Incoming inspection In-process inspection Shipment Quality abnormality |
| Test equipment | Charging adapter |
| Customer/supplier | Battery capacity |
| Test quantity | 3pcs |
| Solution | Test completion time |
| Test ambient temperature | 28℃ |
5.4.2. Test Conditions and Methods
-
Discharge the product until it shuts down automatically.
-
Then connect the power cable to the power outlet to charge the product.
-
Check the red charging indicator: lit means charging; off means the battery is fully charged.
5.4.3. Test Standard Requirements and Test Records
- The charging test times are as follows:
| No. | Start date and time | End date and time | Adapter | Actual requirement (H) | Product status | Remarks |
|---|---|---|---|---|---|---|
| 1# | May 17, 15:00 | May 17, 17:02 | 5V2A | 2H02 minutes | Test with power off | |
| 2# | May 17, 15:00 | May 17, 17:04 | 5V2A | 2H02 minutes | Test with power off | |
| 2# | May 17, 15:00 | May 17, 17:15 | 5V2A | 2H15 minutes | Test with power off |
5.4.4. Equipment and Tools Used
1)Test samples *3pcs;
2)Charging adapters (5V2A) *2pcs;
3)USB charging cables *2pcs
5.4.5. Test Procedure
-
During charging testing, the LED is red.
-
The red charging LED turning off indicates a fully charged battery.
5.4.6. Test Results
Final assessment: Test passed
5.4.7. Preparation, Review, and Approval
| Stage | Personnel | Date |
|---|---|---|
| Tester | Ji Zuyun | — |
| Reviewed by | Lu Yuqian | — |
| Approved by | — | — |
5.5. Product Functional Aging Test
5.5.1. Basic Test Item Information
| Item | Content |
|---|---|
| Test category | Electrical Performance Testing |
| Test item | Product Functional Aging Test |
| Test item stated in the report | Product Functional Aging Test |
| Product model | F33 |
| Report test date | 2025.5.13 |
| Test start time | 2025.5.13 |
| Test completion time | 2025.5.20 |
| Archiving department | Quality Department |
5.5.2. Test Conditions and Methods
-
R&D provided 5 pilot-production sample units for functional checks, which were OK.
-
R&D provided 5 pilot-production sample units for aging testing, playing while charging at maximum volume. The test requires no product abnormalities after 168 hours of simultaneous charging and playback.
-
Place the product on the aging rack, insert the TF card and charging cable, power on, and play at 100% volume.
-
Loop tracks with mid-, high-, and low-frequency content. (This test looped the DJ track “朋友的酒”.)
5.5.3. Test Standard Requirements and Test Records
- A pass requires no product abnormalities, noise, or loss of sound after 168 hours of simultaneous charging and playback.
5.5.4. Equipment and Tools Used
-
Test samples 5*psc
-
Phone *1pcs
-
5V2A charger, USB cables 5pcs
5.5.5. Test Procedure
- Image of product aging in progress
5.5.6. Test Results
- Aging started on 5.13 at 08:30 and ended on 5.20 at 08:30, totaling 168H with no abnormalities found. Considered a pass.
5.5.7. Images of the Test Procedure and Results
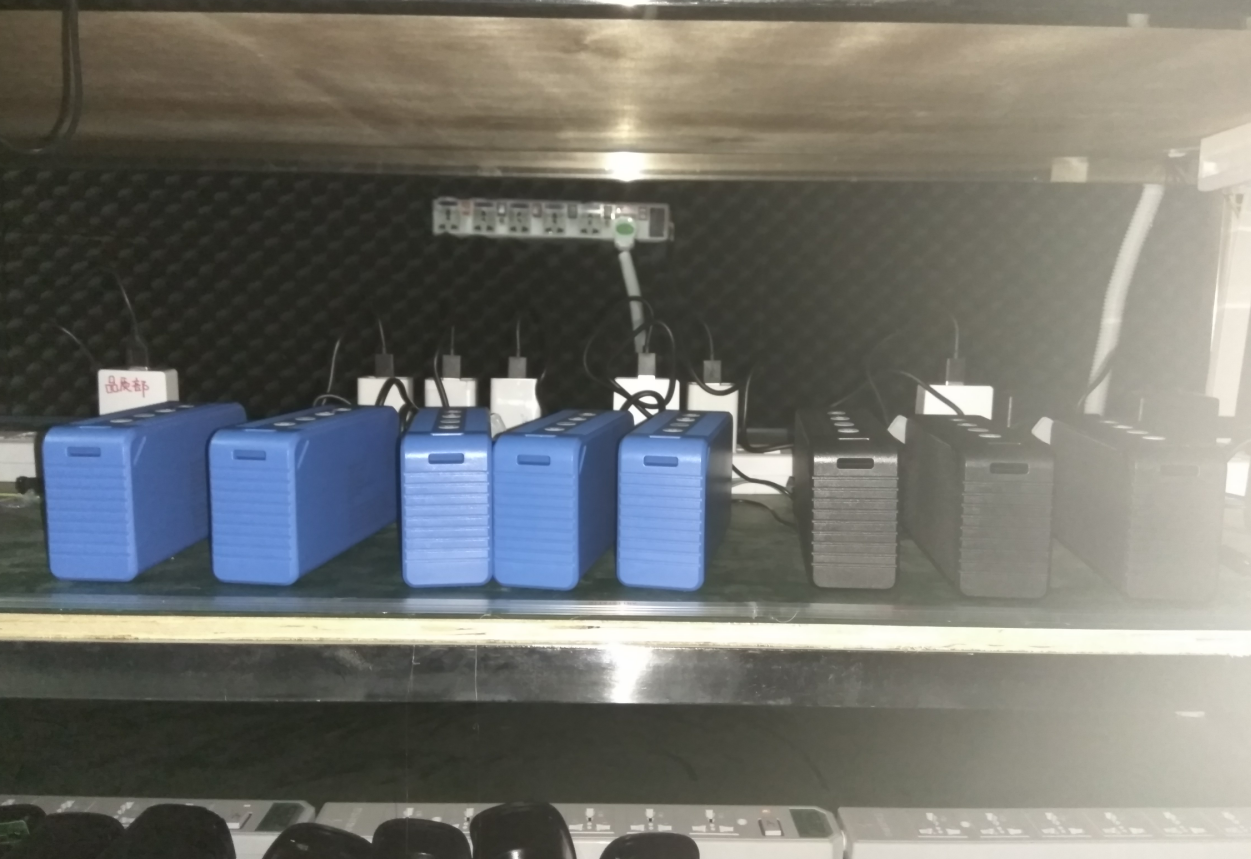
Figure 5.5-1 Product functional aging test image
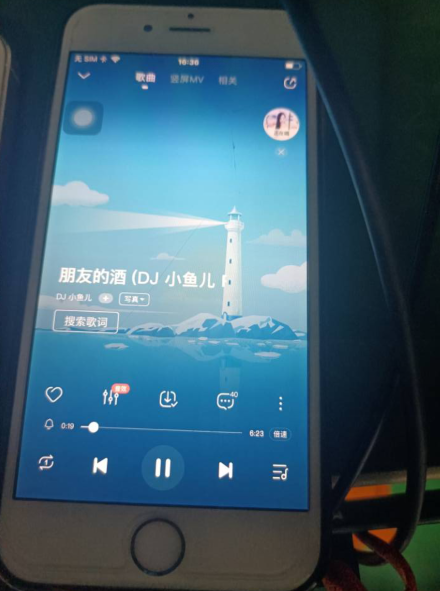
Figure 5.5-2 Product functional aging test image
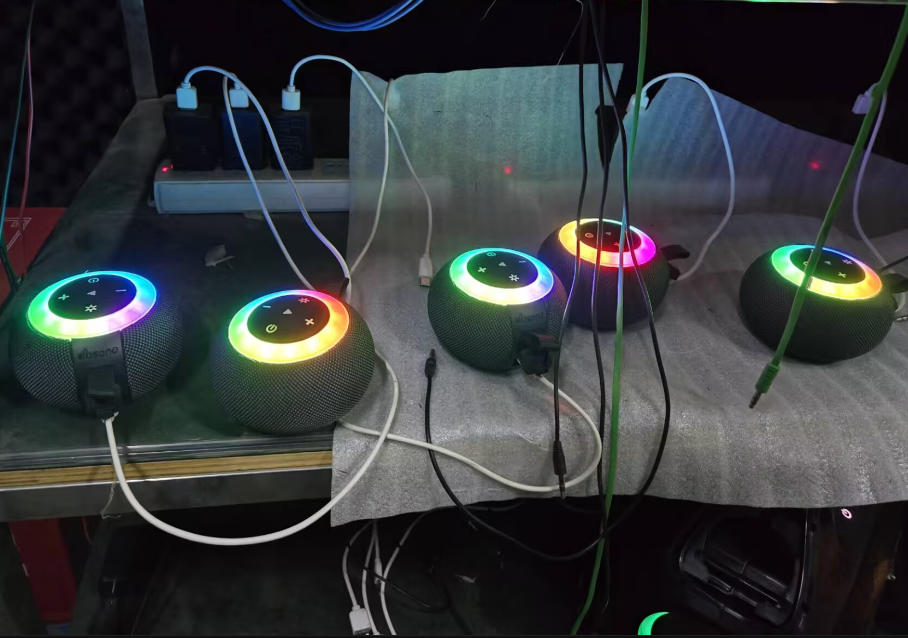
Figure 5.5-3 Product functional aging test image
5.5.8. Preparation, Review, and Approval
| Stage | Personnel | Date |
|---|---|---|
| Prepared by | Ji Zuyun | 2025.5.20 |
| Reviewed by | Lu Yuqian | 2025.5.20 |
| Approved by | — | — |