N7/N7A-DVT Reliability Test Report
Dongguan Jinwenhua Digital Technology Co., Ltd.
| Item | Content |
|---|---|
| Company Name | Dongguan Jinwenhua Digital Technology Co., Ltd. |
| Report Title | Product Reliability Test Report |
| Product Model | N7/N7A |
| Test Period | 2025.4.25 to 2025.12.24 |
| Archiving Department | Quality Department |
This report records environmental reliability, mechanical reliability, EMC and electrical performance tests for the N7/N7A Bluetooth speaker at the DVT stage. Conditions, methods, test records, procedures and results are presented by test item in separate sections.
1. Environmental Reliability
1.1. Unpackaged Unit Low-Temperature Storage Test
1.1.1. Basic Test Information
| Item | Content |
|---|---|
| Test Category | Environmental Reliability |
| Test Item | Unpackaged Unit Low-Temperature Storage Test |
| Product Model | N7/N7A |
| Test Start Date | 2025.4.25 |
| Test Start Time | 2025.4.25 |
| Test Completion Time | 2025.4.27 |
| Archiving Department | Quality Department |
1.1.2. Test Conditions and Methods
-
Check that the speaker passes visual and functional inspections before testing.
-
Place the product that has passed visual and functional inspections in an environmental test chamber for 48H of storage.
-
Operating temperature: set the low temperature to -20℃, 0%RH, with a running time of 48 hours.
-
After the low-temperature storage test, remove the test samples and leave them at room temperature for 2 hours before inspecting appearance and functions.
1.1.3. Test Criteria and Records
-
From 20:00 on April 25 to 20:00 on April 27: after 48 hours of low-temperature testing, remove the samples and leave them at room temperature for 2 hours, then inspect appearance and functions.
-
Appearance inspection: no deformation, color difference, surface scorching or adhesive separation is considered a pass.
-
Basic product functions show no abnormalities. Considered a pass.
1.1.4. Equipment and Tools
-
Test samples*3pcs
-
High/low-temperature test chamber
1.1.5. Test Procedure
-
Place the product in the high/low-temperature chamber.
-
Turn on the switch, set the parameters and select Run to start.
-
Current temperature during low-temperature testing: -19.99℃; humidity
-
Remove the product and check that the tested functions operate normally.
1.1.6. Test Results
After 48 hours in the high/low-temperature test, remove the product and check that its functions operate normally. Appearance: no deformation, color difference, surface scorching or adhesive separation. Considered a pass.
1.1.7. Test Procedure and Result Photographs
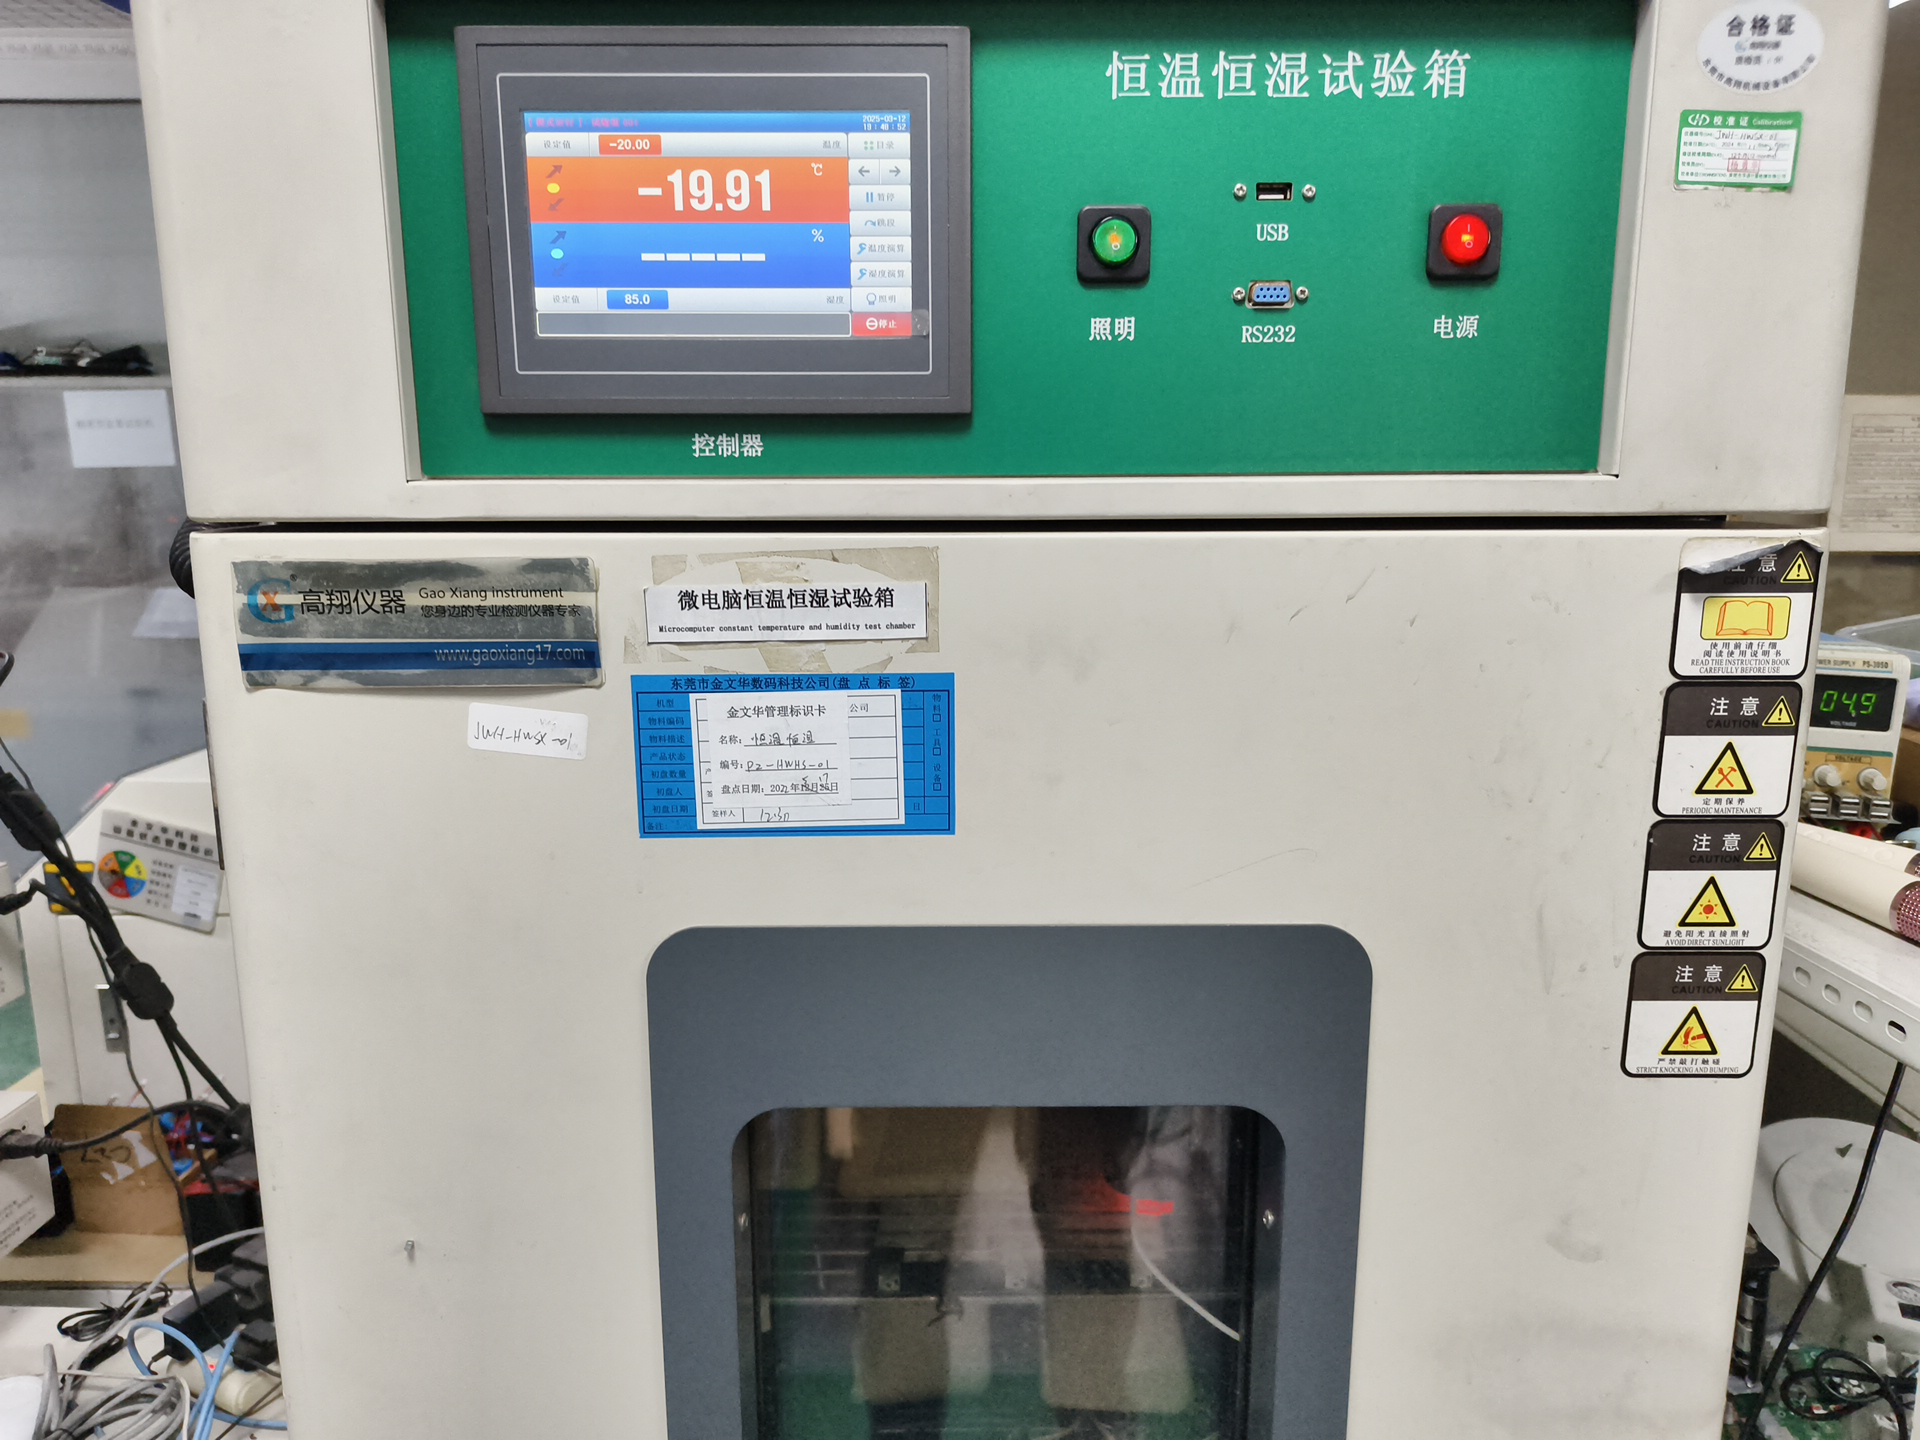
Figure 1.1-1 Low-Temperature Storage Test Photograph
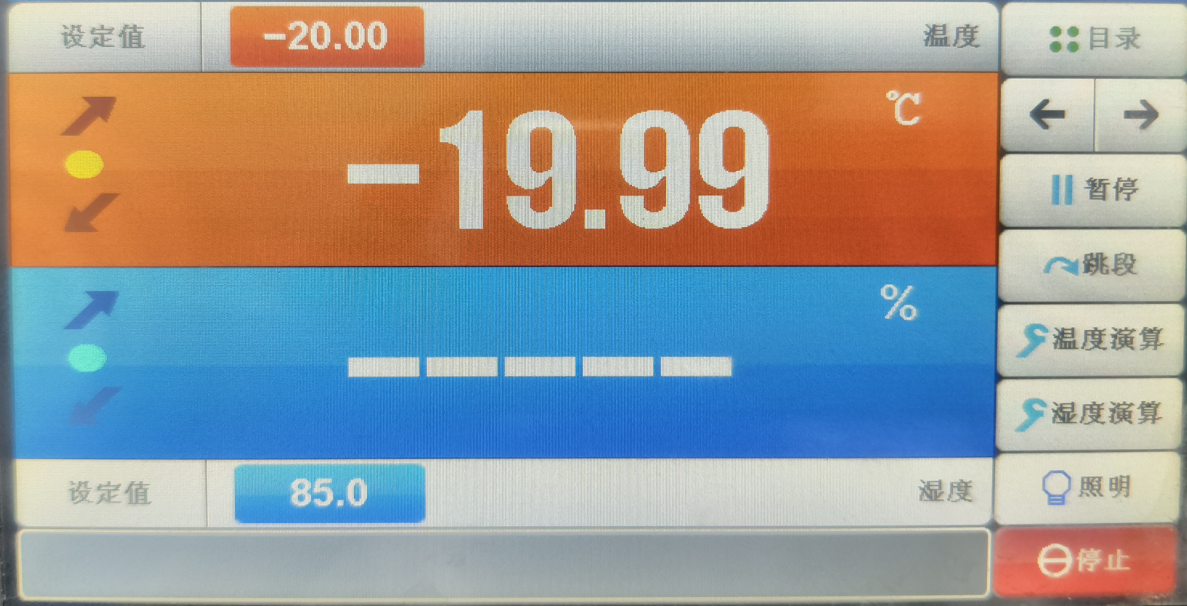
Figure 1.1-2 Low-Temperature Storage Test Photograph
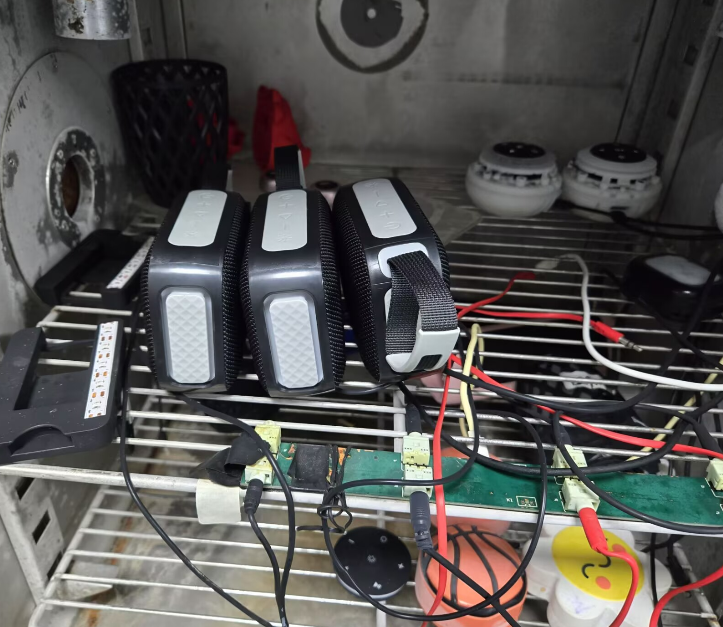
Figure 1.1-3 Low-Temperature Storage Test Photograph
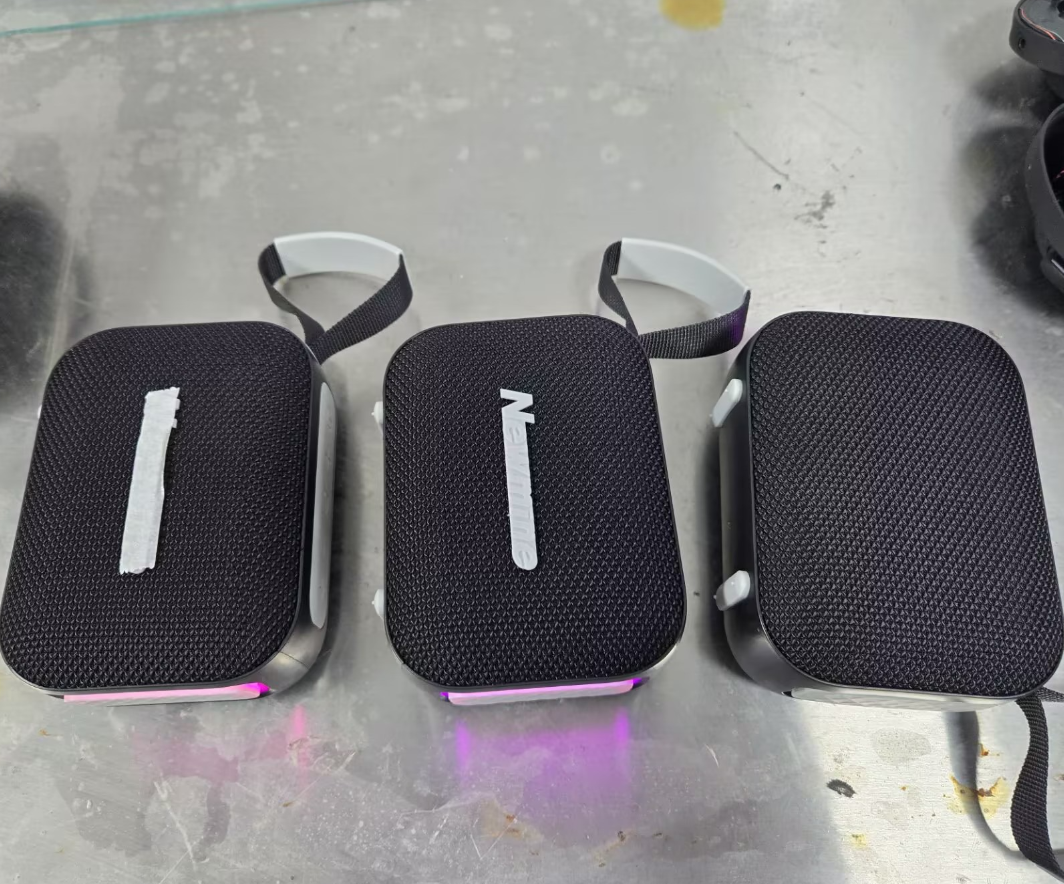
Figure 1.1-4 Low-Temperature Storage Test Photograph
1.1.8. Preparation, Review and Approval
| Stage | Personnel | Date |
|---|---|---|
| Prepared by | Ji Zuyun | 2025.4.27 |
| Reviewed by | Lu Yuqian | 2025.4.27 |
| Approved by | — | — |
1.2. Unpackaged Unit Low-Temperature Operating Test
1.2.1. Basic Test Information
| Item | Content |
|---|---|
| Test Category | Environmental Reliability |
| Test Item | Unpackaged Unit Low-Temperature Operating Test |
| Product Model | N7/N7A |
| Test Start Date | 2025.4.27 |
| Test Start Time | 2025.4.27 |
| Test Completion Time | 2025.4.28 |
| Archiving Department | Quality Department |
1.2.2. Test Conditions and Methods
-
Check that the speaker passes visual and functional inspections before testing.
-
Place the product that has passed visual and functional inspections in an environmental test chamber for 24H of storage.
-
Operating temperature: set the low temperature to -20℃, 00%RH, with a running time of 24 hours.
-
After the low-temperature operating test, remove the samples and leave them at room temperature for 2 hours before inspecting appearance and functions.
1.2.3. Test Criteria and Records
-
From 10:00 on April 27 to 10:00 on April 28: after 24 hours of low-temperature testing, remove the samples and leave them at room temperature for 2 hours, then inspect appearance and functions.
-
Appearance inspection: no deformation, color difference, surface scorching or adhesive separation is considered a pass.
-
Basic product functions show no abnormalities. Considered a pass.
1.2.4. Equipment and Tools
-
Test samples*3pcs
-
High/low-temperature test chamber
1.2.5. Test Procedure
-
Place the product in the high/low-temperature chamber, connect the charging cable and switch it on. Connect a phone and play at 60% volume.
-
Turn on the switch, set the parameters and select Run to start.
-
Current temperature during low-temperature testing: -19.99℃; humidity
-
Remove the product and check that the tested functions operate normally.
1.2.6. Test Results
After 24 hours of low-temperature testing, remove the product and check that its functions operate normally. Appearance: no deformation, color difference or surface scorching. Considered a pass.
1.2.7. Test Procedure and Result Photographs
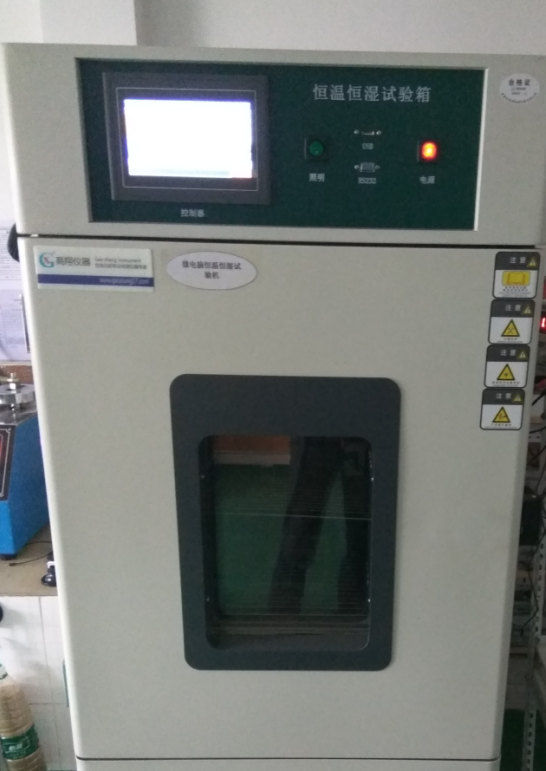
Figure 1.2-1 Low-Temperature Operating Test Photograph
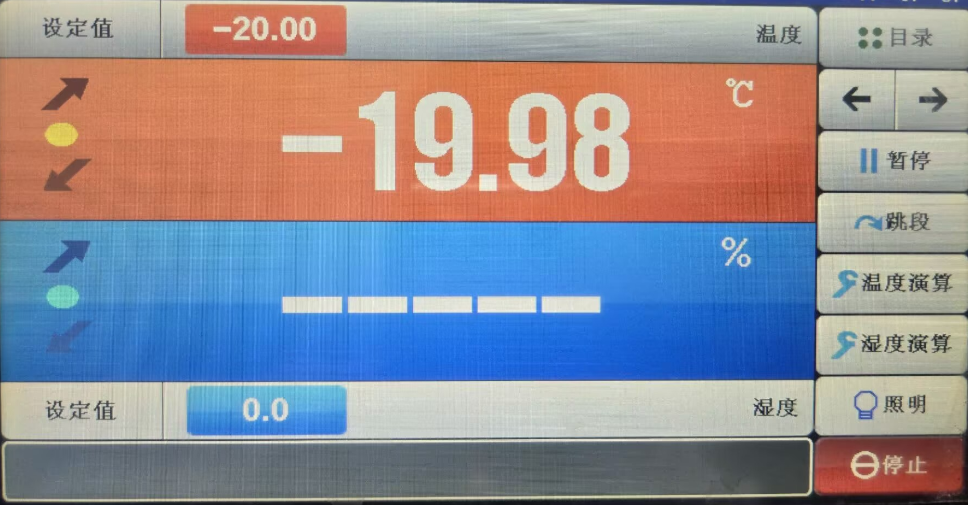
Figure 1.2-2 Low-Temperature Operating Test Photograph
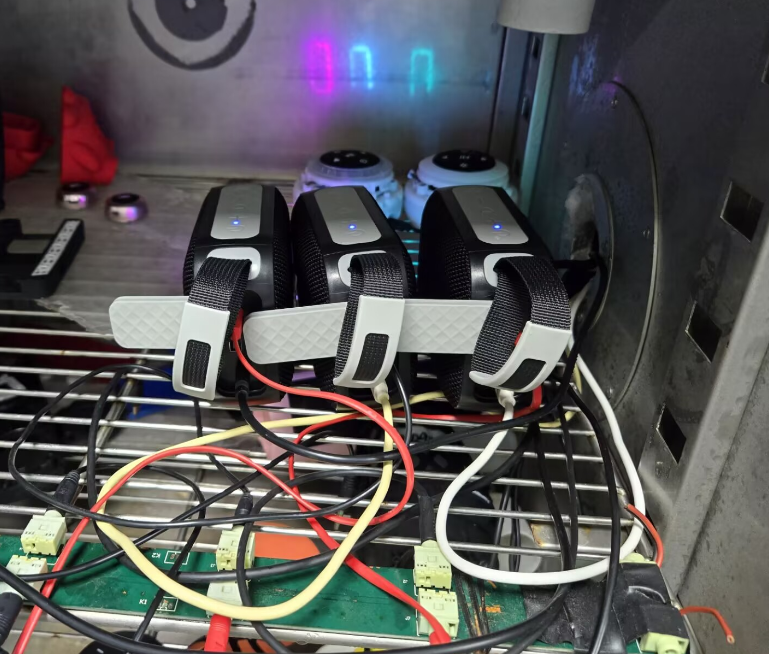
Figure 1.2-3 Low-Temperature Operating Test Photograph
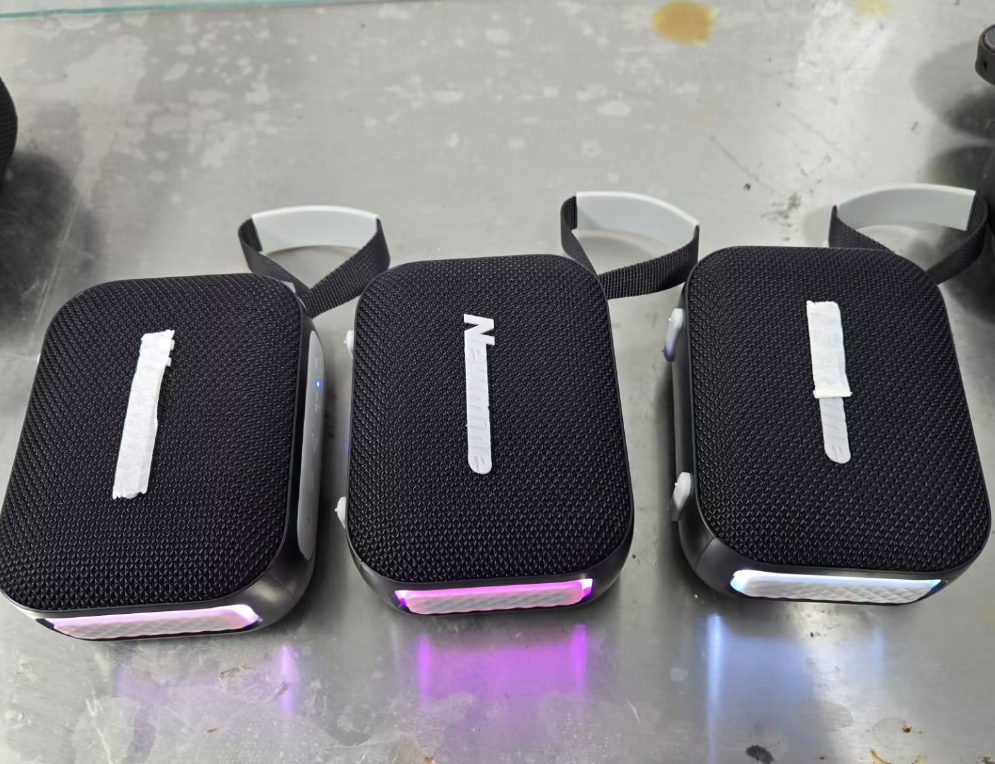
Figure 1.2-4 Low-Temperature Operating Test Photograph
1.2.8. Preparation, Review and Approval
| Stage | Personnel | Date |
|---|---|---|
| Prepared by | Ji Zuyun | 2025.4.28 |
| Reviewed by | Lu Yuqian | 2025.4.28 |
| Approved by | — | — |
1.3. Unpackaged Unit High-Temperature Storage Test
1.3.1. Basic Test Information
| Item | Content |
|---|---|
| Test Category | Environmental Reliability |
| Test Item | Unpackaged Unit High-Temperature Storage Test |
| Product Model | N7/N7A |
| Test Start Date | 2025.4.28 |
| Test Start Time | 2025.4.28 |
| Test Completion Time | 2025.4.30 |
| Archiving Department | Quality Department |
1.3.2. Test Conditions and Methods
-
Check that the speaker passes visual and functional inspections before testing.
-
Place the product that has passed visual and functional inspections in an environmental test chamber for 48H of storage.
-
Operating temperature: set the low temperature to 60℃, 85%RH, with a running time of 48 hours.
-
After the low-temperature operating test, remove the samples and leave them at room temperature for 2 hours before inspecting appearance and functions.
1.3.3. Test Criteria and Records
-
From 11:00 on April 28 to 11:00 on April 30: after 48 hours of high-temperature testing, remove the samples and leave them at room temperature for 2 hours, then inspect appearance and functions.
-
Appearance inspection: no deformation, color difference, surface scorching or adhesive separation is considered a pass.
-
Basic product functions show no streaking, defects or other abnormalities. Considered a pass.
1.3.4. Equipment and Tools
-
Test samples*2pcs
-
High/low-temperature test chamber
1.3.5. Test Procedure
-
Place the product in the high/low-temperature chamber.
-
Turn on the switch, set the parameters and select Run to start.
-
Current temperature during high-temperature testing: 59.9℃; humidity: 98.1%
-
Remove the product and check that the tested functions operate normally.
1.3.6. Test Results
After 48 hours of high/low-temperature testing, remove the product and check that its functions operate normally, with no defects. Appearance: no deformation, color difference, surface scorching or adhesive separation. Considered a pass.
1.3.7. Test Procedure and Result Photographs
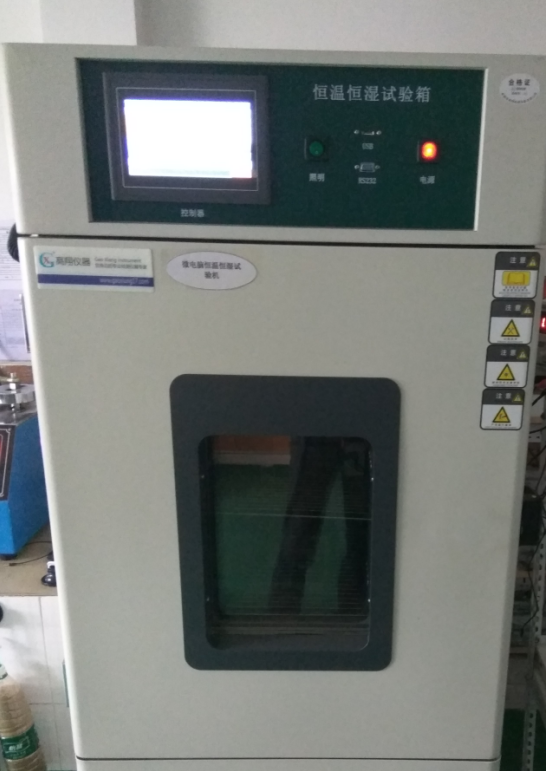
Figure 1.3-1 High-Temperature Storage Test Photograph
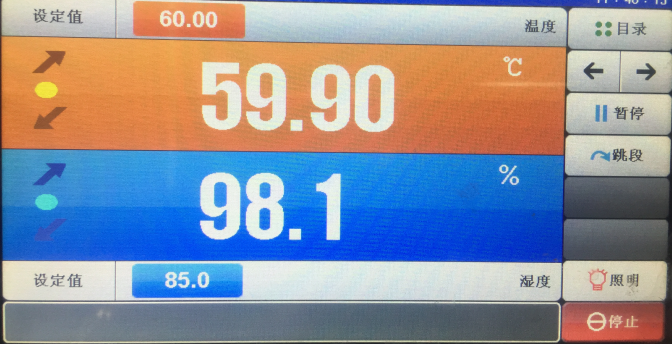
Figure 1.3-2 High-Temperature Storage Test Photograph
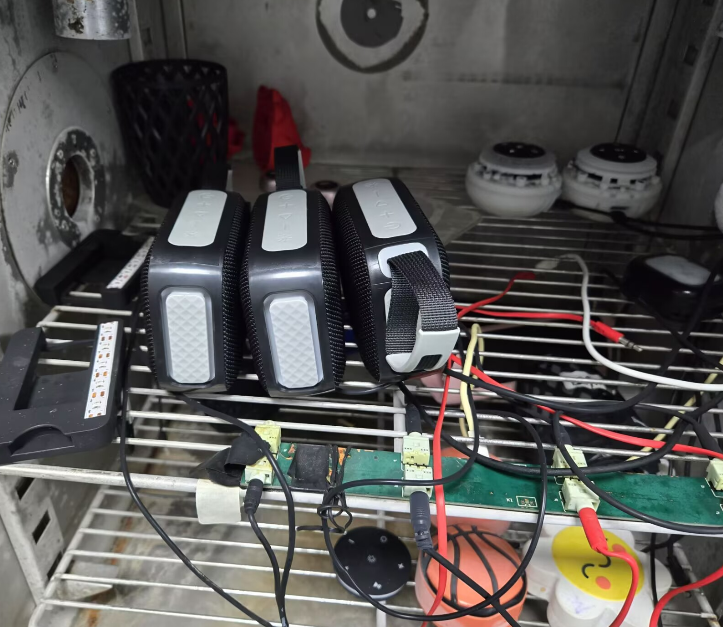
Figure 1.3-3 High-Temperature Storage Test Photograph
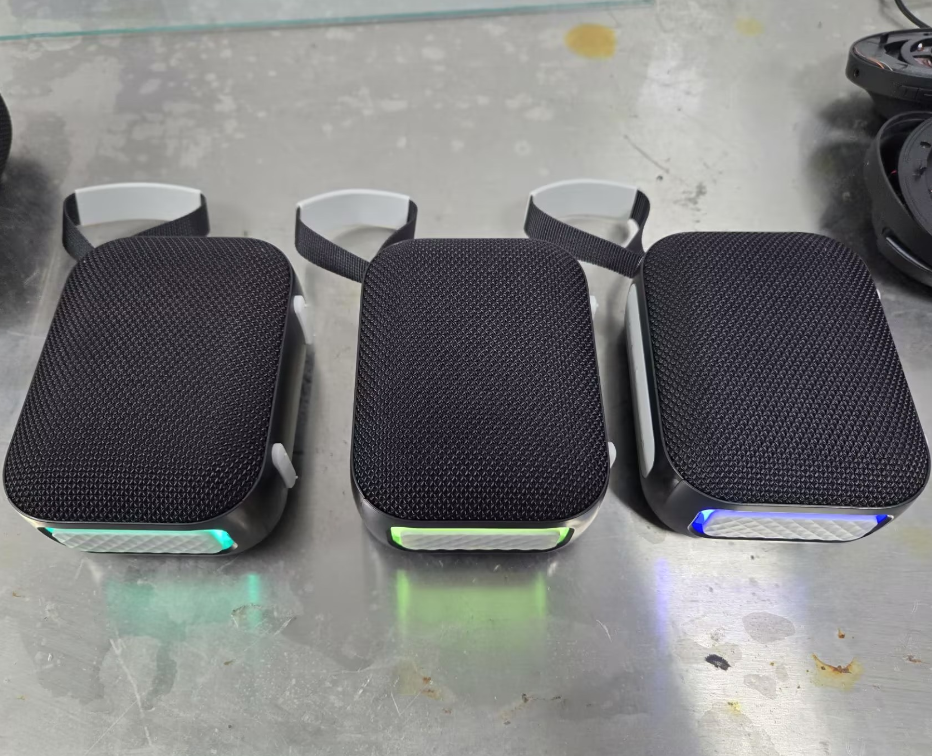
Figure 1.3-4 High-Temperature Storage Test Photograph
1.3.8. Preparation, Review and Approval
| Stage | Personnel | Date |
|---|---|---|
| Prepared by | Ji Zuyun | 2025.4.30 |
| Reviewed by | Lu Yuqian | 2025.4.30 |
| Approved by | — | — |
1.4. Unpackaged Unit High-Temperature Operating Test
1.4.1. Basic Test Information
| Item | Content |
|---|---|
| Test Category | Environmental Reliability |
| Test Item | Unpackaged Unit High-Temperature Operating Test |
| Product Model | N7/N7A |
| Test Start Date | 2025.4.30 |
| Test Start Time | 2025.4.30 |
| Test Completion Time | 2025.5.1 |
| Archiving Department | Quality Department |
1.4.2. Test Conditions and Methods
-
Check that the speaker passes visual and functional inspections before testing.
-
Place the product that has passed visual and functional inspections in an environmental test chamber for 24H of storage.
-
Operating temperature: set the low temperature to 60℃, 85%RH, with a running time of 24 hours.
-
After the high-temperature operating test, remove the samples and leave them at room temperature for 2 hours before inspecting appearance and functions.
1.4.3. Test Criteria and Records
-
From 10:00 on April 30 to 10:00 on May 1: after 24 hours of low-temperature testing, remove the samples and leave them at room temperature for 2 hours, then inspect appearance and functions.
-
Appearance inspection: no deformation, color difference, surface scorching or adhesive separation is considered a pass.
-
Basic product functions show no streaking, defects or other abnormalities. Considered a pass.
1.4.4. Equipment and Tools
-
Test samples*2pcs
-
High/low-temperature test chamber
1.4.5. Test Procedure
-
Place the product in the high/low-temperature chamber, connect the charging cable and switch it on. Connect a phone and play at 60% volume.
-
Turn on the switch, set the parameters and select Run to start.
-
Current temperature during high-temperature testing: 59.9℃; humidity: 98.1%
-
Remove the product and check that the tested functions operate normally.
1.4.6. Test Results
After 24 hours of high/low-temperature testing, remove the product and check that its functions operate normally, with no defects. Appearance: no deformation, color difference, surface scorching or adhesive separation. Considered a pass.
1.4.7. Test Procedure and Result Photographs
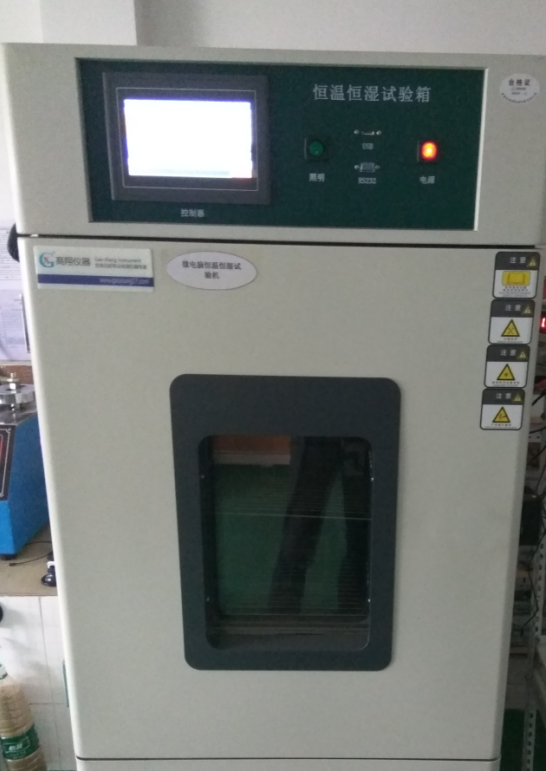
Figure 1.4-1 High-Temperature Operating Test (Extreme Burn-In) Photograph
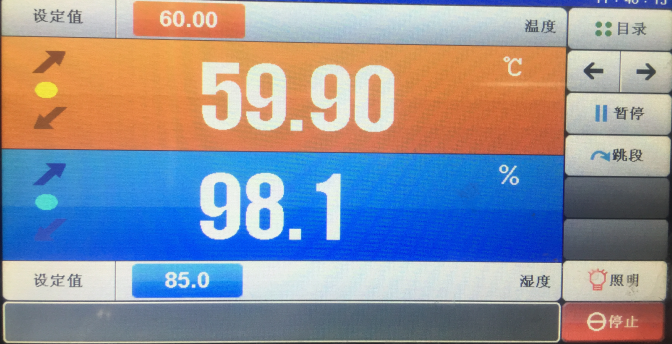
Figure 1.4-2 High-Temperature Operating Test (Extreme Burn-In) Photograph
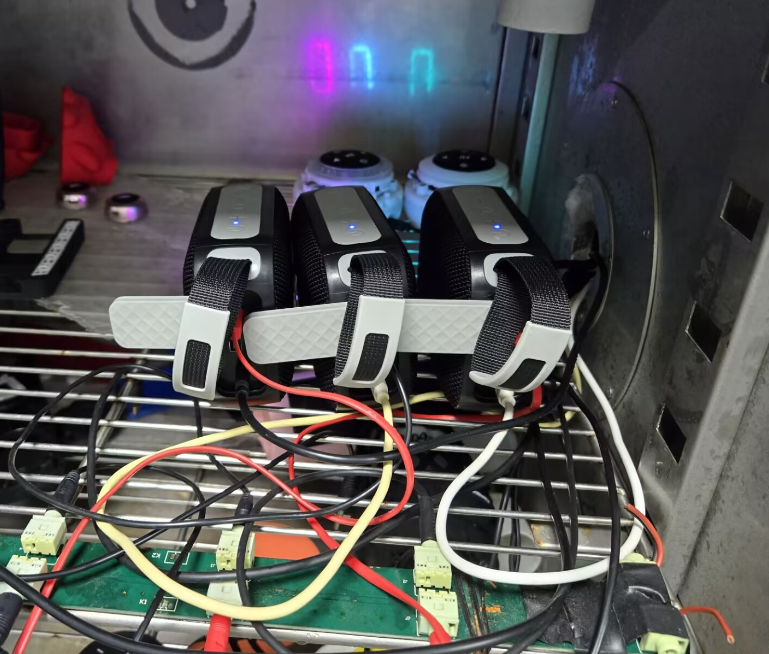
Figure 1.4-3 High-Temperature Operating Test (Extreme Burn-In) Photograph
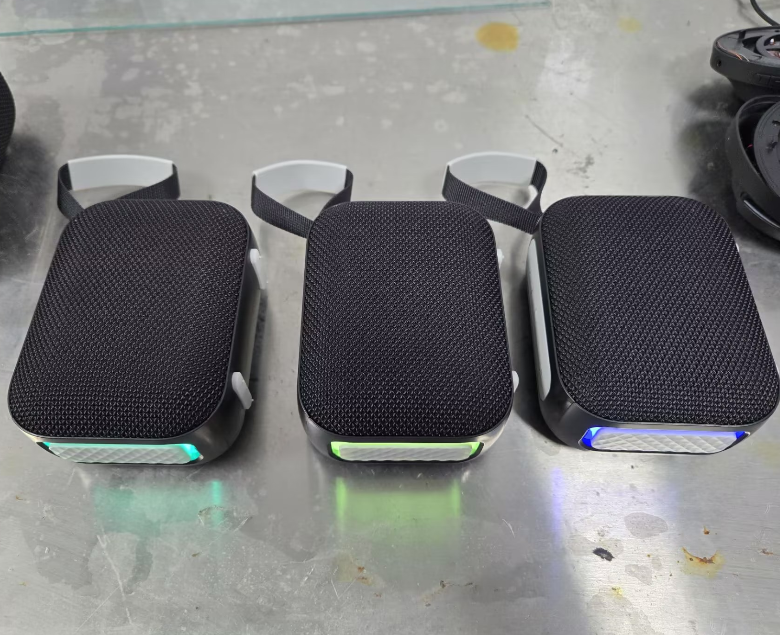
Figure 1.4-4 High-Temperature Operating Test (Extreme Burn-In) Photograph
1.4.8. Preparation, Review and Approval
| Stage | Personnel | Date |
|---|---|---|
| Prepared by | Ji Zuyun | 2025.5.1 |
| Reviewed by | Lu Yuqian | 2025.5.1 |
| Approved by | — | — |
1.5. Unpackaged Unit Constant Damp Heat Operating Test
1.5.1. Basic Test Information
| Item | Content |
|---|---|
| Test Category | Environmental Reliability |
| Test Item | Unpackaged Unit Constant Damp Heat Operating Test |
| Product Model | N7/N7A |
| Test Start Date | 2025.5.1 |
| Test Start Time | 2025.5.2 |
| Test Completion Time | 2025.5.2 |
| Archiving Department | Quality Department |
1.5.2. Test Conditions and Methods
-
Check that the speaker passes visual and functional inspections before testing.
-
Place the product that has passed visual and functional inspections in an environmental test chamber for 24H of storage.
-
Operating temperature: set the low temperature to 55℃, 90%RH, with a running time of 24 hours.
-
After the high-temperature operating test, remove the samples and leave them at room temperature for 2 hours before inspecting appearance and functions.
1.5.3. Test Criteria and Records
-
From 10:00 on May 1 to 10:00 on May 2: after 24 hours of low-temperature testing, remove the samples and leave them at room temperature for 2 hours, then inspect appearance and functions.
-
Appearance inspection: no deformation, color difference, surface scorching or adhesive separation is considered a pass.
-
Basic product functions show no streaking, defects or other abnormalities. Considered a pass.
1.5.4. Equipment and Tools
-
Test samples*2pcs
-
High/low-temperature test chamber
1.5.5. Test Procedure
-
Place the product in the high/low-temperature chamber, connect the charging cable and switch it on. Connect a phone and play at 60% volume.
-
Turn on the switch, set the parameters and select Run to start.
-
Current temperature during high-temperature testing: 54.99℃; humidity: 85%
-
Remove the product and check that the tested functions operate normally.
1.5.6. Test Results
After 24 hours of high/low-temperature testing, remove the product and check that its functions operate normally, with no defects. Appearance: no deformation, color difference, surface scorching or adhesive separation. Considered a pass.
1.5.7. Test Procedure and Result Photographs
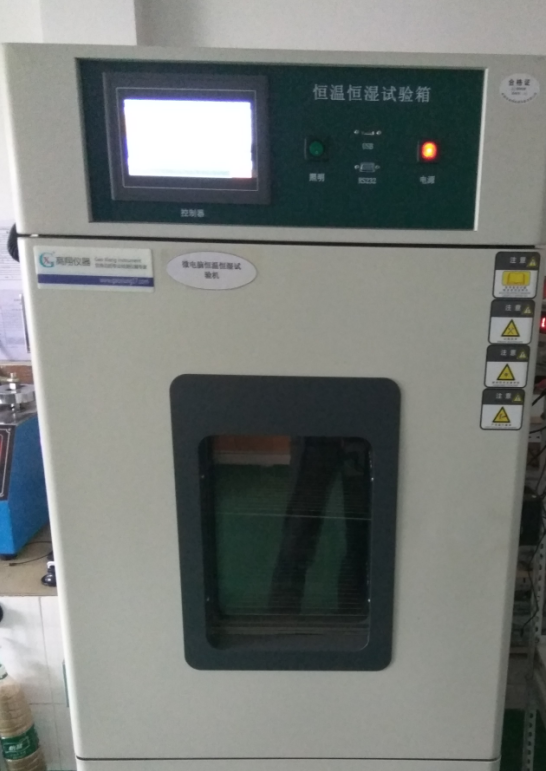
Figure 1.5-1 High/Low-Temperature Shock Test Photograph
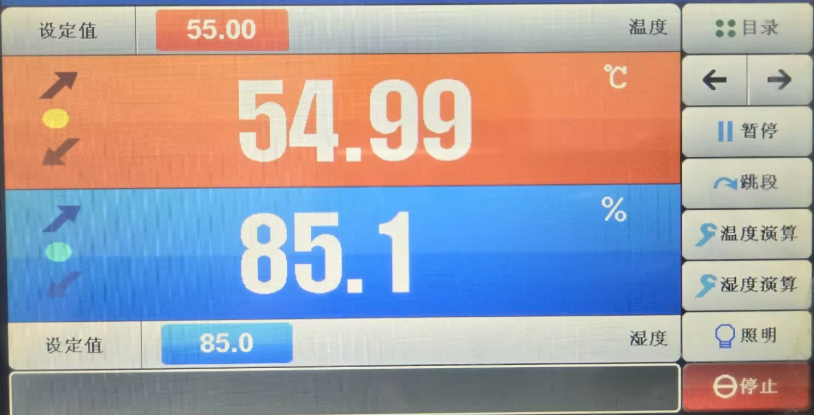
Figure 1.5-2 High/Low-Temperature Shock Test Photograph
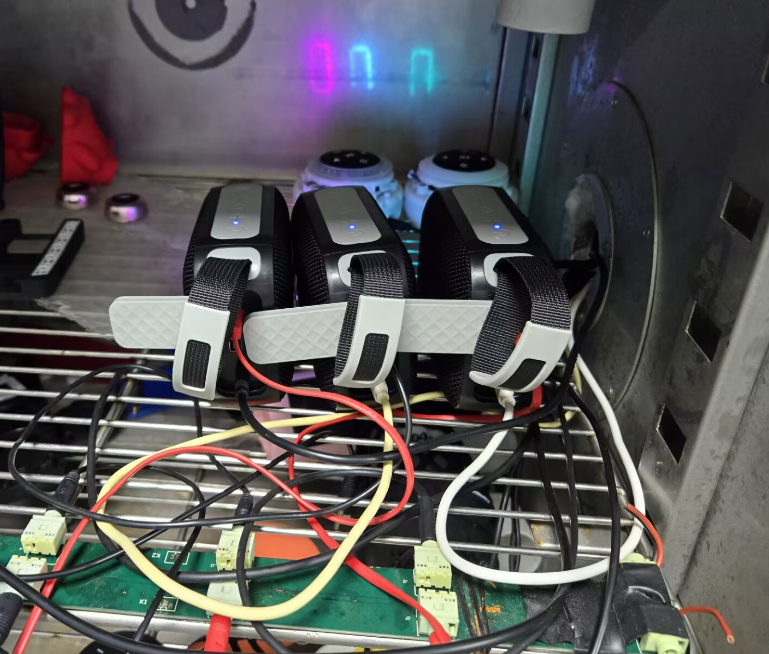
Figure 1.5-3 High/Low-Temperature Shock Test Photograph
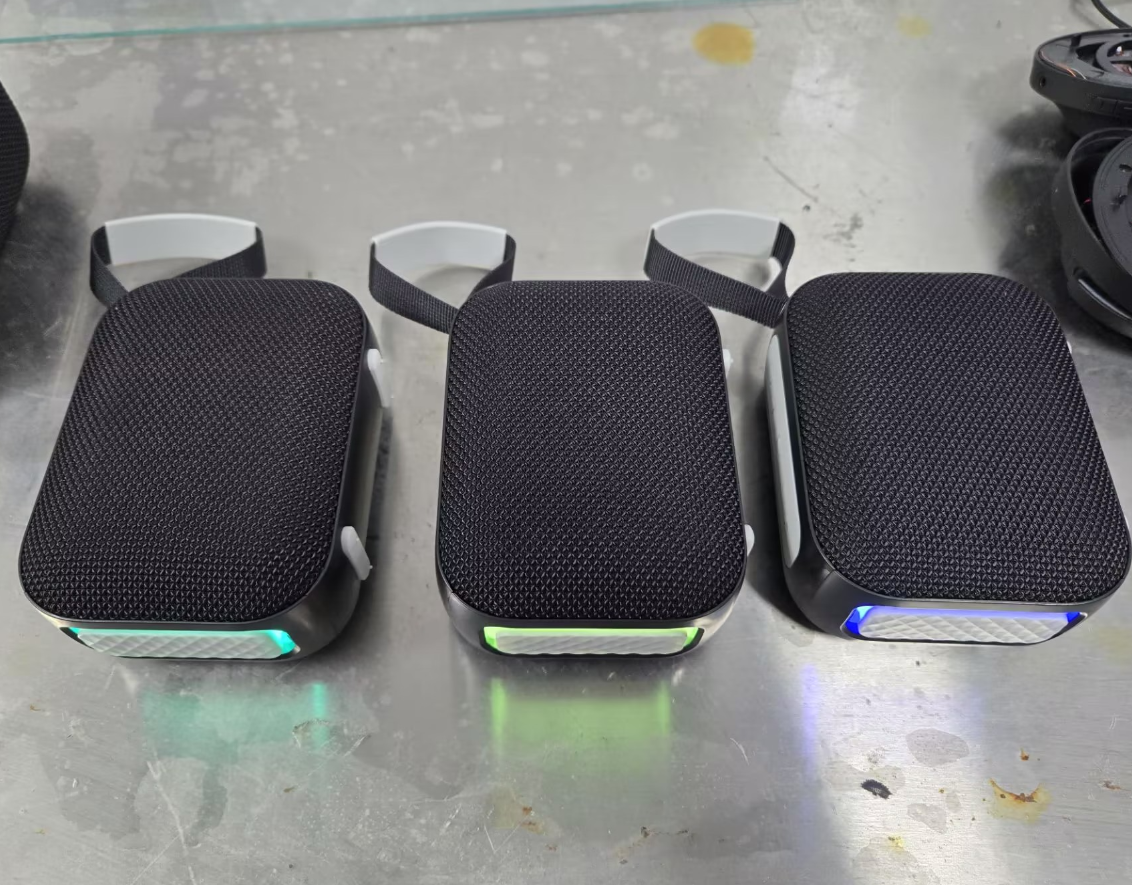
Figure 1.5-4 High/Low-Temperature Shock Test Photograph
1.5.8. Preparation, Review and Approval
| Stage | Personnel | Date |
|---|---|---|
| Prepared by | Ji Zuyun | 2025.5.2 |
| Reviewed by | Lu Yuqian | 2025.5.2 |
| Approved by | — | — |
1.6. Salt Spray Test
1.6.1. Basic Test Information
| Item | Content |
|---|---|
| Test Category | Environmental Reliability |
| Test Item | Salt Spray Test |
| Product Model | N7/N7A |
| Test Start Date | 2025.4.25 |
| Test Start Time | 2025.4.25 |
| Test Completion Time | 2025.4.27 |
| Archiving Department | Quality Department |
1.6.2. Test Conditions and Methods
-
Perform the test after the product passes a visual inspection.
-
Prepare the salt solution using chemically pure sodium chloride and distilled or deionized water: 5% sodium chloride salt and 95% distilled or deionized water.
Mix thoroughly to obtain a salt solution containing 5±1% sodium chloride, and pour it into the solution tank of the salt spray test chamber.
-
Place the product that has passed visual inspection in the salt spray chamber. Laboratory ambient temperature: 27 degrees Celsius; barrel temperature: 47 degrees Celsius; spray time: 48H.
-
After testing, leave the product at room temperature for 2 hours, then inspect metal parts for rust, corrosion, oxidation, discoloration or other abnormalities.
1.6.3. Test Criteria and Records
- After the 48H test and 2 hours at room temperature, no rust, corrosion, oxidation or discoloration on metal parts and exposed screws is considered a pass.
1.6.4. Equipment and Tools
-
Test samples*2pcs
-
Industrial sodium chloride salt
-
Salt spray test chamber.
1.6.5. Test Procedure
-
Place the metal parts and product in the salt spray chamber.
-
Turn on the power, set the timer to 48H, and start operation, spraying and timing.
-
Salt spray test in progress
-
Test completed: 48H
-
Remove the product and inspect the product and metal parts after 2H. No surface rust, corrosion, oxidation or other abnormalities.
1.6.6. Test Results
After the 48H test, remove the product and metal parts and inspect them after 2H. No surface rust, corrosion, oxidation or other abnormalities is considered a pass.
1.6.7. Test Procedure and Result Photographs
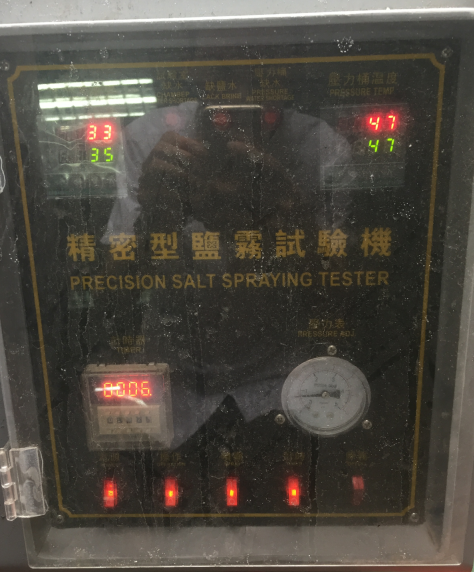
Figure 1.6-1 Salt Spray Test Photograph
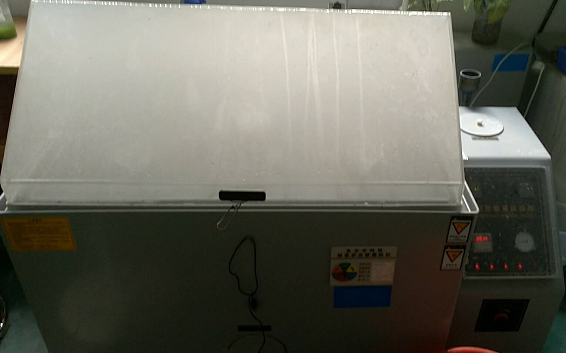
Figure 1.6-2 Salt Spray Test Photograph
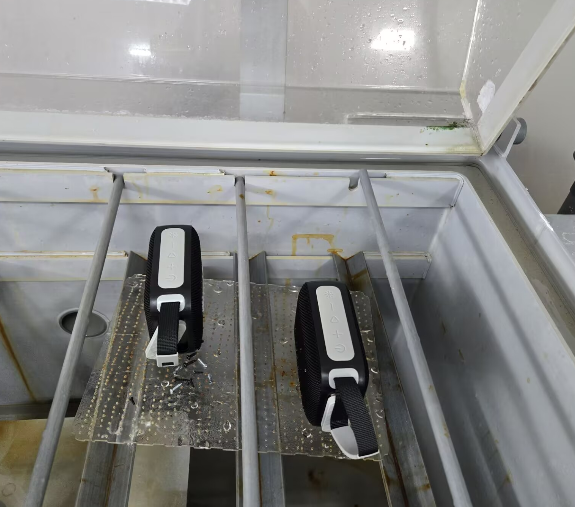
Figure 1.6-3 Salt Spray Test Photograph
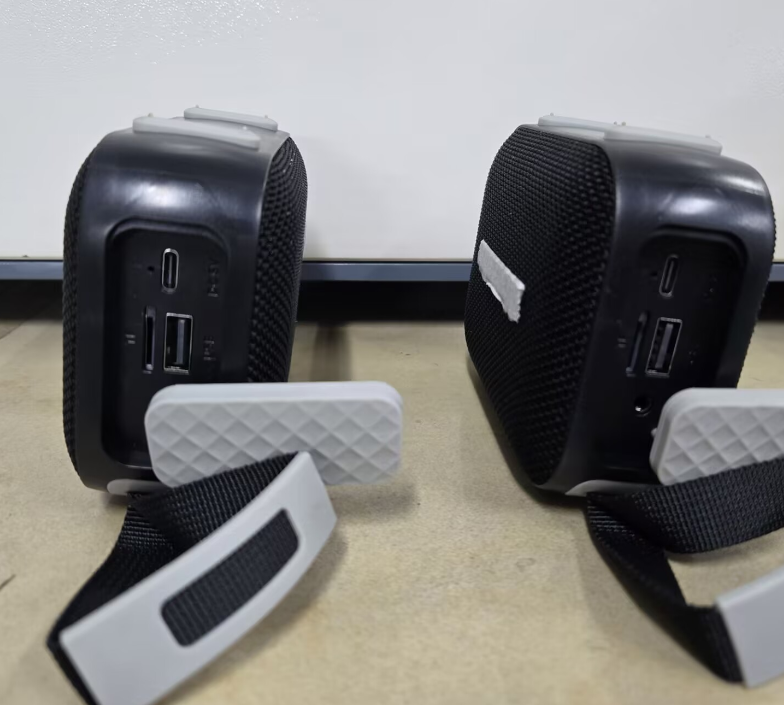
Figure 1.6-4 Salt Spray Test Photograph
1.6.8. Preparation, Review and Approval
| Stage | Personnel | Date |
|---|---|---|
| Prepared by | Ji Zuyun | 2025.4.27 |
| Reviewed by | Lu Yuqian | 2025.4.27 |
| Approved by | — | — |
1.7. UV Exposure
1.7.1. Basic Test Information
| Item | Content |
|---|---|
| Test Category | Environmental Reliability |
| Test Item | UV Exposure |
| Product Model | N7/N7A |
| Test Start Date | 2025.5.5 |
| Test Start Time | 2025.5.5 |
| Test Completion Time | 2025.5.9 |
| Archiving Department | Quality Department |
1.7.2. Test Conditions and Methods
-
Perform testing after the product passes a visual inspection.
-
Perform 8 cycles of 8 hours of exposure at 0.63W/m2 followed by 4 hours of condensation without radiation (96 hours in total). The UV chamber has no temperature adjustment: measure sample temperature after UV testing and preheat the constant-temperature chamber to sample temperature +10℃, with humidity >90%RH to simulate condensation. Measure color difference before and after testing. During testing, expose one half and cover the other half.
1.7.3. Test Criteria and Records
After testing, samples must show no discoloration, deformation, cracking, oxidation, corrosion or other abnormalities; the color difference before and after testing must not exceed 1.
1.7.4. Equipment and Tools
- Test samples*25pcs
1.7.5. Test Procedure
-
Place the product in the UV exposure chamber.
-
Turn on the power, set the timer to 96H, and start operation and timing.
-
Test completed: 96H
-
Remove the product and inspect the product and metal parts after 2H. No surface rust, corrosion, oxidation or other abnormalities.
1.7.6. Test Results
After testing, samples showed no discoloration, deformation, cracking, oxidation, corrosion or other abnormalities; color difference before and after testing did not exceed 1. Considered a pass.
1.7.7. Test Procedure and Result Photographs
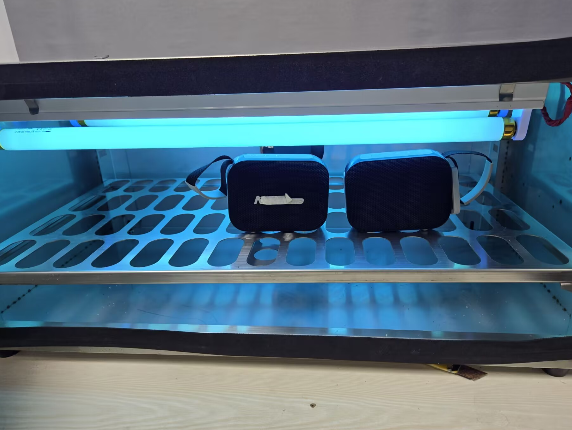
Figure 1.7-1 UV Exposure Photograph
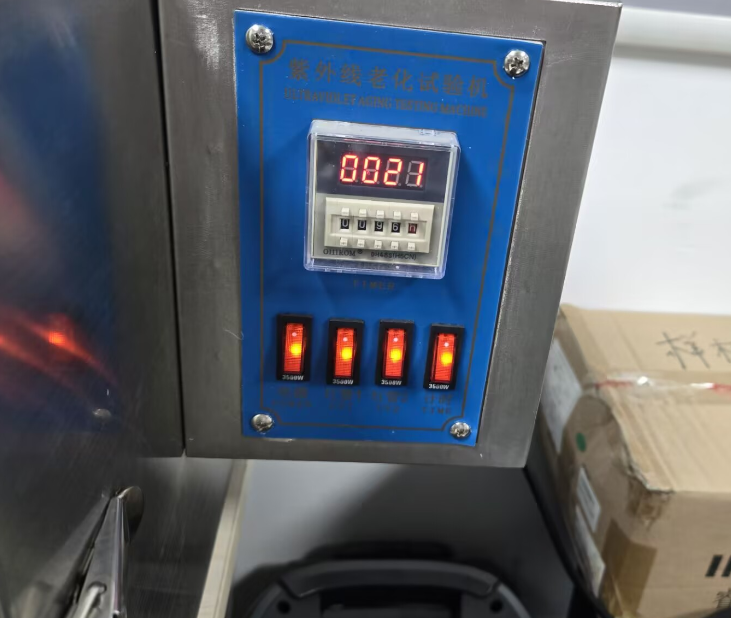
Figure 1.7-2 UV Exposure Photograph
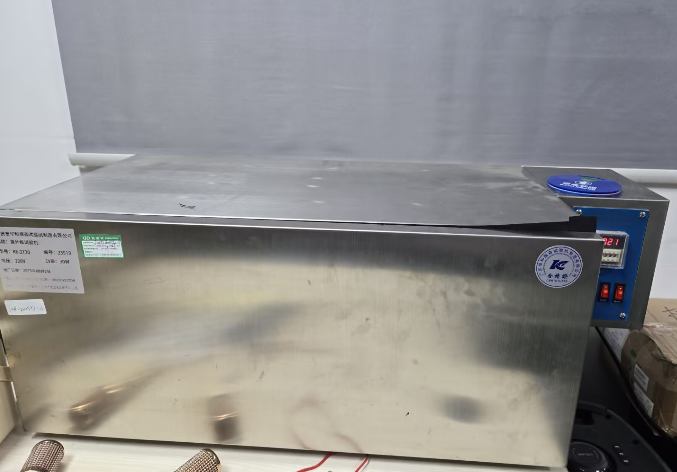
Figure 1.7-3 UV Exposure Photograph
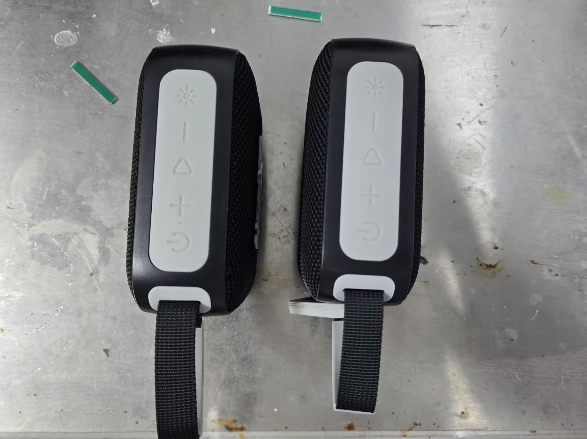
Figure 1.7-4 UV Exposure Photograph
1.7.8. Preparation, Review and Approval
| Stage | Personnel | Date |
|---|---|---|
| Prepared by | Ji Zuyun | 2025.5.9 |
| Reviewed by | Lu Yuqian | 2025.5.9 |
| Approved by | — | — |
2. Mechanical Reliability
2.1. Unpackaged Unit Drop Test
2.1.1. Basic Test Information
| Item | Content |
|---|---|
| Test Category | Mechanical Reliability |
| Test Item | Unpackaged Unit Drop Test |
| Product Model | N7/N7A |
| Test Start Date | 2025.4.25 |
| Test Start Time | 2025.4.25 |
| Test Completion Time | 2025.4.25 |
| Archiving Department | Quality Department |
2.1.2. Test Conditions and Methods
-
Test after the speaker passes visual and functional inspections.
-
Drop according to the specified drop height: drop 6 times from 100CM in different orientations.
-
Check that basic functions, performance and structure are normal, with no loose internal parts.
2.1.3. Test Criteria and Records
- Drop 6 times from 100CM in different orientations. Normal basic functions and structure, with no loose exterior or internal parts after dropping, constitute a pass.
2.1.4. Equipment and Tools
-
Test samples*2pcs
-
Tape measure*1pcs
2.1.5. Test Procedure
-
Drop the product from 100cn in different orientations.
-
Allow the product to fall freely onto the floor.
-
In this drop test, the product showed no loose internal parts; functions and performance were normal.
2.1.6. Test Results
After the drop test, no internal looseness or functional defects were found, and the structure was normal. Considered a pass.
2.1.7. Test Procedure and Result Photographs
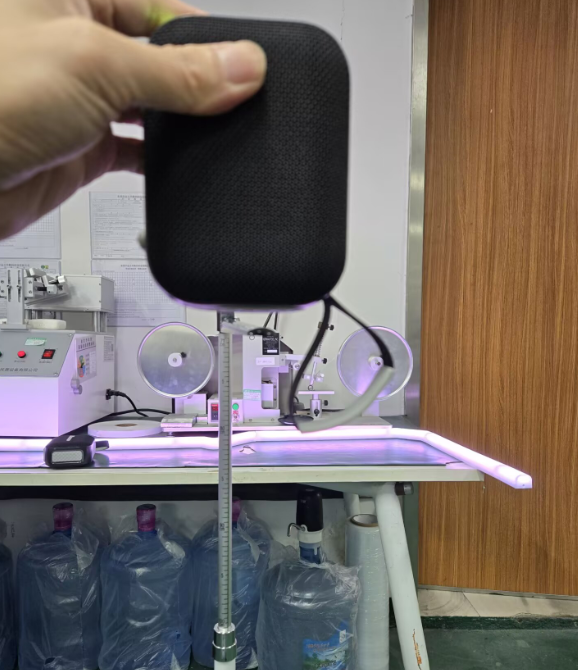
Figure 2.1-1 Drop Test Photograph
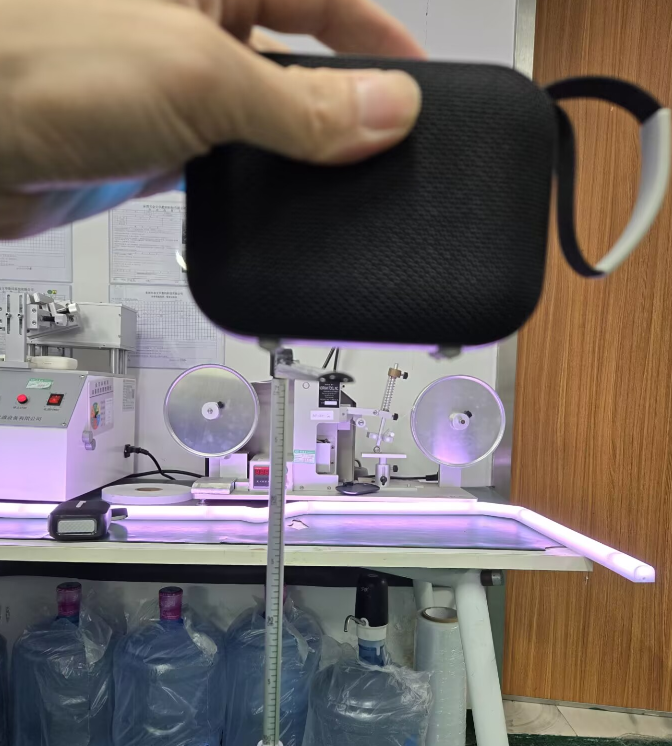
Figure 2.1-2 Drop Test Photograph
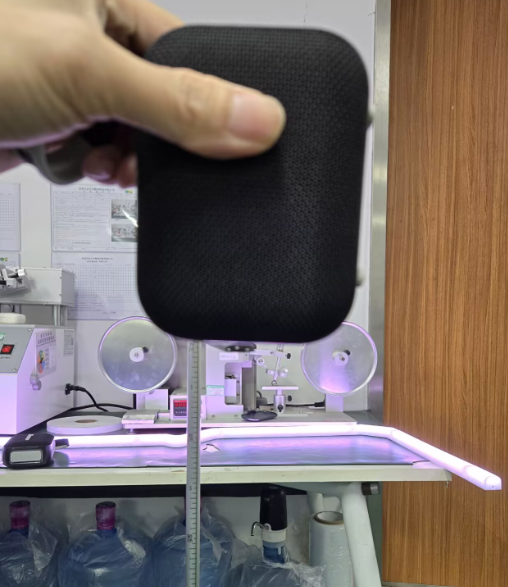
Figure 2.1-3 Drop Test Photograph
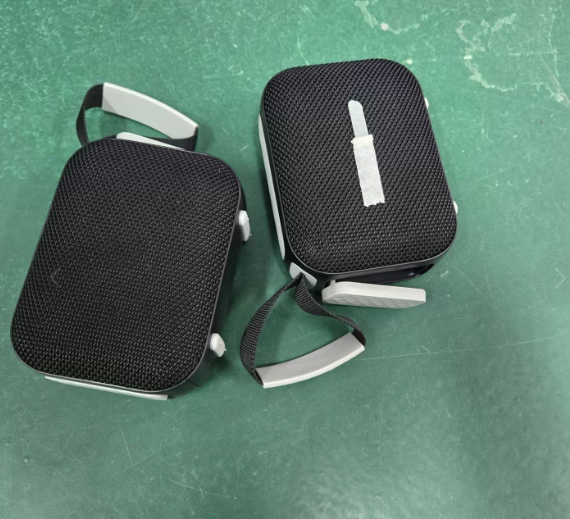
Figure 2.1-4 Drop Test Photograph
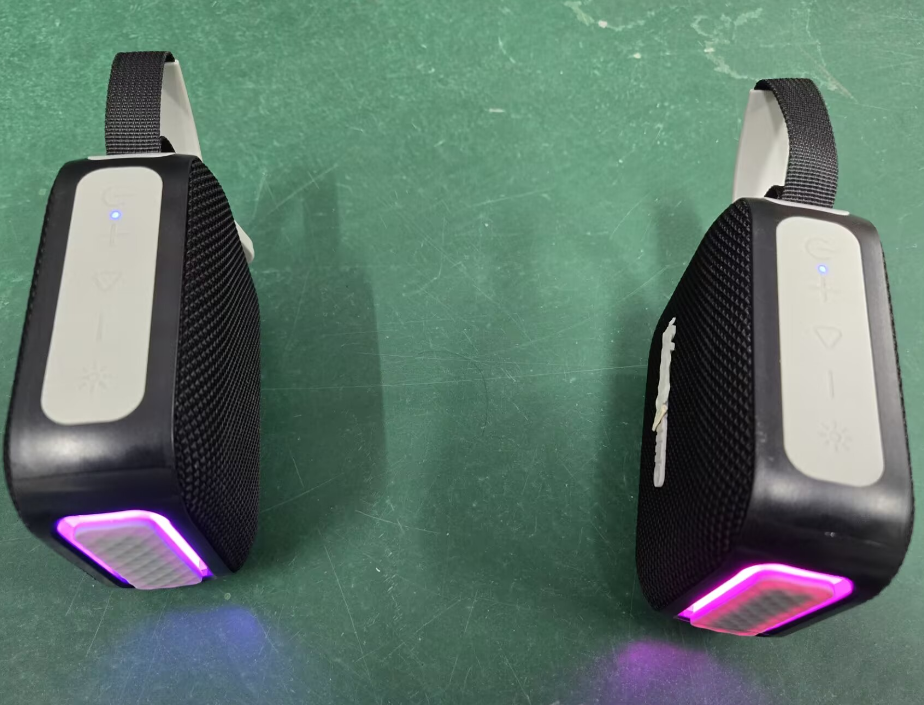
Figure 2.1-5 Drop Test Photograph
2.1.8. Preparation, Review and Approval
| Stage | Personnel | Date |
|---|---|---|
| Prepared by | Ji Zuyun | 2025.4.25 |
| Reviewed by | Lu Yuqian | 2025.4.25 |
| Approved by | — | — |
2.2. Simulated Vibration Test
2.2.1. Basic Test Information
| Item | Content |
|---|---|
| Test Category | Mechanical Reliability |
| Test Item | Simulated Vibration Test |
| Product Model | N7/N7A |
| Test Start Date | 2025.5.8 |
| Test Start Time | 2025.5.8 |
| Test Completion Time | 2025.5.8 |
| Archiving Department | Quality Department |
2.2.2. Test Conditions and Methods
-
Check that the product operates normally before testing.
-
Test at 7
50HZ with a constant amplitude of 0.8mm and at 50200HZ with a constant acceleration of 4g, for 1 hour on each X, Y and Z axis. -
The DUT must show no internal rattling or visibly loose parts, and all functions and performance must be normal. Repeat the listening test and compare with pre-test data; results should be essentially consistent.
2.2.3. Equipment and Tools
-
Test samples*2pcs
-
Wrench
-
Simulated vibration test machine.
2.2.4. Test Procedure
-
Place the packaging carton on the vibration machine and secure it with the fixture.
-
Test the second face.
-
Test the third face.
-
Turn on the power and set the vibration speed per minute. With 245/minute displayed, press Run to start.
-
Run each face for 60 minutes at a speed of 245/min.
-
Open the product carton and inspect. No loose internal parts or functional defects were found.
2.2.5. Test Results
The tested product showed no internal looseness or scratches, and functions were normal (pass).
2.2.6. Test Procedure and Result Photographs
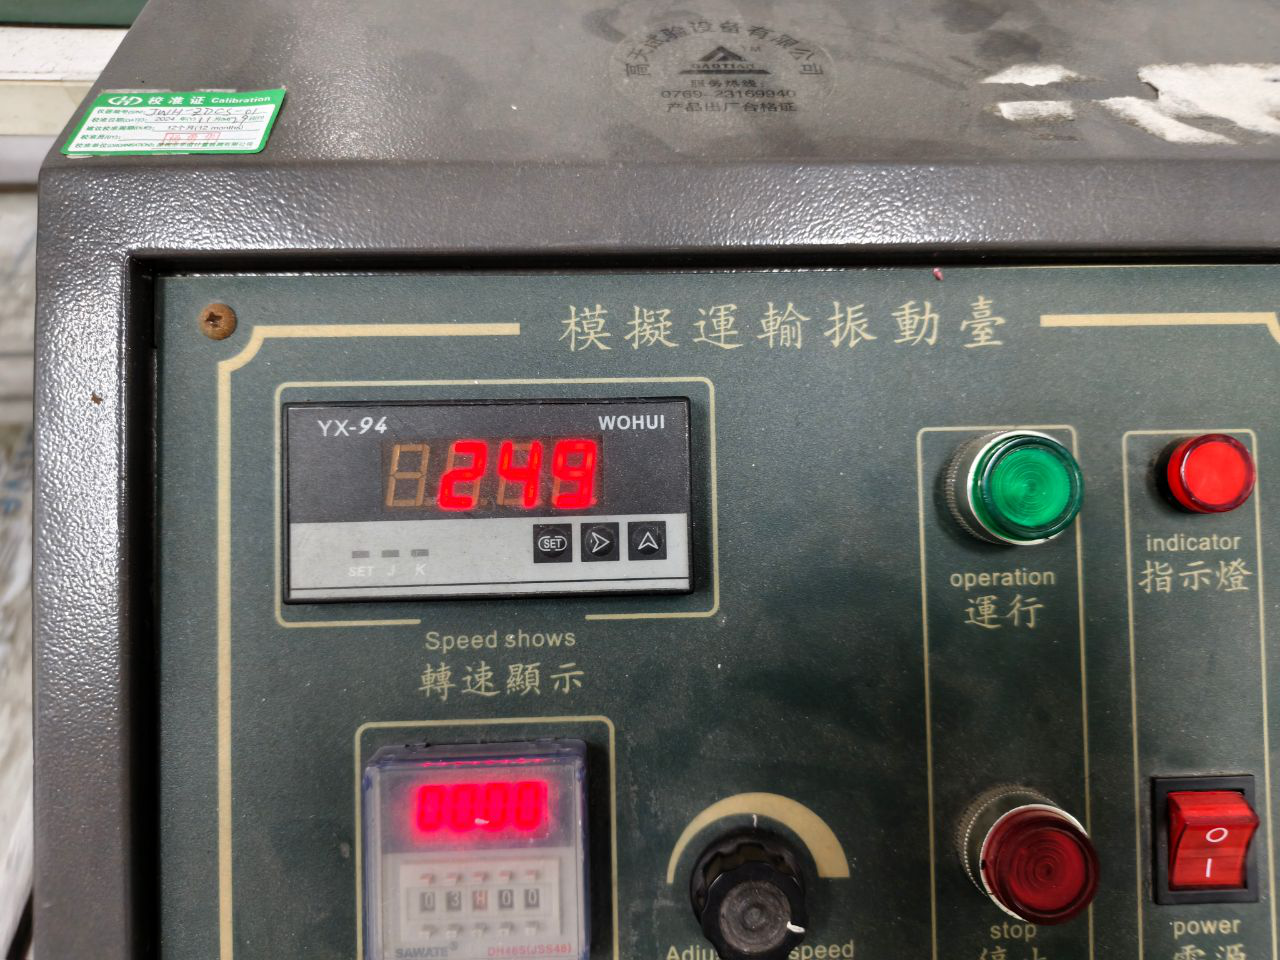
Figure 2.2-1 Unpackaged Unit Vibration Test Photograph
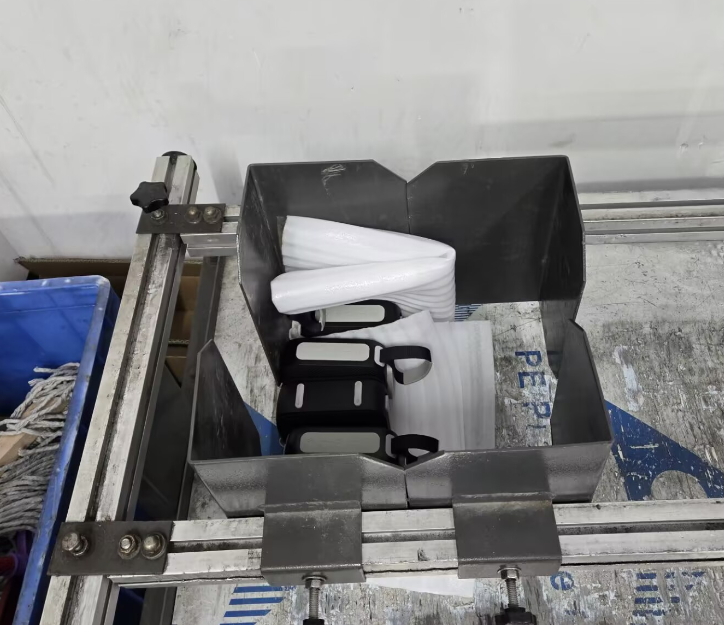
Figure 2.2-2 Unpackaged Unit Vibration Test Photograph
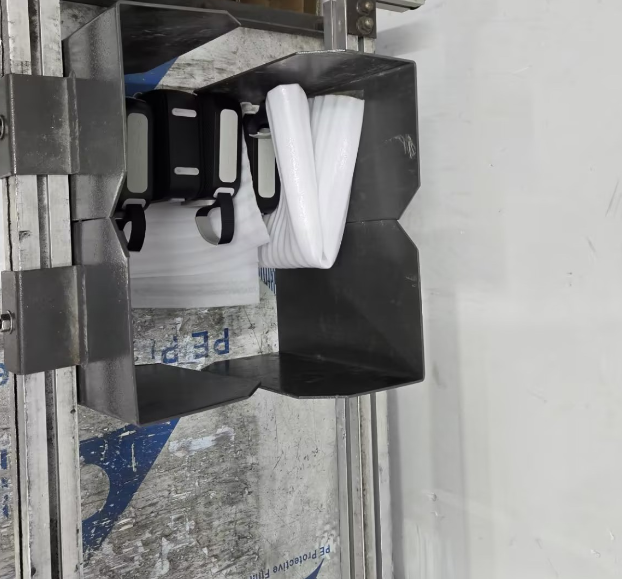
Figure 2.2-3 Unpackaged Unit Vibration Test Photograph
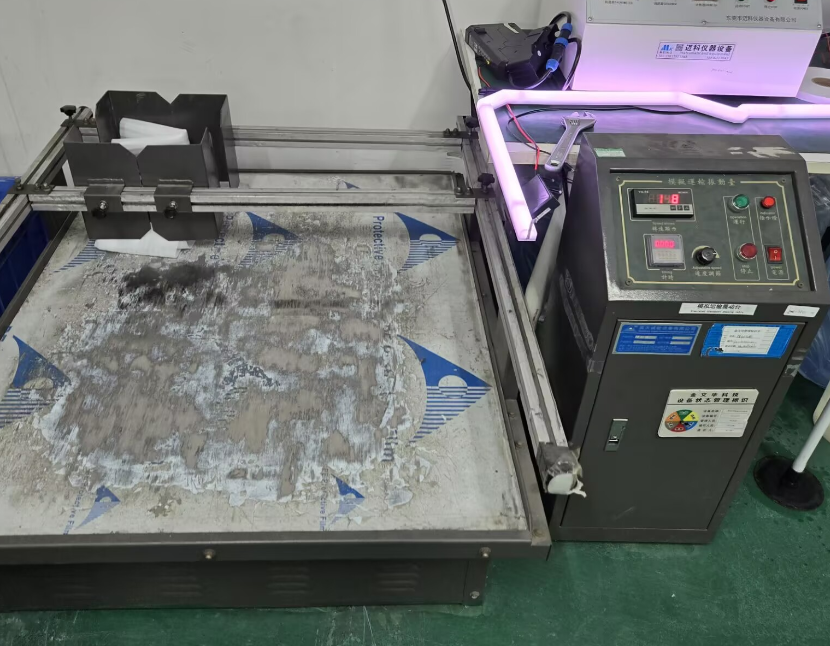
Figure 2.2-4 Unpackaged Unit Vibration Test Photograph
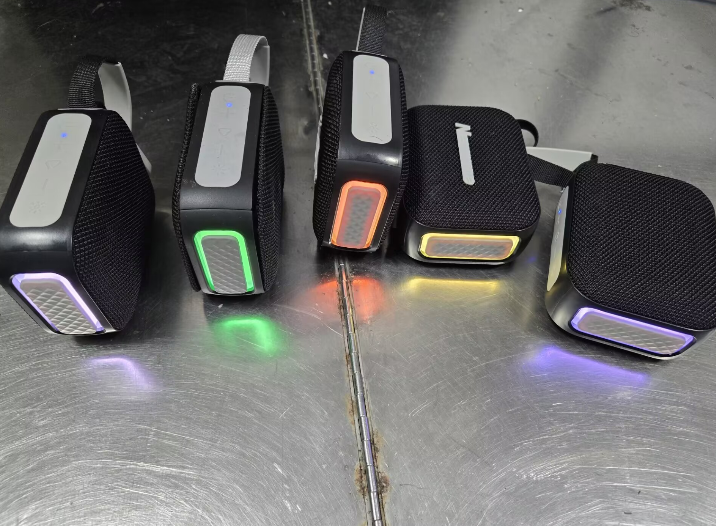
Figure 2.2-5 Unpackaged Unit Vibration Test Photograph
2.2.7. Preparation, Review and Approval
| Stage | Personnel | Date |
|---|---|---|
| Prepared by | Ji Zuyun | 2025.5.8 |
| Reviewed by | Lu Yuqian | 2025.5.8 |
| Approved by | — | — |
2.3. Button Feel
2.3.1. Basic Test Information
| Item | Content |
|---|---|
| Test Category | Mechanical Reliability |
| Test Item | Button Feel |
| Product Model | N7/N7A |
| Test Start Date | 2025.5.8 |
| Test Start Time | 2025.5.9 |
| Test Completion Time | 2025.5.9 |
| Archiving Department | Quality Department |
2.3.2. Test Conditions and Methods
-
Check that the product buttons function normally before testing.
-
Press the button vertically at 90° with the button test instrument until it actuates.
-
Use the button force tester to press the DUT button fully, without excessive pressure. Test three consecutive times, record the displayed data and judge based on the average.
2.3.3. Equipment and Tools
-
Test samples*2pcs.
-
Button force tester
2.3.4. Test Results
The measured average values were between 790-903. Button feel was good.
Button Actuation Force (unit: gf)
| Sample | Test Run | Power Button | “−” Button | Pause Button | “+” Button | Light Button |
|---|---|---|---|---|---|---|
| 1# | First Run | 790 | 790 | 800 | 850 | 880 |
| Second Run | 810 | 850 | 790 | 800 | 800 | |
| Third Run | 790 | 790 | 810 | 810 | 880 | |
| Average | 796.67 | 810 | 800 | 820 | 853.33 | |
| 2# | First Run | 900 | 860 | 900 | 900 | 900 |
| Second Run | 900 | 800 | 860 | 910 | 900 | |
| Third Run | 890 | 800 | 850 | 900 | 890 | |
| Average | 896.67 | 820 | 870 | 903.33 | 896.67 |
2.3.5. Test Procedure and Result Photographs
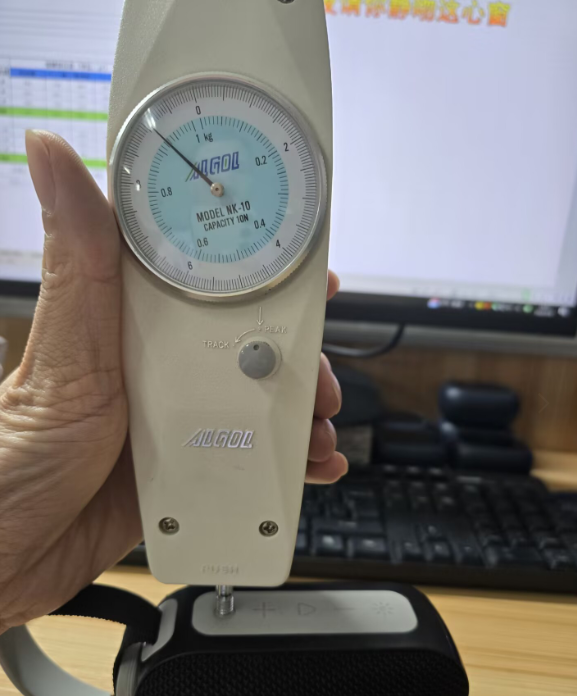
Figure 2.3-1 Button Feel Photograph
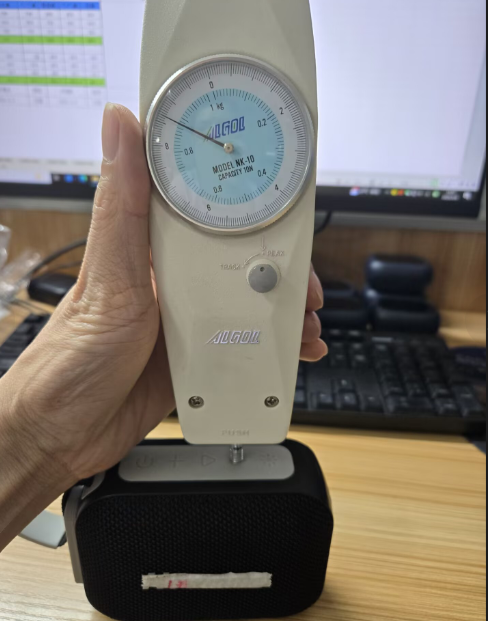
Figure 2.3-2 Button Feel Photograph
2.3.6. Preparation, Review and Approval
| Stage | Personnel | Date |
|---|---|---|
| Prepared by | Ji Zuyun | 2025.5.8 |
| Reviewed by | Lu Yuqian | 2025.5.8 |
| Approved by | — | — |
2.4. Button Life Test
2.4.1. Basic Test Information
| Item | Content |
|---|---|
| Test Category | Mechanical Reliability |
| Test Item | Button Life Test |
| Product Model | N7/N7A |
| Test Start Date | 2025.4.25 |
| Test Start Time | 2025.4.25 |
| Test Completion Time | 2025.4.27 |
| Archiving Department | Quality Department |
2.4.2. Test Conditions and Methods
-
Check that the speaker button functions and appearance are acceptable before testing.
-
Keep the sample stationary. Fit a 500g weight to the test actuator and operate at 40-60 cycles/minute; pressing and releasing counts as one cycle. Check basic functions every 10,000 cycles. Record appearance or structural damage and abnormal functions.
-
The button life requirement is 10,000 cycles.
2.4.3. Test Criteria and Records
-
After 10,000 cycles, the buttons must operate normally without poor contact or failure, with no deformation or broken plastic. Passing all functional tests constitutes a pass.
-
Reduced button elasticity is acceptable if tactile response remains and functions are normal.
-
Four products were tested for button life: 5 buttons on each product, with 10020 cycles per button.
2.4.4. Equipment and Tools
-
Test samples*4pcs
-
500g weights, 2pcs
2.4.5. Test Procedure
-
Place the product in the fixture, center it and secure it.
-
Display the speed setting, set the cycle count and press Start.
-
Button life test in progress
-
Test completed: 10020 cycles
2.4.6. Test Results
After 10,000 test cycles, each button was checked and showed no functional abnormalities (pass).
2.4.7. Test Procedure and Result Photographs
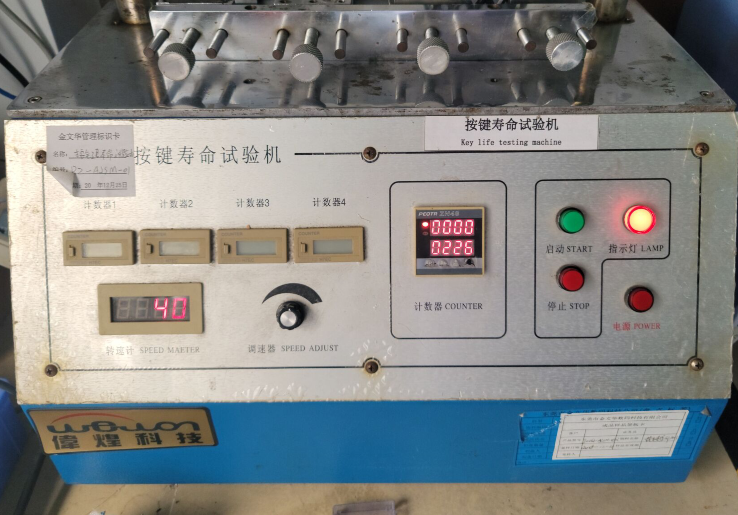
Figure 2.4-1 Button Life Photograph
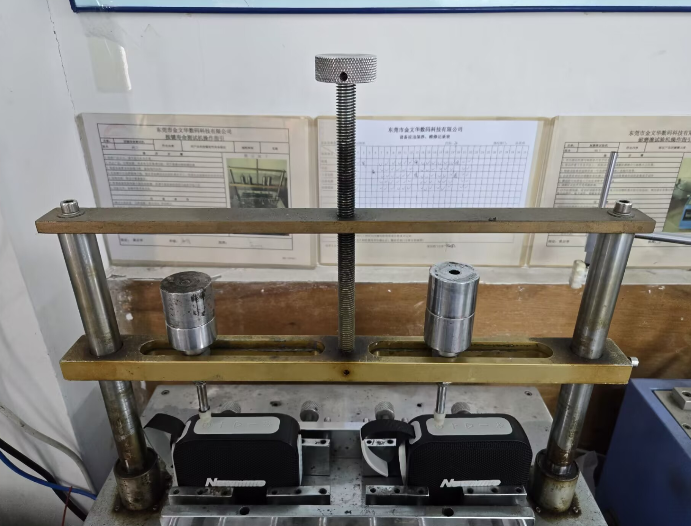
Figure 2.4-2 Button Life Photograph
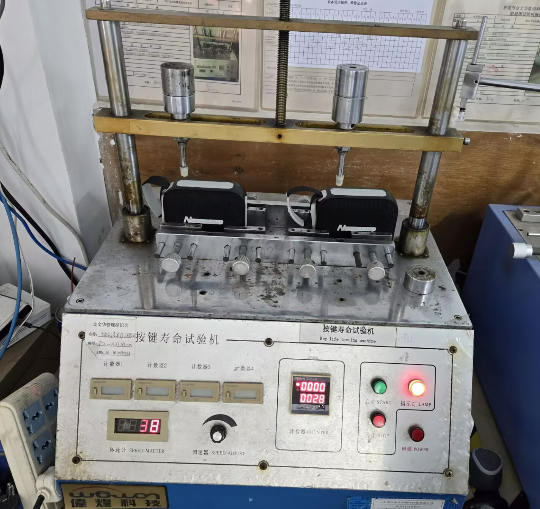
Figure 2.4-3 Button Life Photograph
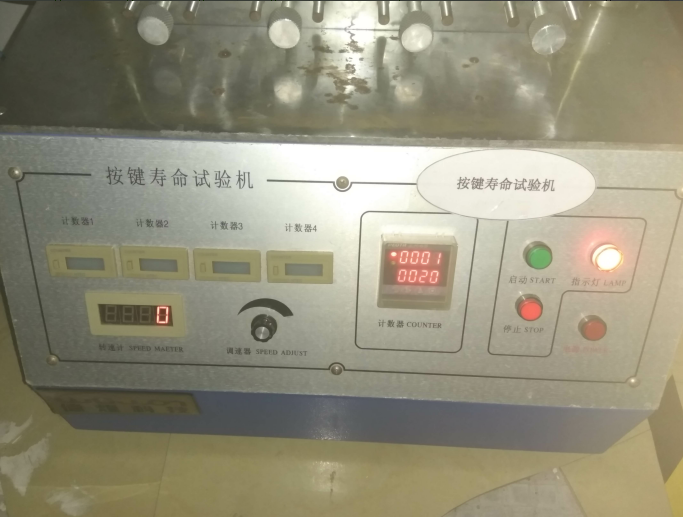
Figure 2.4-4 Button Life Photograph
2.4.8. Preparation, Review and Approval
| Stage | Personnel | Date |
|---|---|---|
| Prepared by | Ji Zuyun | 2025.4.27 |
| Reviewed by | Lu Yuqian | 2025.4.27 |
| Approved by | — | — |
2.5. 3.5/USB Insertion and Removal Test
2.5.1. Basic Test Information
| Item | Content |
|---|---|
| Test Category | Mechanical Reliability |
| Test Item | 3.5/USB Insertion and Removal Test |
| Product Model | N7/N7A |
| Test Start Date | 2024.4.25 |
| Test Start Time | 2025.4.25 |
| Test Completion Time | 2025.4.27 |
| Archiving Department | Quality Department |
2.5.2. Test Conditions and Methods
-
Check that the sample USB and 3.5 functions and appearance pass inspection.
-
Secure the product on the insertion/removal tester and align the USB plug with the USB port.
-
Perform the test at 35-45 cycles per minute.
-
Check functions and appearance every 2500 cycles during testing.
2.5.3. Test Criteria and Records
- No functional or appearance abnormalities after 5000 cycles constitutes a pass.
2.5.4. Equipment and Tools
-
Microcomputer-controlled insertion/removal force tester
-
Test units*3pcs
-
USB data cable*1pcs
2.5.5. Test Procedure
-
Place the product in the fixture, center it and secure it.
-
Set the parameters and press Start.
-
Photograph of the test in progress
-
Test completed: 5020 cycles
2.5.6. Test Results
- After 5000 test cycles, no functional or appearance abnormalities at the USB port constitutes a pass.
2.5.7. Test Procedure and Result Photographs
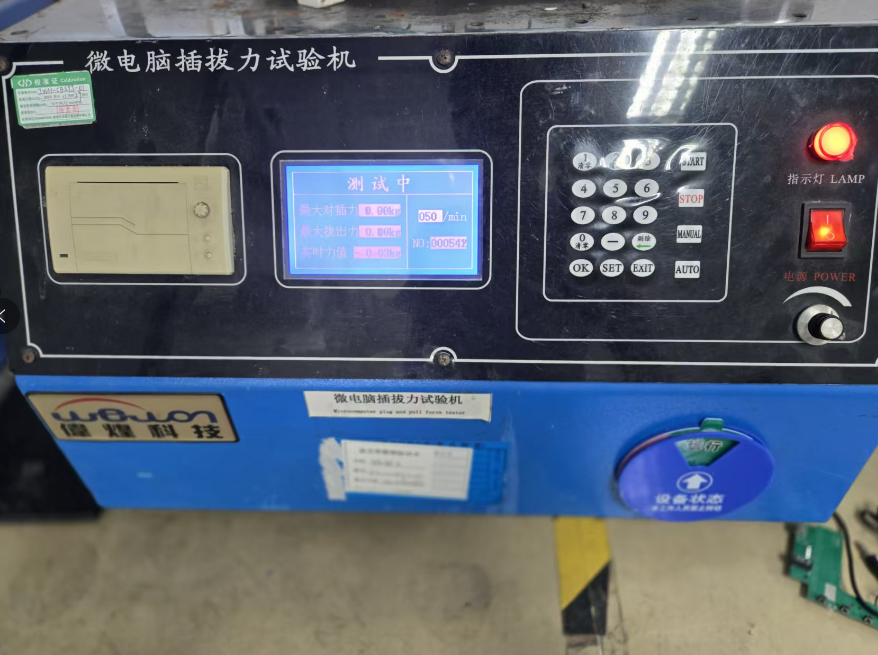
Figure 2.5-1 Connector Insertion/Removal Force and Life Test Photograph
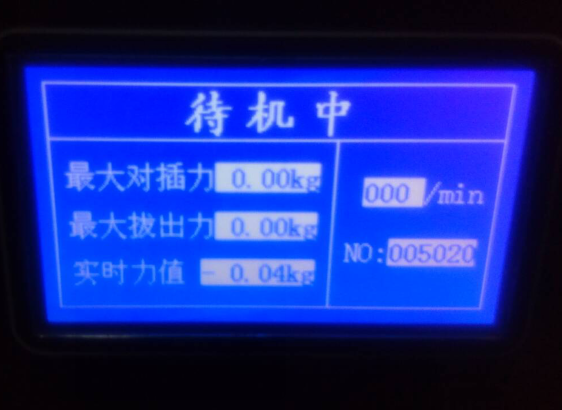
Figure 2.5-2 Connector Insertion/Removal Force and Life Test Photograph
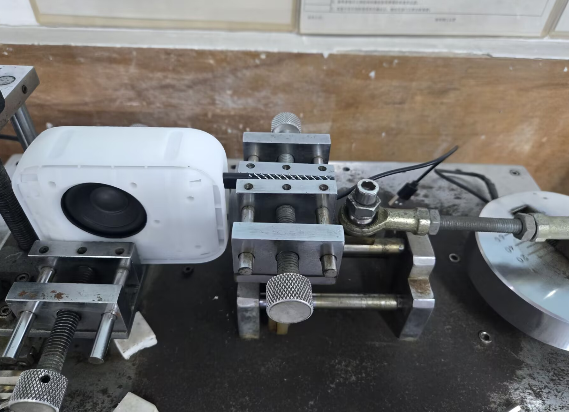
Figure 2.5-3 Connector Insertion/Removal Force and Life Test Photograph
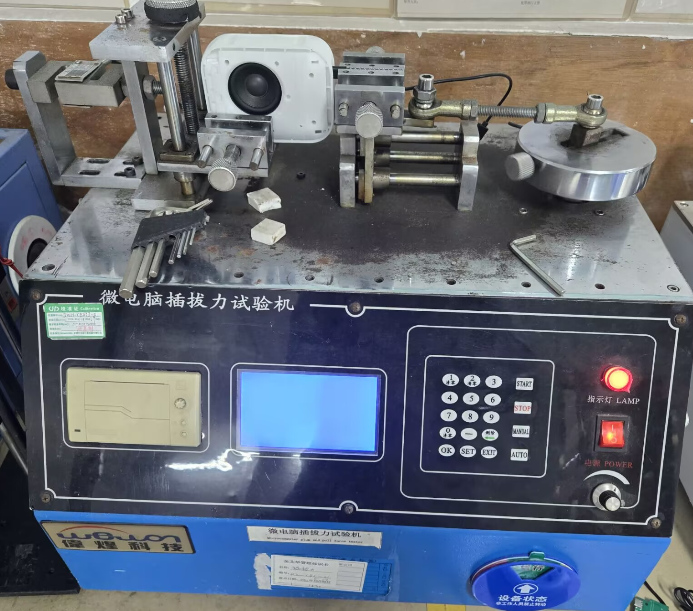
Figure 2.5-4 Connector Insertion/Removal Force and Life Test Photograph
2.5.8. Preparation, Review and Approval
| Stage | Personnel | Date |
|---|---|---|
| Prepared by | Ji Zuyun | 2025.4.27 |
| Reviewed by | Lu Yuqian | 2025.4.27 |
| Approved by | — | — |
2.6. USB-AUX Silicone Cover Pull Test
2.6.1. Basic Test Information
| Item | Content |
|---|---|
| Test Category | Mechanical Reliability |
| Test Item | USB-AUX Silicone Cover Pull Test |
| Product Model | N7/N7A |
| Test Start Date | 2025.4.25 |
| Test Start Time | 2025.4.25 |
| Test Completion Time | 2025.4.25 |
| Archiving Department | Quality Department |
2.6.2. Test Conditions and Methods
-
Check that the product silicone cover functions and appearance pass inspection.
-
Open the silicone cover and apply a vertical pull of 2.5KG with a push-pull gauge, holding steadily for 60 seconds.
2.6.3. Test Criteria and Records
- Apply a vertical pull of 2.5KG with the push-pull gauge for 60 seconds. No breakage, detachment or damage to the silicone cover constitutes a pass.
2.6.4. Equipment and Tools
-
Test samples*3pcs.
-
Push-pull gauge*1pcs.
2.6.5. Test Procedure
-
USB pull test photograph
-
Apply a test force ≥2.5kg vertically and hold steadily for 60 seconds.
2.6.6. Test Results
The product USB silicone cover passed a vertical 2.5KG pull held steadily for 60 seconds. The USB cover broke at approximately 3-4KG.
2.6.7. Test Procedure and Result Photographs
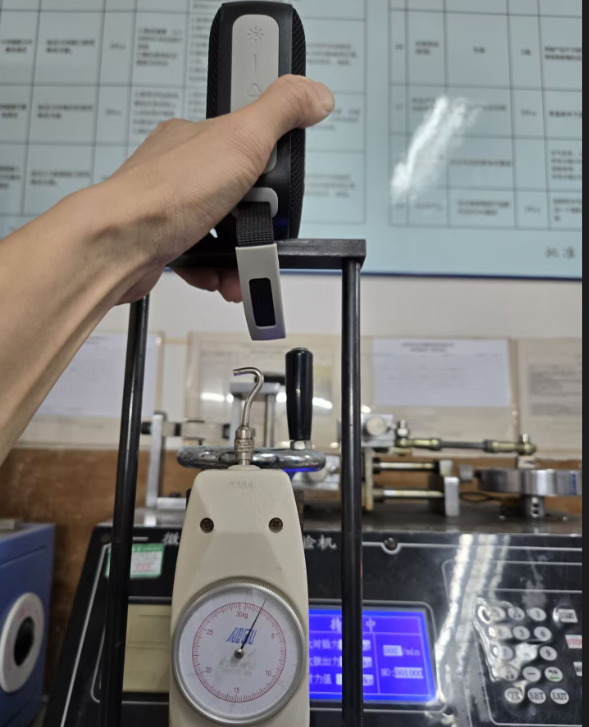
Figure 2.6-1 USB Port Cover Pull Test Photograph
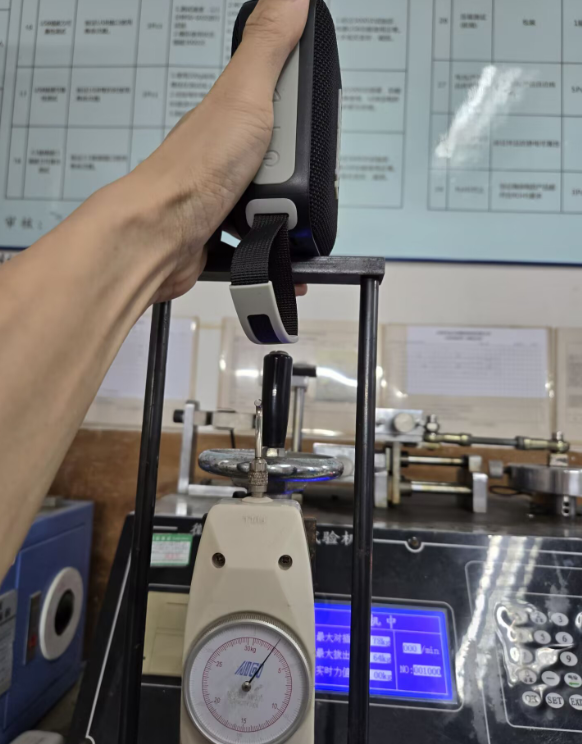
Figure 2.6-2 USB Port Cover Pull Test Photograph
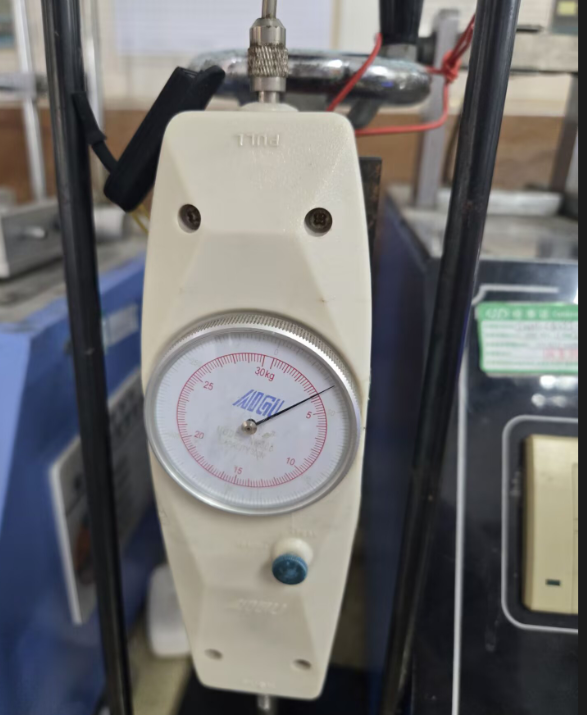
Figure 2.6-3 USB Port Cover Pull Test Photograph
2.6.8. Preparation, Review and Approval
| Stage | Personnel | Date |
|---|---|---|
| Prepared by | Ji Zuyun | 2025.4.25 |
| Reviewed by | Lu Yuqian | 2025.4.25 |
| Approved by | — | — |
2.7. Hanging Load Test
2.7.1. Basic Test Information
| Item | Content |
|---|---|
| Test Category | Mechanical Reliability |
| Test Item | Hanging Load Test |
| Product Model | N7/N7A |
| Test Start Date | 2025.5.5 |
| Test Start Time | 2025.5.5 |
| Test Completion Time | 2025.5.9 |
| Archiving Department | Quality Department |
2.7.2. Test Conditions and Methods
-
Perform testing after the product passes a visual inspection.
-
Product weight: 310g. The hanging load is 3 times the product weight, or 930G.
-
Ambient conditions: 26℃, 50%RH.
-
Duration time: 96hrs. Duration: 96 hours. Apply a vertical hanging load for 96 hours.
2.7.3. Test Criteria and Records
- Requirement: approximately 930G weight for 96 hours. No detachment after the hanging load test constitutes a pass.
2.7.4. Equipment and Tools
- Test samples*2pcs
2.7.5. Test Procedure
-
Product weight: 310g
-
Apply a vertical hanging load using a 2KG weight for 96 hours.
2.7.6. Test Results
In this test, a 2KG weight, 6.5 times the product weight, was suspended vertically for 96 hours. The handle did not detach. Considered a pass.
2.7.7. Test Procedure and Result Photographs
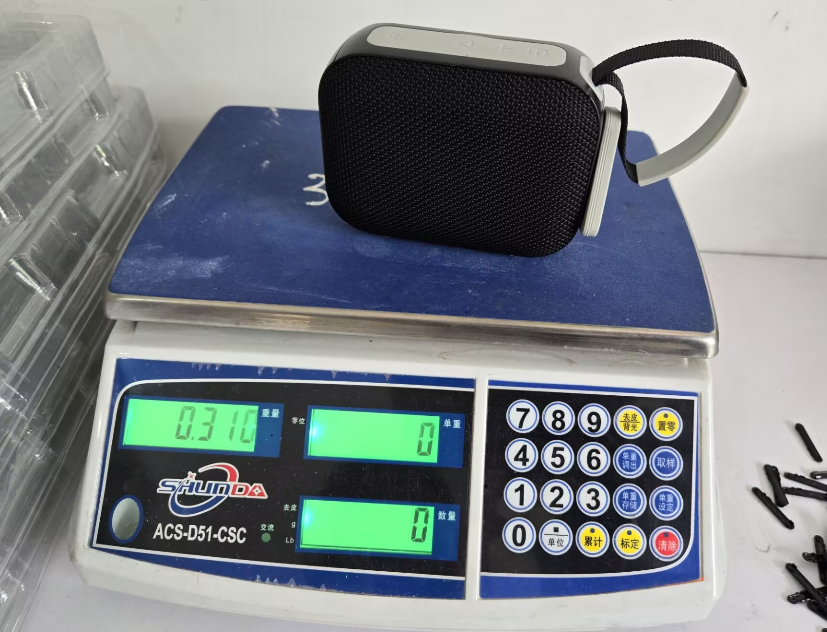
Figure 2.7-1 Handle Hanging Load Test Photograph
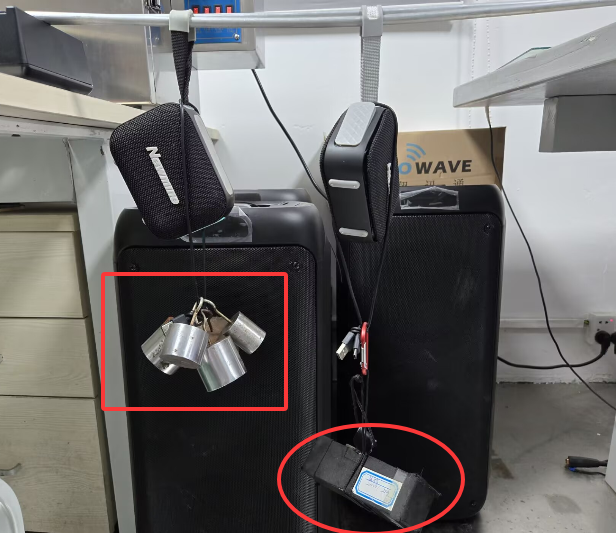
Figure 2.7-2 Handle Hanging Load Test Photograph
2.7.8. Preparation, Review and Approval
| Stage | Personnel | Date |
|---|---|---|
| Prepared by | Ji Zuyun | 2025.5.9 |
| Reviewed by | Lu Yuqian | 2025.5.9 |
| Approved by | — | — |
2.8. Water Resistance Test
2.8.1. Basic Test Information
| Item | Content |
|---|---|
| Test Category | Mechanical Reliability |
| Test Item | Water Resistance Test |
| Product Model | N7/N7A |
| Test Start Date | 2025.5.6 |
| Test Start Time | 2025.5.6 |
| Test Completion Time | 2025.5.6 |
| Archiving Department | Quality Department |
2.8.2. Test Conditions and Methods
-
The product structure has a level-five water resistance rating.
-
Check that the speaker appearance, functions and housing seal are acceptable before testing.
-
Place the product in a clean area. Set the shower head to maximum flow and spray the product directly from different directions for 10 minutes, then remove the product and open the housing to check for water ingress.
2.8.3. Test Criteria and Records
- Set the shower head to maximum flow and spray the product directly from different directions for 10 minutes. Remove the product and open the housing; no water ingress constitutes a pass.
2.8.4. Equipment and Tools
-
Test samples*5pcs
-
Shower head
2.8.5. Test Procedure
-
Place the product in a clean area.
-
Spray the product directly with the shower head for 10 minutes.
2.8.6. Test Results
After the water resistance test, the housing was opened and no water ingress was found inside. Considered a pass.
2.8.7. Test Procedure and Result Photographs
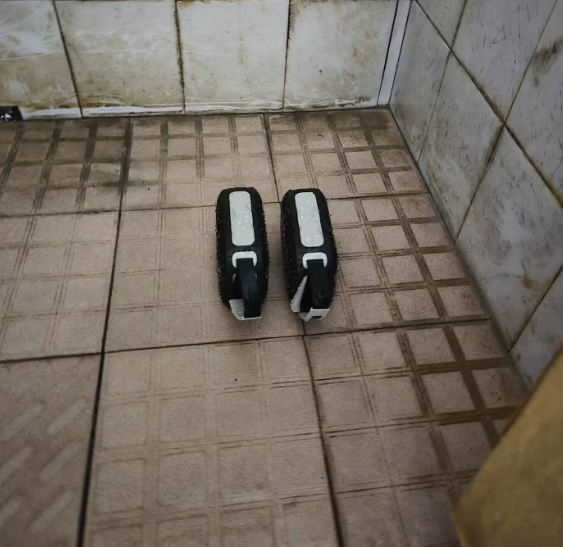
Figure 2.8-1 Water Resistance Test Photograph
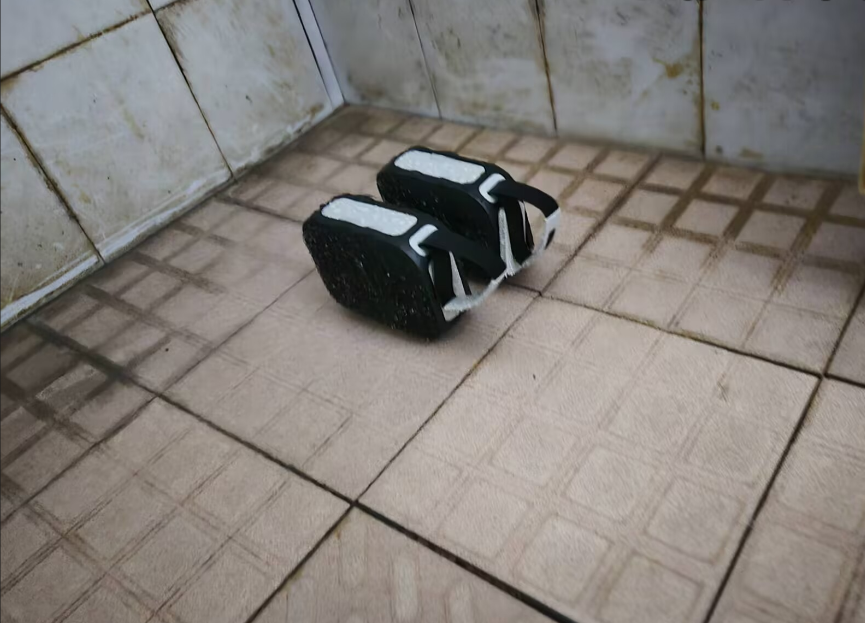
Figure 2.8-2 Water Resistance Test Photograph
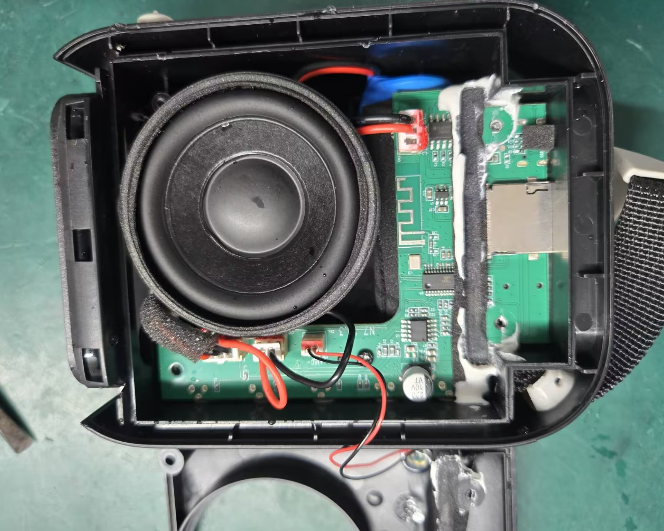
Figure 2.8-3 Water Resistance Test Photograph
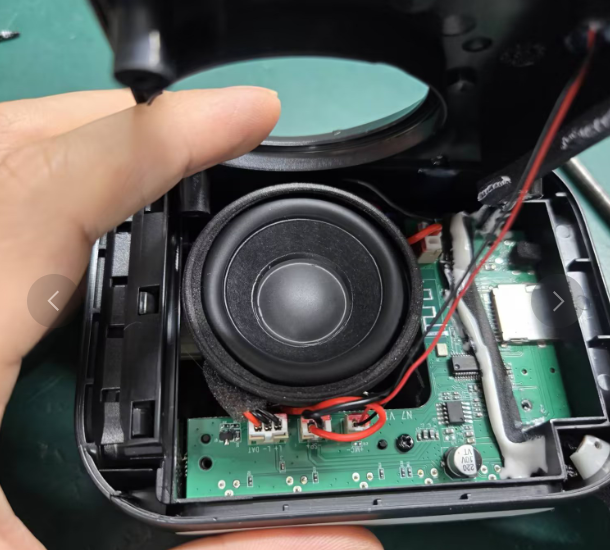
Figure 2.8-4 Water Resistance Test Photograph
2.8.8. Preparation, Review and Approval
| Stage | Personnel | Date |
|---|---|---|
| Prepared by | Ji Zuyun | 2025.5.6 |
| Reviewed by | Lu Yuqian | 2025.5.6 |
| Approved by | — | — |
3. EMC
3.1. ESD Test
3.1.1. Basic Test Information
| Item | Content |
|---|---|
| Test Category | EMC |
| Test Item | ESD Test |
| Product Model | N7/N7A |
| Test Start Date | 2025.4.29 |
| Test Start Time | 2025.4.29 |
| Test Completion Time | 2025.4.29 |
| Archiving Department | Quality Department |
3.1.2. Test Conditions and Methods
-
Connect the product to a phone over Bluetooth, play music, set up the equipment and begin testing.
-
Contact ESD: ±4KV (exposed metal parts). Apply 10 discharges to the USB contact of each product.
-
Air ESD: ±8KV (buttons, gaps, etc.). Apply 10 discharges to different points on each product’s plastic surface.
-
Keep the product operating during testing.
3.1.3. Test Criteria and Records
Normal operation without automatic shutdown or damage throughout testing and at completion constitutes a pass.
3.1.4. Equipment and Tools
-
Test samples*3pcs
-
BACL Laboratory
-
Mobile phone
3.1.5. Test Procedure
-
Contact ESD: ±4KV test photograph
-
Air ESD: ±8KV test photograph
3.1.6. Test Results
Testing showed that the product met the ESD requirements and operated normally during the test; the product passed.
3.1.7. Test Procedure and Result Photographs
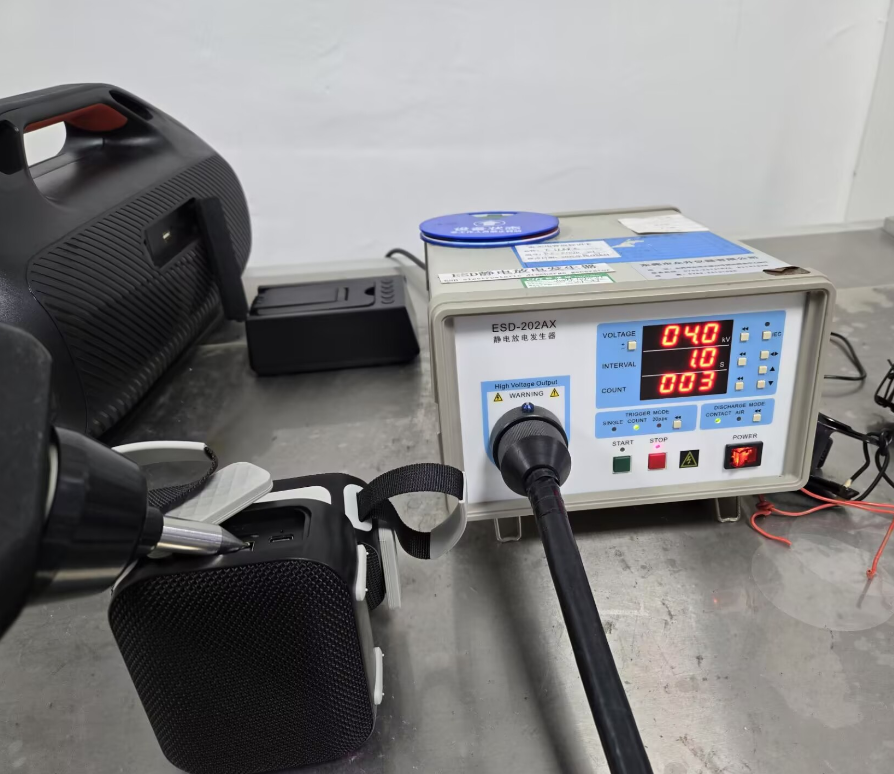
Figure 3.1-1 ESD (Electrostatic Discharge Immunity) Photograph
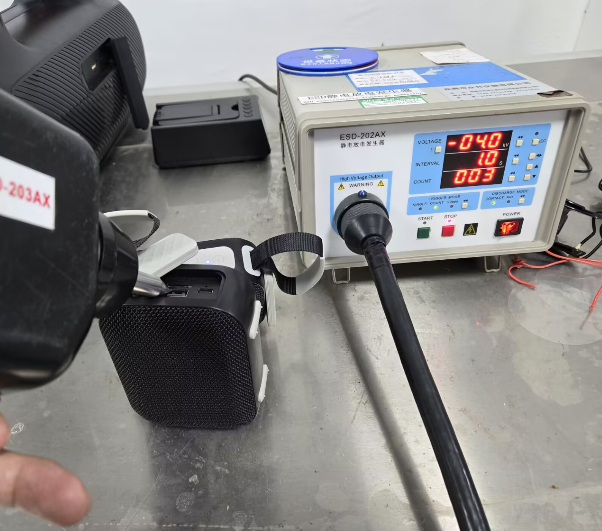
Figure 3.1-2 ESD (Electrostatic Discharge Immunity) Photograph
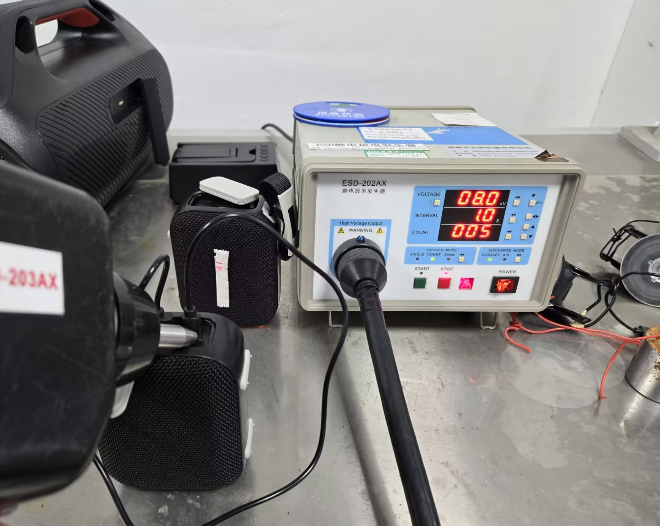
Figure 3.1-3 ESD (Electrostatic Discharge Immunity) Photograph
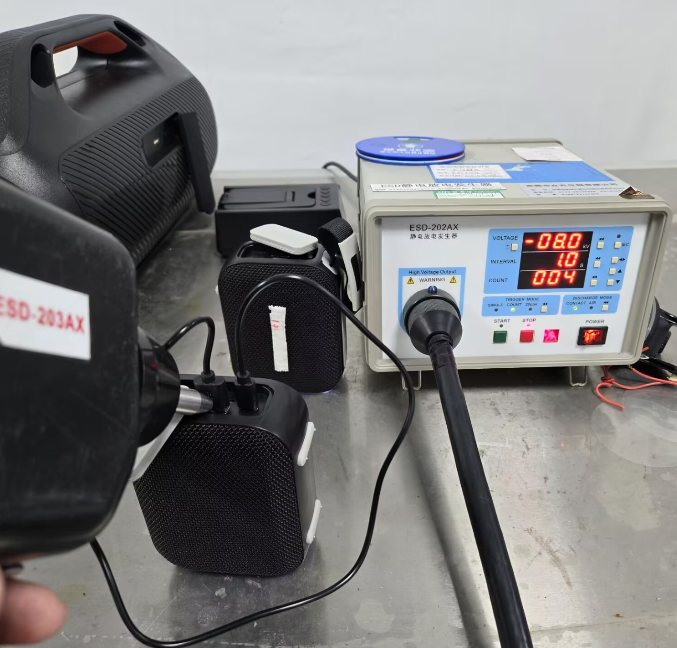
Figure 3.1-4 ESD (Electrostatic Discharge Immunity) Photograph
3.1.8. Preparation, Review and Approval
| Stage | Personnel | Date |
|---|---|---|
| Prepared by | Ji Zuyun | 2025.4.29 |
| Reviewed by | Lu Yuqian | 2025.4.29 |
| Approved by | — | — |
4. Electrical Performance Tests
4.1. Uniqueness Test
4.1.1. Basic Test Information
| Item | Content |
|---|---|
| Test Category | Electrical Performance Tests |
| Test Item | Uniqueness Test |
| Product Model | N7/N7A |
| Test Start Date | 2025.5.19 |
| Test Start Time | 2025.5.19 |
| Test Completion Time | 2025.5.19 |
| Archiving Department | Quality Department |
4.1.2. Test Conditions and Methods
-
Pair the phone and product over Bluetooth and play music.
-
Simulate actual use by placing three or more units in the same test area, approximately 0.5M apart. Each set of samples must operate normally without crosstalk or mutual interference.
4.1.3. Test Criteria and Records
Normal appearance, functions and performance throughout testing and at completion constitute a pass.
4.1.4. Equipment and Tools
-
Test samples*3pcs
-
BACL Laboratory
-
Mobile phone
4.1.5. Test Results
Testing showed that the product met the interference immunity requirements and operated normally during the test; the product passed.
4.1.6. Test Procedure and Result Photographs
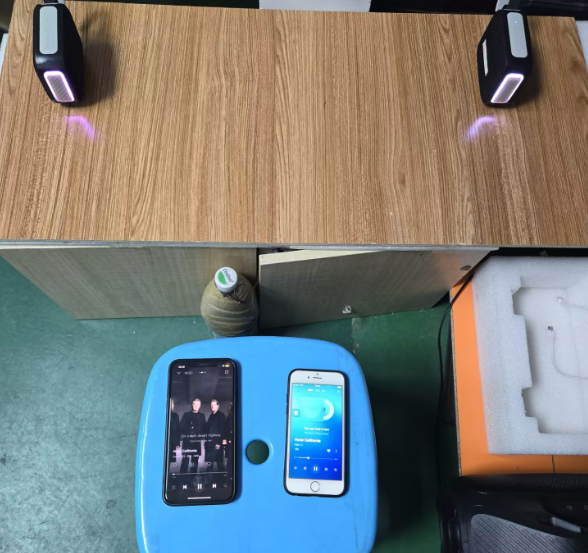
Figure 4.1-1 Uniqueness Test Photograph
4.1.7. Preparation, Review and Approval
| Stage | Personnel | Date |
|---|---|---|
| Prepared by | Ji Zuyun | 2025.5.19 |
| Reviewed by | Lu Yuqian | 2025.5.19 |
| Approved by | — | — |
4.2. Bluetooth Range
4.2.1. Basic Test Information
| Item | Content |
|---|---|
| Test Category | Electrical Performance Tests |
| Test Item | Bluetooth Range |
| Product Model | N7/N7A |
| Test Start Date | 2025.4.25 |
| Test Start Time | 2025.5.5 |
| Test Completion Time | 2025.5.5 |
| Archiving Department | Quality Department |
4.2.2. Test Conditions and Methods
-
Pair the phone and product over Bluetooth, play music and slowly move away starting at 1 meter.
-
Observe changes in the product while moving, and record the distance at which changes begin.
-
Record the distance at which Bluetooth can be switched off and reconnected.
-
This test used iphone8P, Samsung S24+ and Huawei Enjoy 20pro phones.
4.2.3. Test Criteria and Records
-
During testing, music playback and calls must operate normally at ≥15 meters, without audio dropouts or Bluetooth disconnection.
-
During testing, Bluetooth must be able to be switched off and reconnected at ≥15 meters.
4.2.4. Equipment and Tools
-
Test samples*3pcs
-
Bluetooth mobile phone devices*3pcs.
4.2.5. Test Results
| Test Phone Model | Test Round | Light Button |
|---|---|---|
| Apple 8P | 1 | Playback, switching off and reconnection were normal from 0 meters to 23 meters. Bluetooth range: 24 meters. |
| 2 | Playback, switching off and reconnection were normal from 0 meters to 25 meters. Bluetooth range: 25 meters. | |
| 3 | Playback, switching off and reconnection were normal from 0 meters to 25 meters. Bluetooth range: 25 meters. | |
| Samsung S24+ | 1 | Playback, switching off and reconnection were normal from 0 meters to 16 meters. Bluetooth range: 16 meters. |
| 2 | Playback, switching off and reconnection were normal from 0 meters to 18 meters. Bluetooth range: 18 meters. | |
| 3 | Playback, switching off and reconnection were normal from 0 meters to 16 meters. Bluetooth range: 16 meters. | |
| Huawei Enjoy 20pro | 1 | Playback, switching off and reconnection were normal from 0 meters to 14 meters. Bluetooth range: 14 meters. |
| 2 | Playback, switching off and reconnection were normal from 0 meters to 16 meters. Bluetooth range: 16 meters. | |
| 3 | Playback, switching off and reconnection were normal from 0 meters to 15 meters. Bluetooth range: 15 meters. |
4.2.6. Test Procedure and Result Photographs
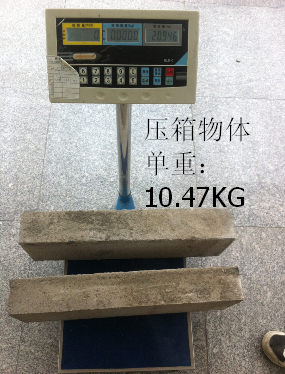
Figure 4.2-1 Bluetooth Range Photograph
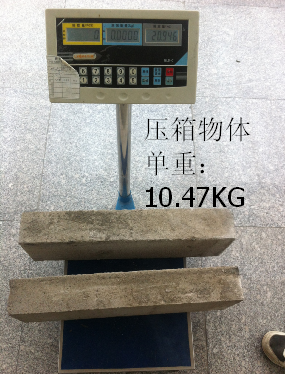
Figure 4.2-2 Bluetooth Range Photograph
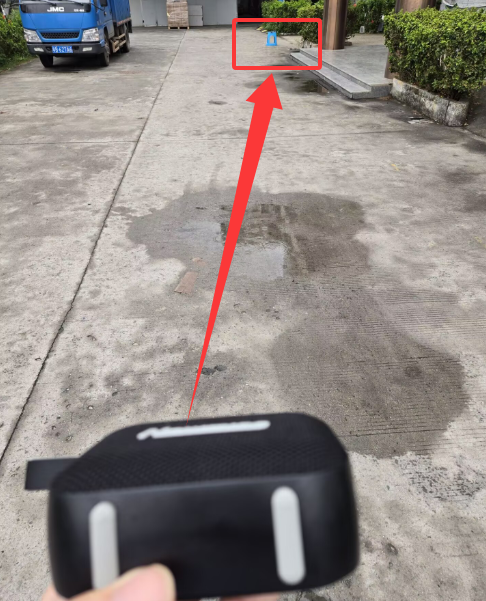
Figure 4.2-3 Bluetooth Range Photograph
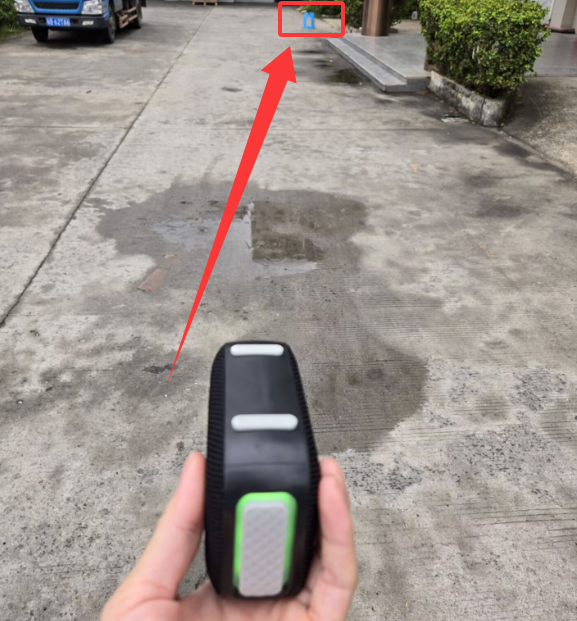
Figure 4.2-4 Bluetooth Range Photograph
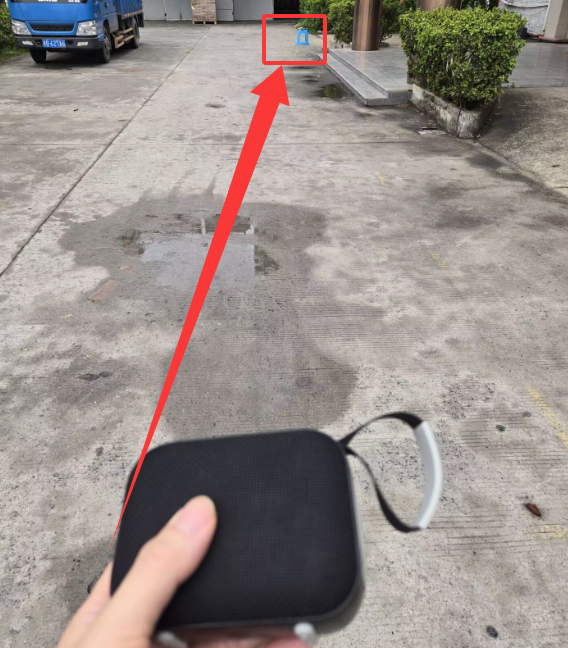
Figure 4.2-5 Bluetooth Range Photograph
4.2.7. Preparation, Review and Approval
| Stage | Personnel | Date |
|---|---|---|
| Prepared by | Ji Zuyun | 2025.4.25 |
| Reviewed by | Lu Yuqian | 2025.4.25 |
| Approved by | — | — |
4.3. BT Music Playback Time Test
4.3.1. Basic Test Information
| Item | Content |
|---|---|
| Test Category | Electrical Performance Tests |
| Test Item | BT Music Playback Time Test |
| Product Model | N7A |
| Test Start Date | 2025.12.20 |
| Test Start Time | 2025.12.20 |
| Test Completion Time | 2025.12.24 |
| Archiving Department | Quality Department |
| Requesting Department | Business Department |
| Test Stage | PV |
| Test Equipment | Phone/ipad |
| Test Track | Hotel California |
| Battery Capacity | 18650/3.7V/1800MAH |
| Test Quantity | 4pcs |
| Ambient Test Temperature | 25℃ |
| Test Purpose | Verify Battery Playback Time |
4.3.2. Test Conditions and Methods
-
Fully charge the test sample. An illuminated charging indicator means charging is in progress; the red charging LED turning off means the battery is fully charged.
-
Turn on the product and phone Bluetooth, connect to the product, select single-track playback, and set synchronized phone and product volume to 100%/50%.
-
Continue until a low-battery warning or automatic shutdown, and record the start and completion times.
4.3.3. Test Criteria and Records
Test times with synchronized phone and product volume at 100% (16 volume steps) are as follows:
| No. | Start Date and Time | End Date and Time | Track Title | Test Equipment | Actual Requirement (H) | Product Lighting | Remarks |
|---|---|---|---|---|---|---|---|
| 3# | 12.20 10:00 | 12.21 13:48 | Hotel California | iPhone6 | 3H48min | Lights On | C27 Speaker Driver (Black) |
| 4# | 12.20 10:00 | 12.21 13:40 | iPhone6 | 3H40min | Lights On | ||
| 3# | 12.23 20:00 | 12.23 23:45 | Hotel California | iPhone6 | 3H45min | Lights On | C27 Speaker Driver (Black) |
| 4# | 12.23 20:00 | 12.23 23:42 | iPhone6 | 3H42min | Lights On | ||
| 3# | 12.24 11:00 | 12.24 15:38 | Hotel California | iPhone6 | 4H38min | Lights On | N7 Speaker Driver (Blue) |
| 4# | 12.24 11:00 | 12.24 15:44 | iPhone6 | 4H44min | Lights On |
Test times with synchronized phone and product volume at 50% (8 volume steps) are as follows:
| No. | Start Date and Time | End Date and Time | Track Title | Test Equipment | Actual Requirement (H) | Product Lighting | Remarks |
|---|---|---|---|---|---|---|---|
| 1# | 12.20 10:00 | 12.21 21:22 | Hotel California | iPhone6 | 11H22min | Lights On | N7 Speaker Driver (Blue) |
| 2# | 12.20 10:00 | 12.21 21:30 | iPhone6 | 11H30min | Lights On |
4.3.4. Equipment and Tools
- Mobile phones*3pcs.
4.3.5. Test Procedure
-
Connect the product to phone Bluetooth and place it on the burn-in rack for playback.
-
Phone playback in progress.
4.3.6. Test Results
Measured playback time with lights on at 50% (8 steps) volume: ≥11H. Playback time at 100% (16 steps) volume: ≥3.5H.
4.3.7. Test Procedure and Result Photographs
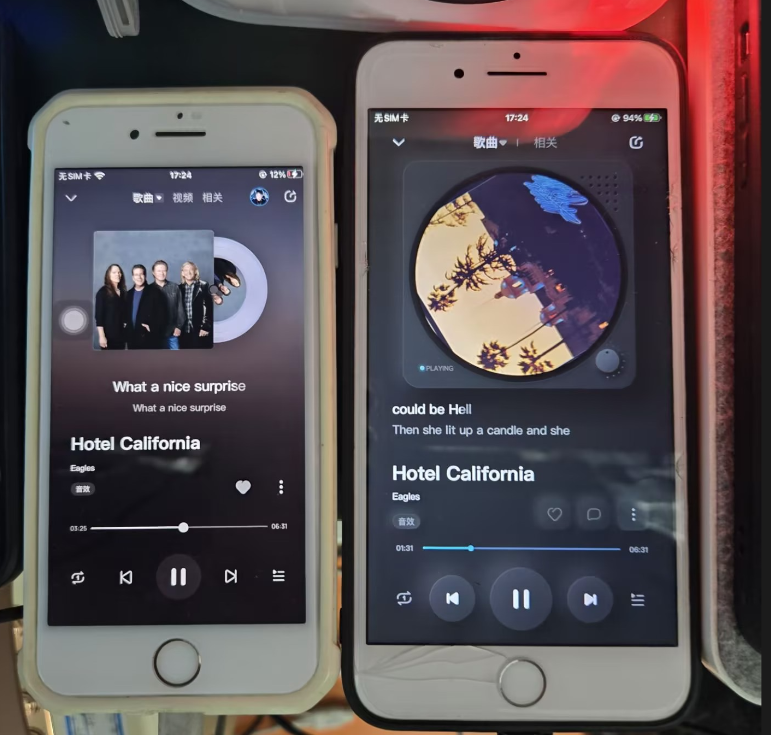
Figure 4.4-1 N7A BT Music Playback Time Test Photograph
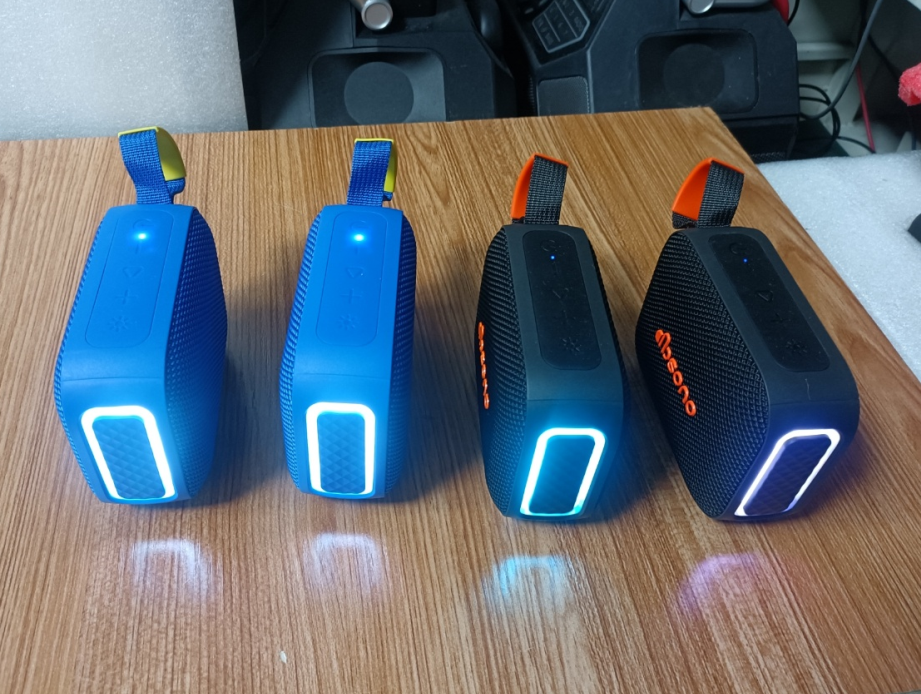
Figure 4.4-2 N7A BT Music Playback Time Test Photograph
4.3.8. Preparation, Review and Approval
| Stage | Personnel | Date |
|---|---|---|
| Prepared by | Ji Zuyun | — |
| Reviewed by | — | — |
| Approved by | — | — |
4.4. Charging Time Test
4.4.1. Basic Test Information
| Item | Content |
|---|---|
| Test Category | Electrical Performance Tests |
| Test Item | Charging Time Test |
| Product Model | N7/N7A |
| Test Start Date | 2025.4.26 |
| Test Start Time | 2025.4.26 |
| Test Completion Time | 2025.4.26 |
| Archiving Department | Quality Department |
| Requesting Department | R&D Department |
| Test Stage | PV |
| Test Equipment | Charging Adapter |
| Battery Capacity | 3.7V/1800MAH |
| Test Quantity | 3pcs |
| Ambient Test Temperature | 28℃ |
| Test Purpose | Verify Product Charging Time |
4.4.2. Test Conditions and Methods
-
Discharge the product until automatic shutdown.
-
Connect the power cable to the power socket to charge the product.
-
Check whether the red charging indicator is on. On indicates charging; the red charging LED turning off indicates a fully charged battery.
4.4.3. Test Criteria and Records
- The charging test times are as follows:
| No. | Start Date and Time | End Date and Time | Adapter | Actual Requirement (H) | Product State |
|---|---|---|---|---|---|
| 1# | 4.26 9:00 | 4.26 12:23 | 5V2A | 3H32 min | Tested Powered Off |
| 2# | 4.26 9:00 | 4.26 12:28 | 5V2A | 3H21 min | Tested Powered Off |
| 3# | 4.26 9:00 | 4.26 12:29 | 5V2A | 3H29 min | Tested Powered Off |
4.4.4. Equipment and Tools
-
5V/2A charging adapters.*2pcs
-
USB charging cables*2pcs
4.4.5. Test Procedure
-
The LED is red during the charging test.
-
The red charging LED turns off when the battery is fully charged.
-
Charging curve
4.4.6. Test Procedure and Result Photographs
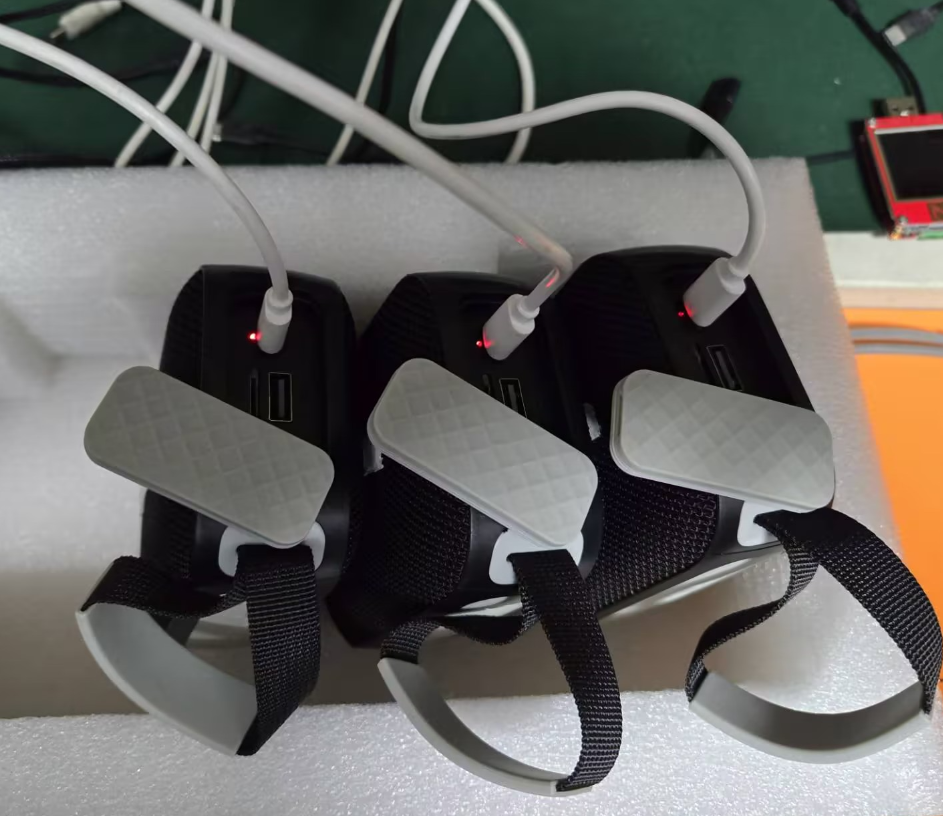
Figure 4.5-1 Charging Duration Photograph
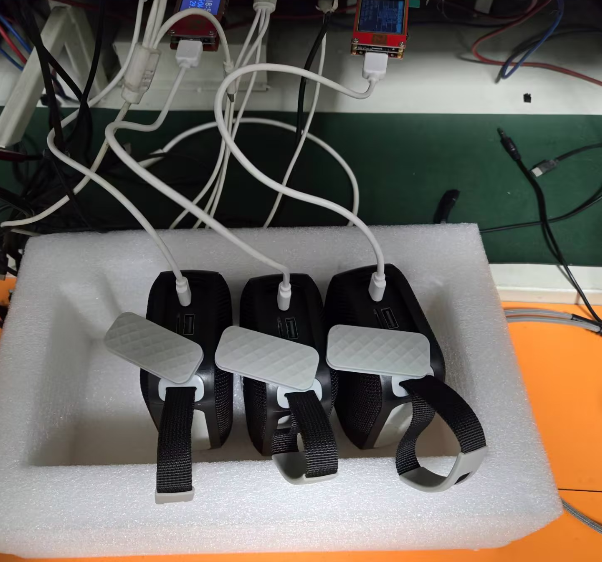
Figure 4.5-2 Charging Duration Photograph
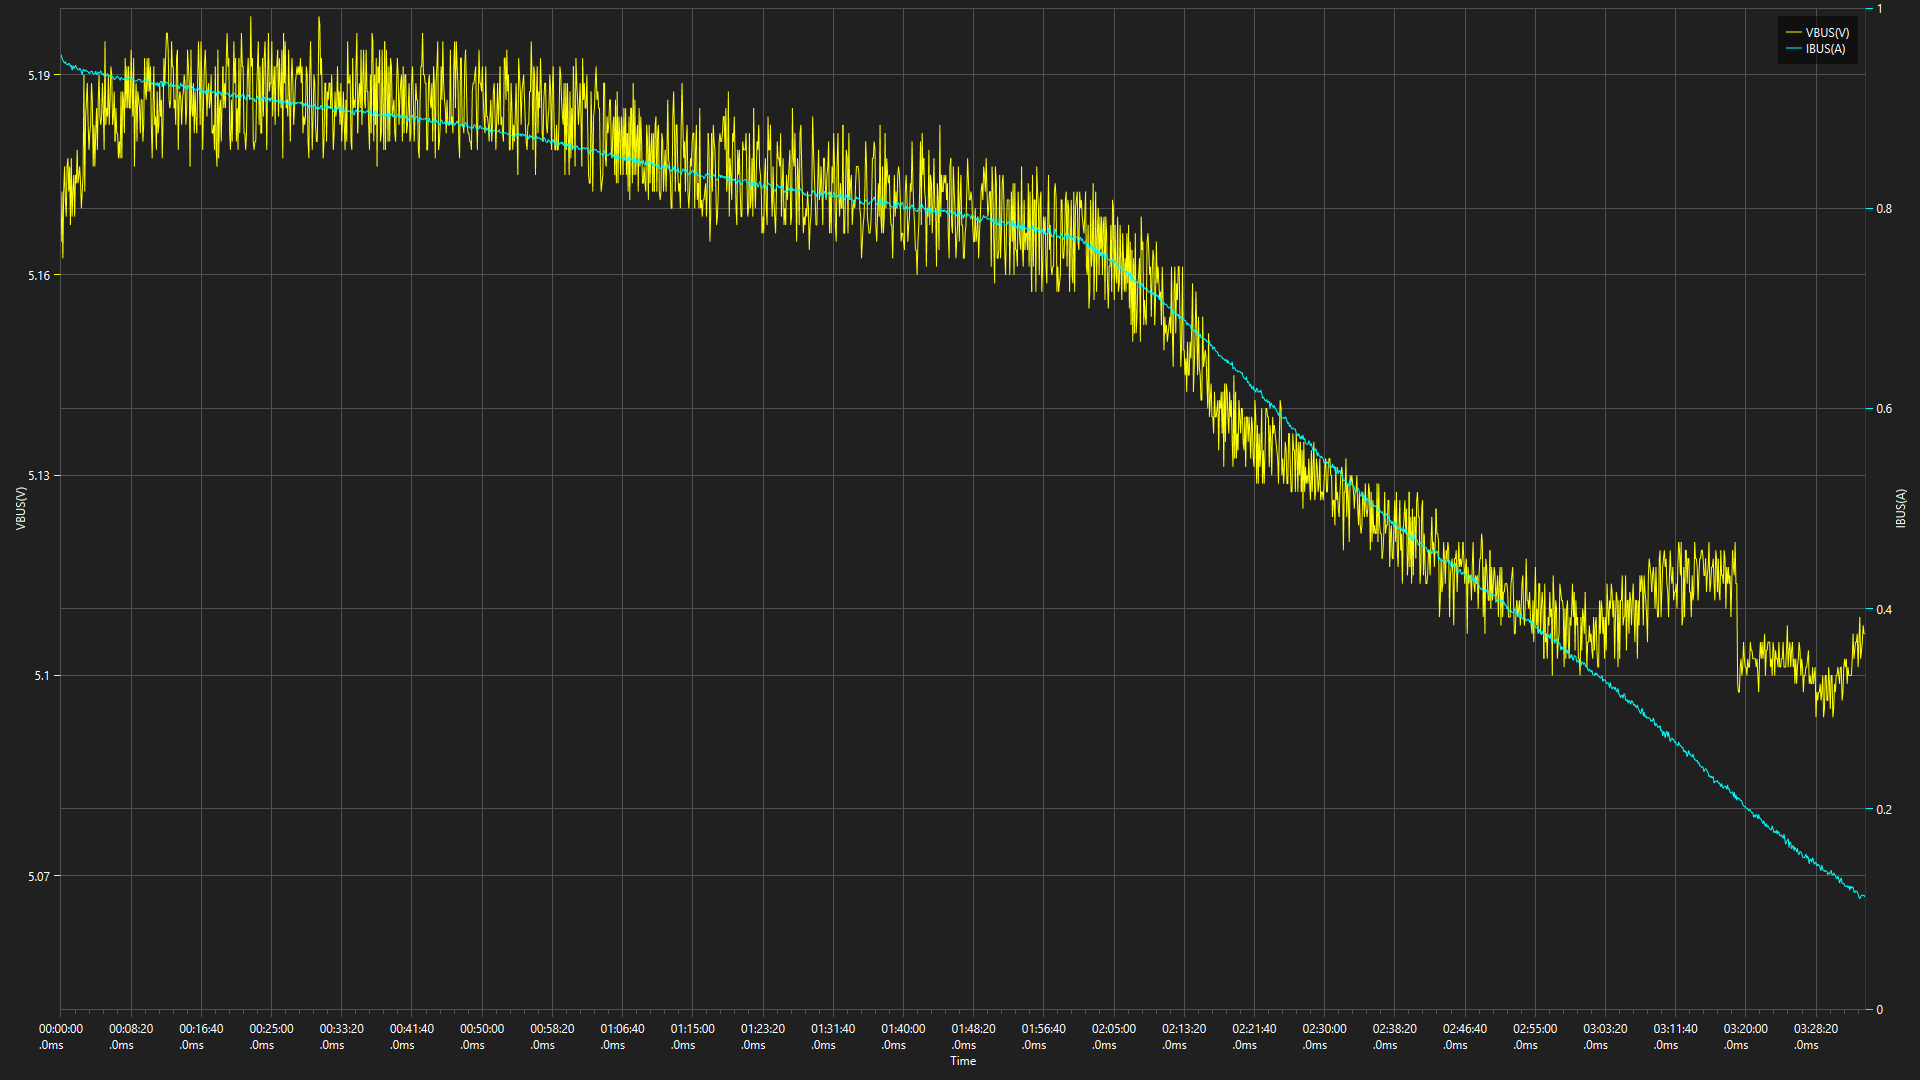
Figure 4.5-3 Charging Duration Photograph
4.4.7. Preparation, Review and Approval
| Stage | Personnel | Date |
|---|---|---|
| Prepared by | Ji Zuyun | — |
| Reviewed by | Lu Yuqian | — |
| Approved by | — | — |
4.5. Product Functional Burn-In Test
4.5.1. Basic Test Information
| Item | Content |
|---|---|
| Test Category | Electrical Performance Tests |
| Test Item | Product Functional Burn-In Test |
| Product Model | N7/N7A |
| Test Start Date | 2025.4.1 |
| Test Start Time | 2025.4.25 |
| Test Completion Time | 2025.5.2 |
| Archiving Department | Quality Department |
4.5.2. Test Conditions and Methods
-
R&D supplied 3 pilot-production samples, which passed functional checks.
-
R&D supplied 3 pilot-production samples for burn-in testing, playing at maximum volume while charging. Requirement: no abnormalities after 168 hours of simultaneous charging and playback.
-
Place the product on the burn-in rack, insert the TF card and charging cable, switch on and play at 100% volume.
-
Test tracks must cycle through mid-, high- and low-frequency content. (The DJ track Pengyou De Jiu was played on repeat in this test.)
4.5.3. Test Criteria and Records
- No abnormalities, noise, loss of sound or similar issues after 168 hours of simultaneous charging and playback constitutes a pass.
4.5.4. Equipment and Tools
-
Test samples*3psc
-
Mobile phone*1pcs
-
5V2A chargers and USB cables*3pcs
4.5.5. Test Procedure
- Photograph of product burn-in in progress
4.5.6. Test Results
-
Burn-in started at 08:30 on April 1 and ended at 08:30 on April 8. No abnormalities were found over 168H. Considered a pass.
-
The product continues burn-in.
4.5.7. Test Procedure and Result Photographs
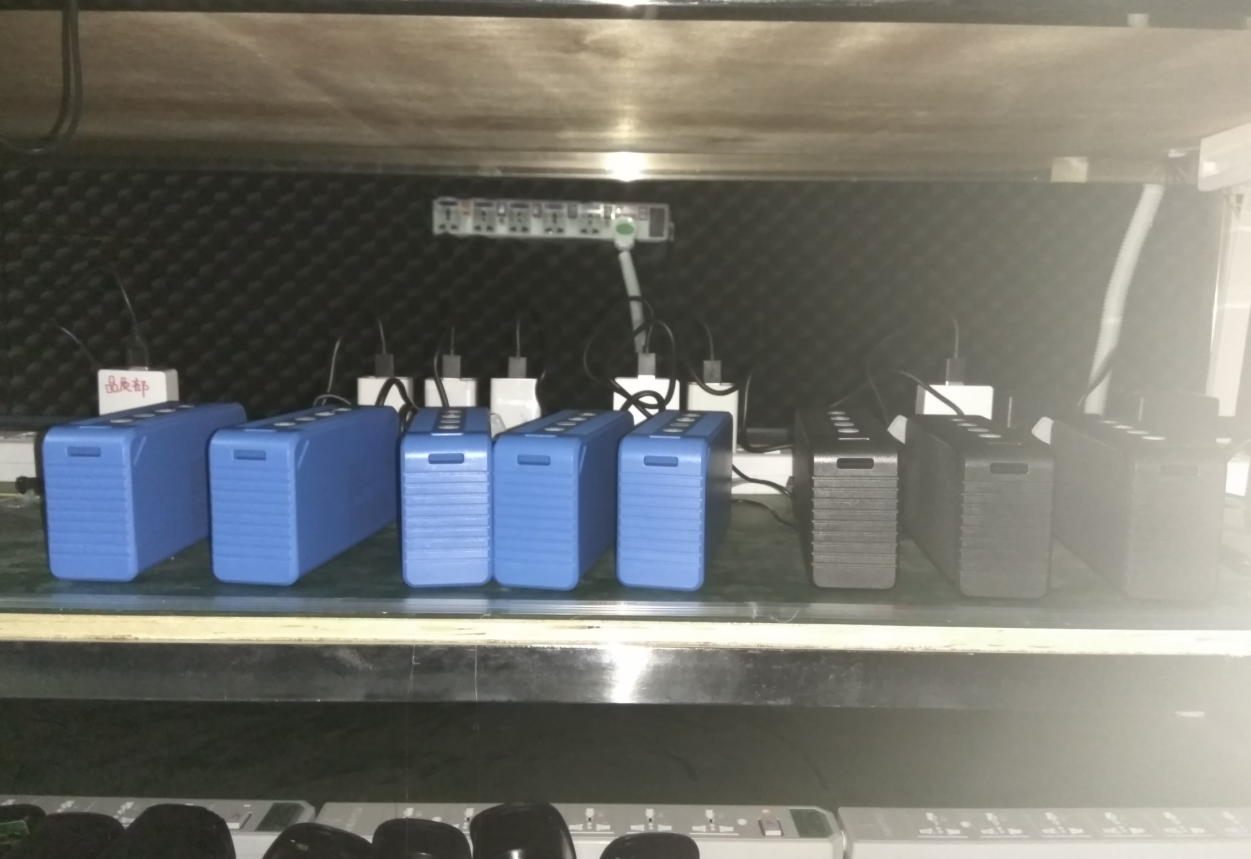
Figure 4.6-1 Product Functional Burn-In Test Photograph
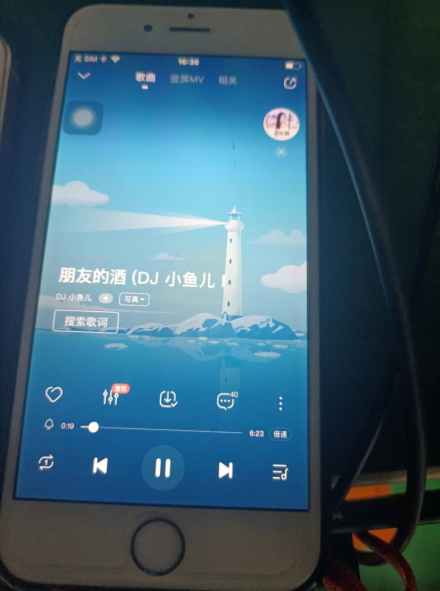
Figure 4.6-2 Product Functional Burn-In Test Photograph
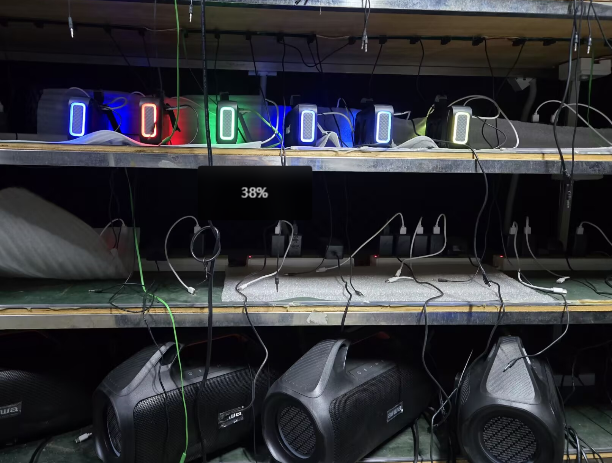
Figure 4.6-3 Product Functional Burn-In Test Photograph
4.5.8. Preparation, Review and Approval
| Stage | Personnel | Date |
|---|---|---|
| Prepared by | Ji Zuyun | 2025.4.8 |
| Reviewed by | Lu Yuqian | 2025.4.8 |
| Approved by | — | — |
4.6. Compatibility Test
4.6.1. Basic Test Information
| Item | Content |
|---|---|
| Test Category | Electrical Performance Tests |
| Test Item | Compatibility Test |
| Product Model | N7/N7A |
| Test Start Date | 2025.5.10 |
| Test Start Time | 2025.5.10 |
| Test Completion Time | 2025.5.10 |
| Archiving Department | Quality Department |
4.6.2. Test Conditions and Methods
- Connect the following devices to check Bluetooth connection and call functions: laptop, iPhoneSE, Samsung S24+, Google Pixe / Sony XPERIA 11, iPhone12PRO and other phones.
4.6.3. Test Criteria and Records
-
Compatible Bluetooth connection and playback with the following devices constitutes a pass: laptop, iPhoneSE, Samsung S24+, Google Pixe / Sony XPERIA 1, iPhone12PRO.
-
Bluetooth name: N7A
4.6.4. Equipment and Tools
-
Test samples*3pcs
-
Mobile phones*6pcs.
4.6.5. Test Procedure
-
Bluetooth connection and playback using laptop, iPhoneSE and Samsung S24+.
-
Bluetooth connection and playback using Google Pixe, Sony XPERIA 11 and iPhone12PRO.
4.6.6. Test Procedure and Result Photographs
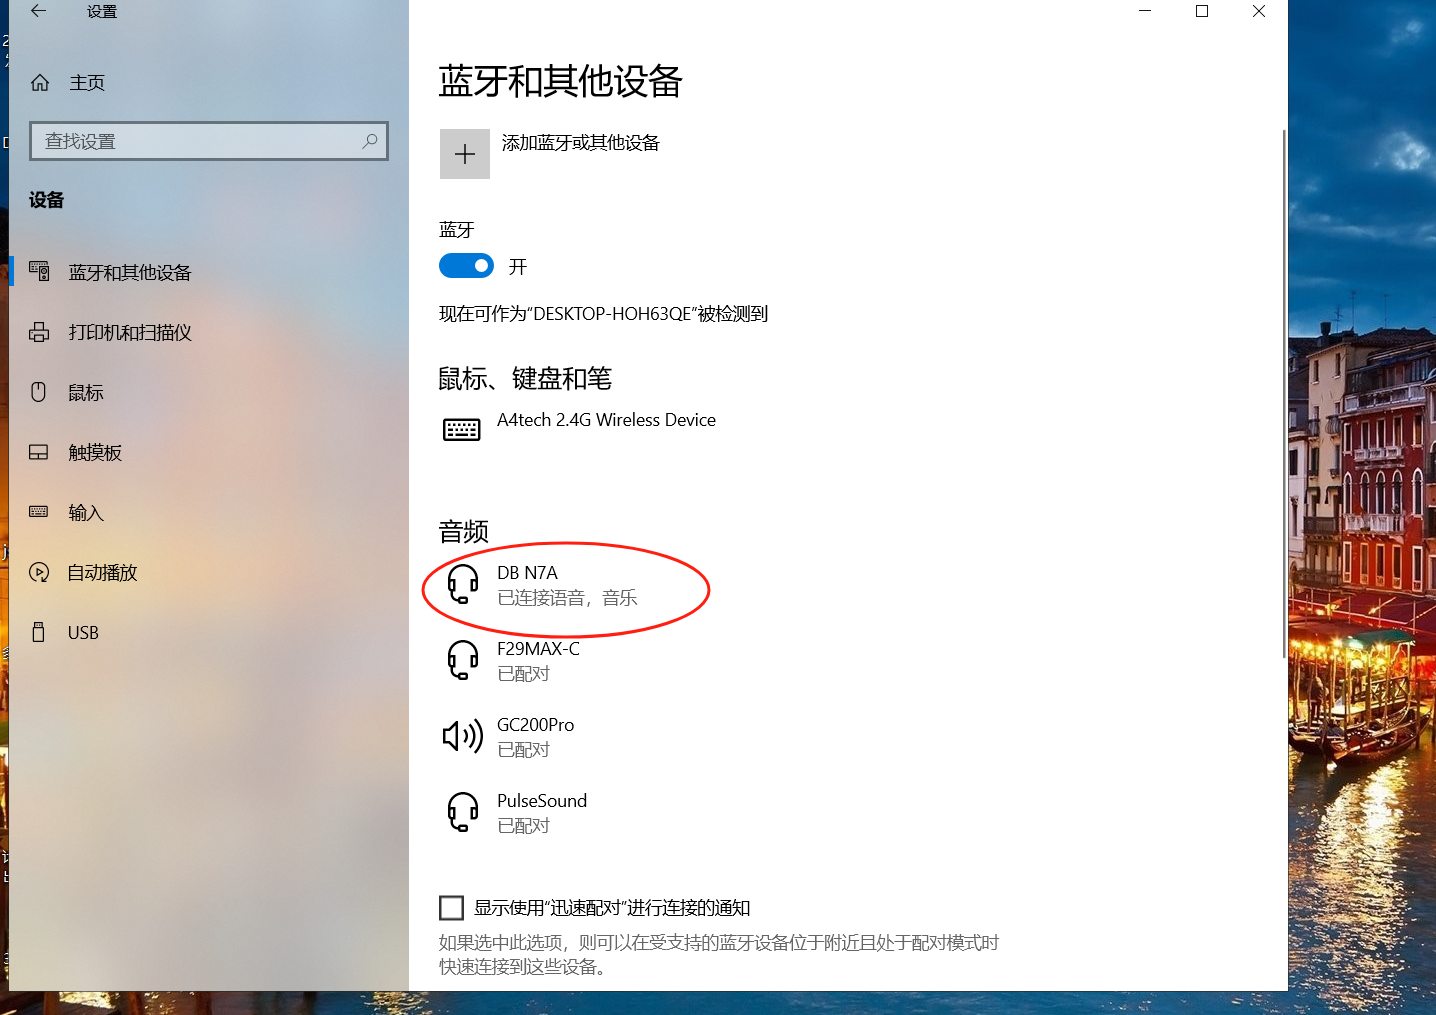
Figure 4.7-1 Compatibility Test Photograph
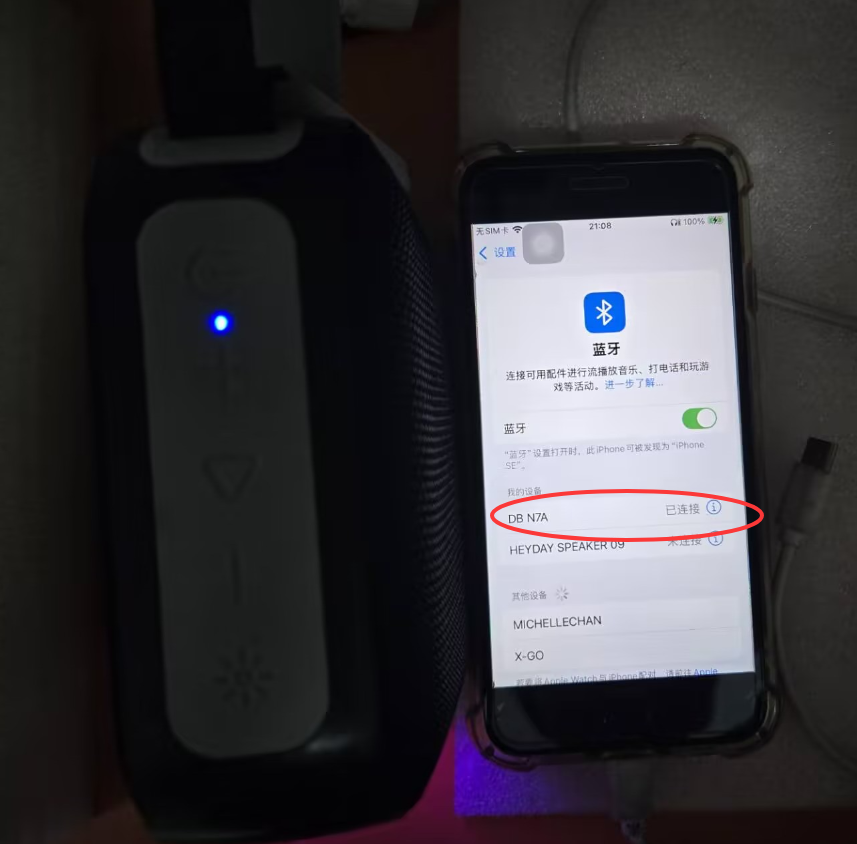
Figure 4.7-2 Compatibility Test Photograph
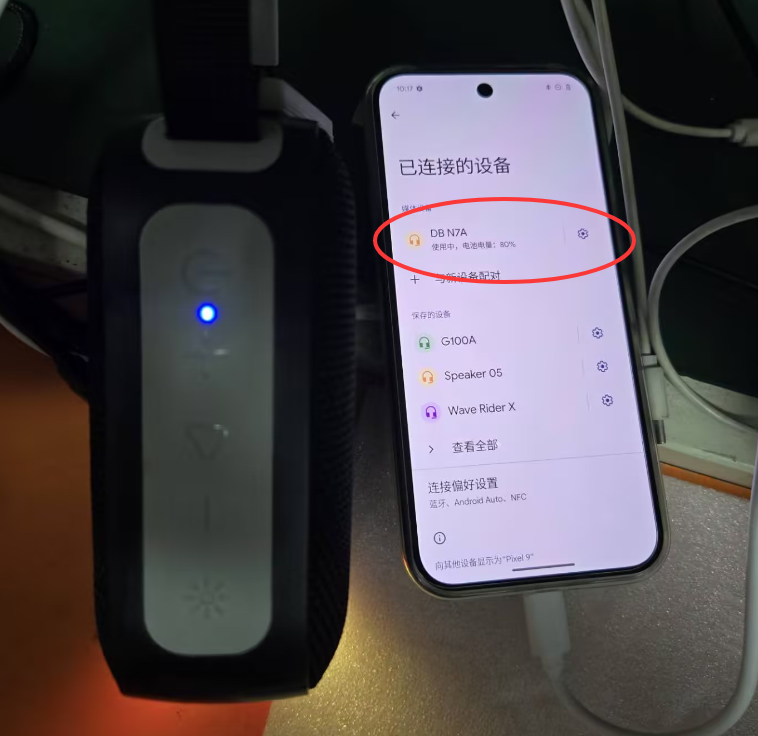
Figure 4.7-3 Compatibility Test Photograph
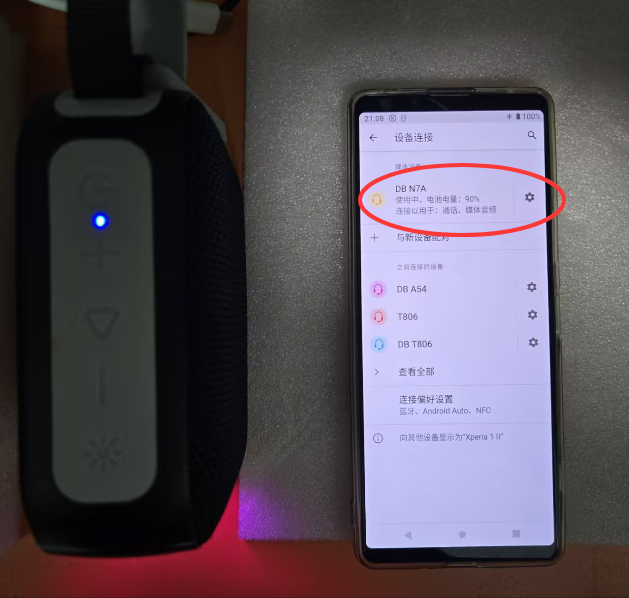
Figure 4.7-4 Compatibility Test Photograph
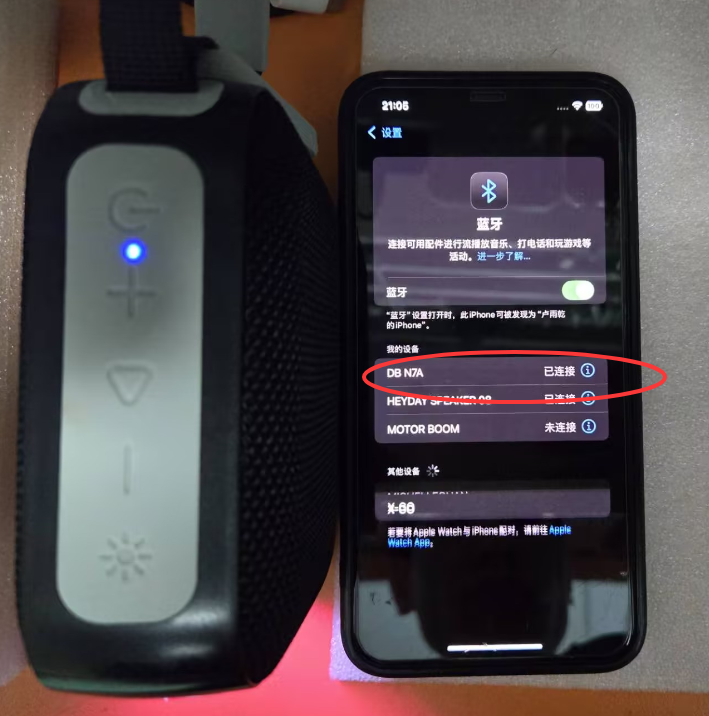
Figure 4.7-5 Compatibility Test Photograph
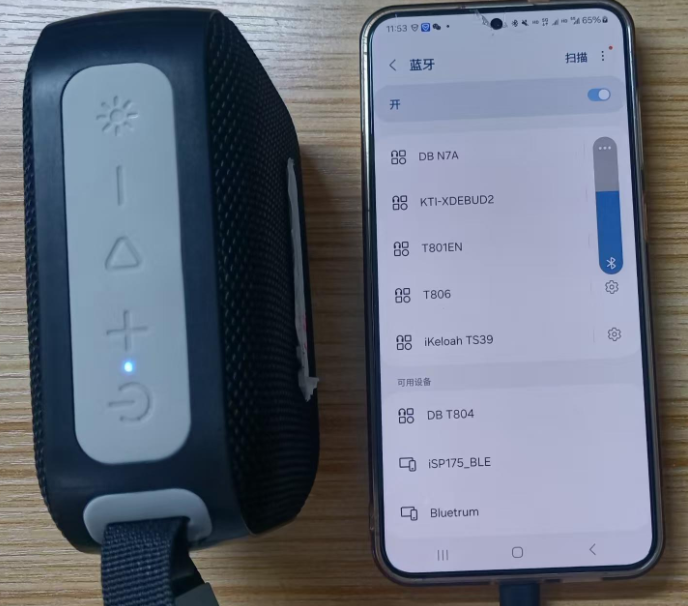
Figure 4.7-6 Compatibility Test Photograph
4.6.7. Preparation, Review and Approval
| Stage | Personnel | Date |
|---|---|---|
| Prepared by | Ji Zuyun | 2025.5.10 |
| Reviewed by | Lu Yuqian | 2025.5.10 |
| Approved by | — | — |